I am currently renting a Prusa XL. I built it with a postdoc student around this time a year ago. Since he’s too busy pursuing now nonexistent government grants for his startup to operate the printer, we’ve come to an arrangement– I can hold on to it in exchange for a few hundred dollars, all labor and maintenance of the thing, and the institutional knowledge on how to work probably the largest and most complex 3D printer commercially available today.
He’s getting his fair share of the bargain.
I figured that, since a year has passed, it would be a good time to write up my experiences, good and bad, with this behemoth. And let me start with the good:
When it’s working right, this machine can do things that absolutely nothing else on the market can.
The Build
I recall the build of the semi-assembled 2-head printer taking about 8-10 hours in total between the two of us. There wasn’t much to say about this– it’s a pretty straightforward process and the gummy bears are tremendously helpful.
This was my first serious attempt at 3D printing, so I didn’t know much, but was excited to dive in.
Out of the gate, the printer was running flawlessly using PLA. The owner has stated that he had good results with ABS using the third-party enclosure that he bought and assembled. I haven’t tested my luck with it.
We initially arranged for the printer to be kept at his workplace, since it belonged to him, and I’d have tap access to his lab as needed. That was the arrangement for 8 months thereafter. So I’d come by, run a print job, and leave.
We set up Prusa Connect so we could send files over the internet, and a Raspberry Pi with SSH out to the open internet and a camera attached so I could watch the prints progress.
There wasn’t much remarkable about the early days. Each of us were running simple PLA prints which it finished without much trouble and could easily have been done on a Prusa MK3. Things started to get “interesting” when I started dialing in the profiles for TPU.
TPU
What an absolute nightmare this was.
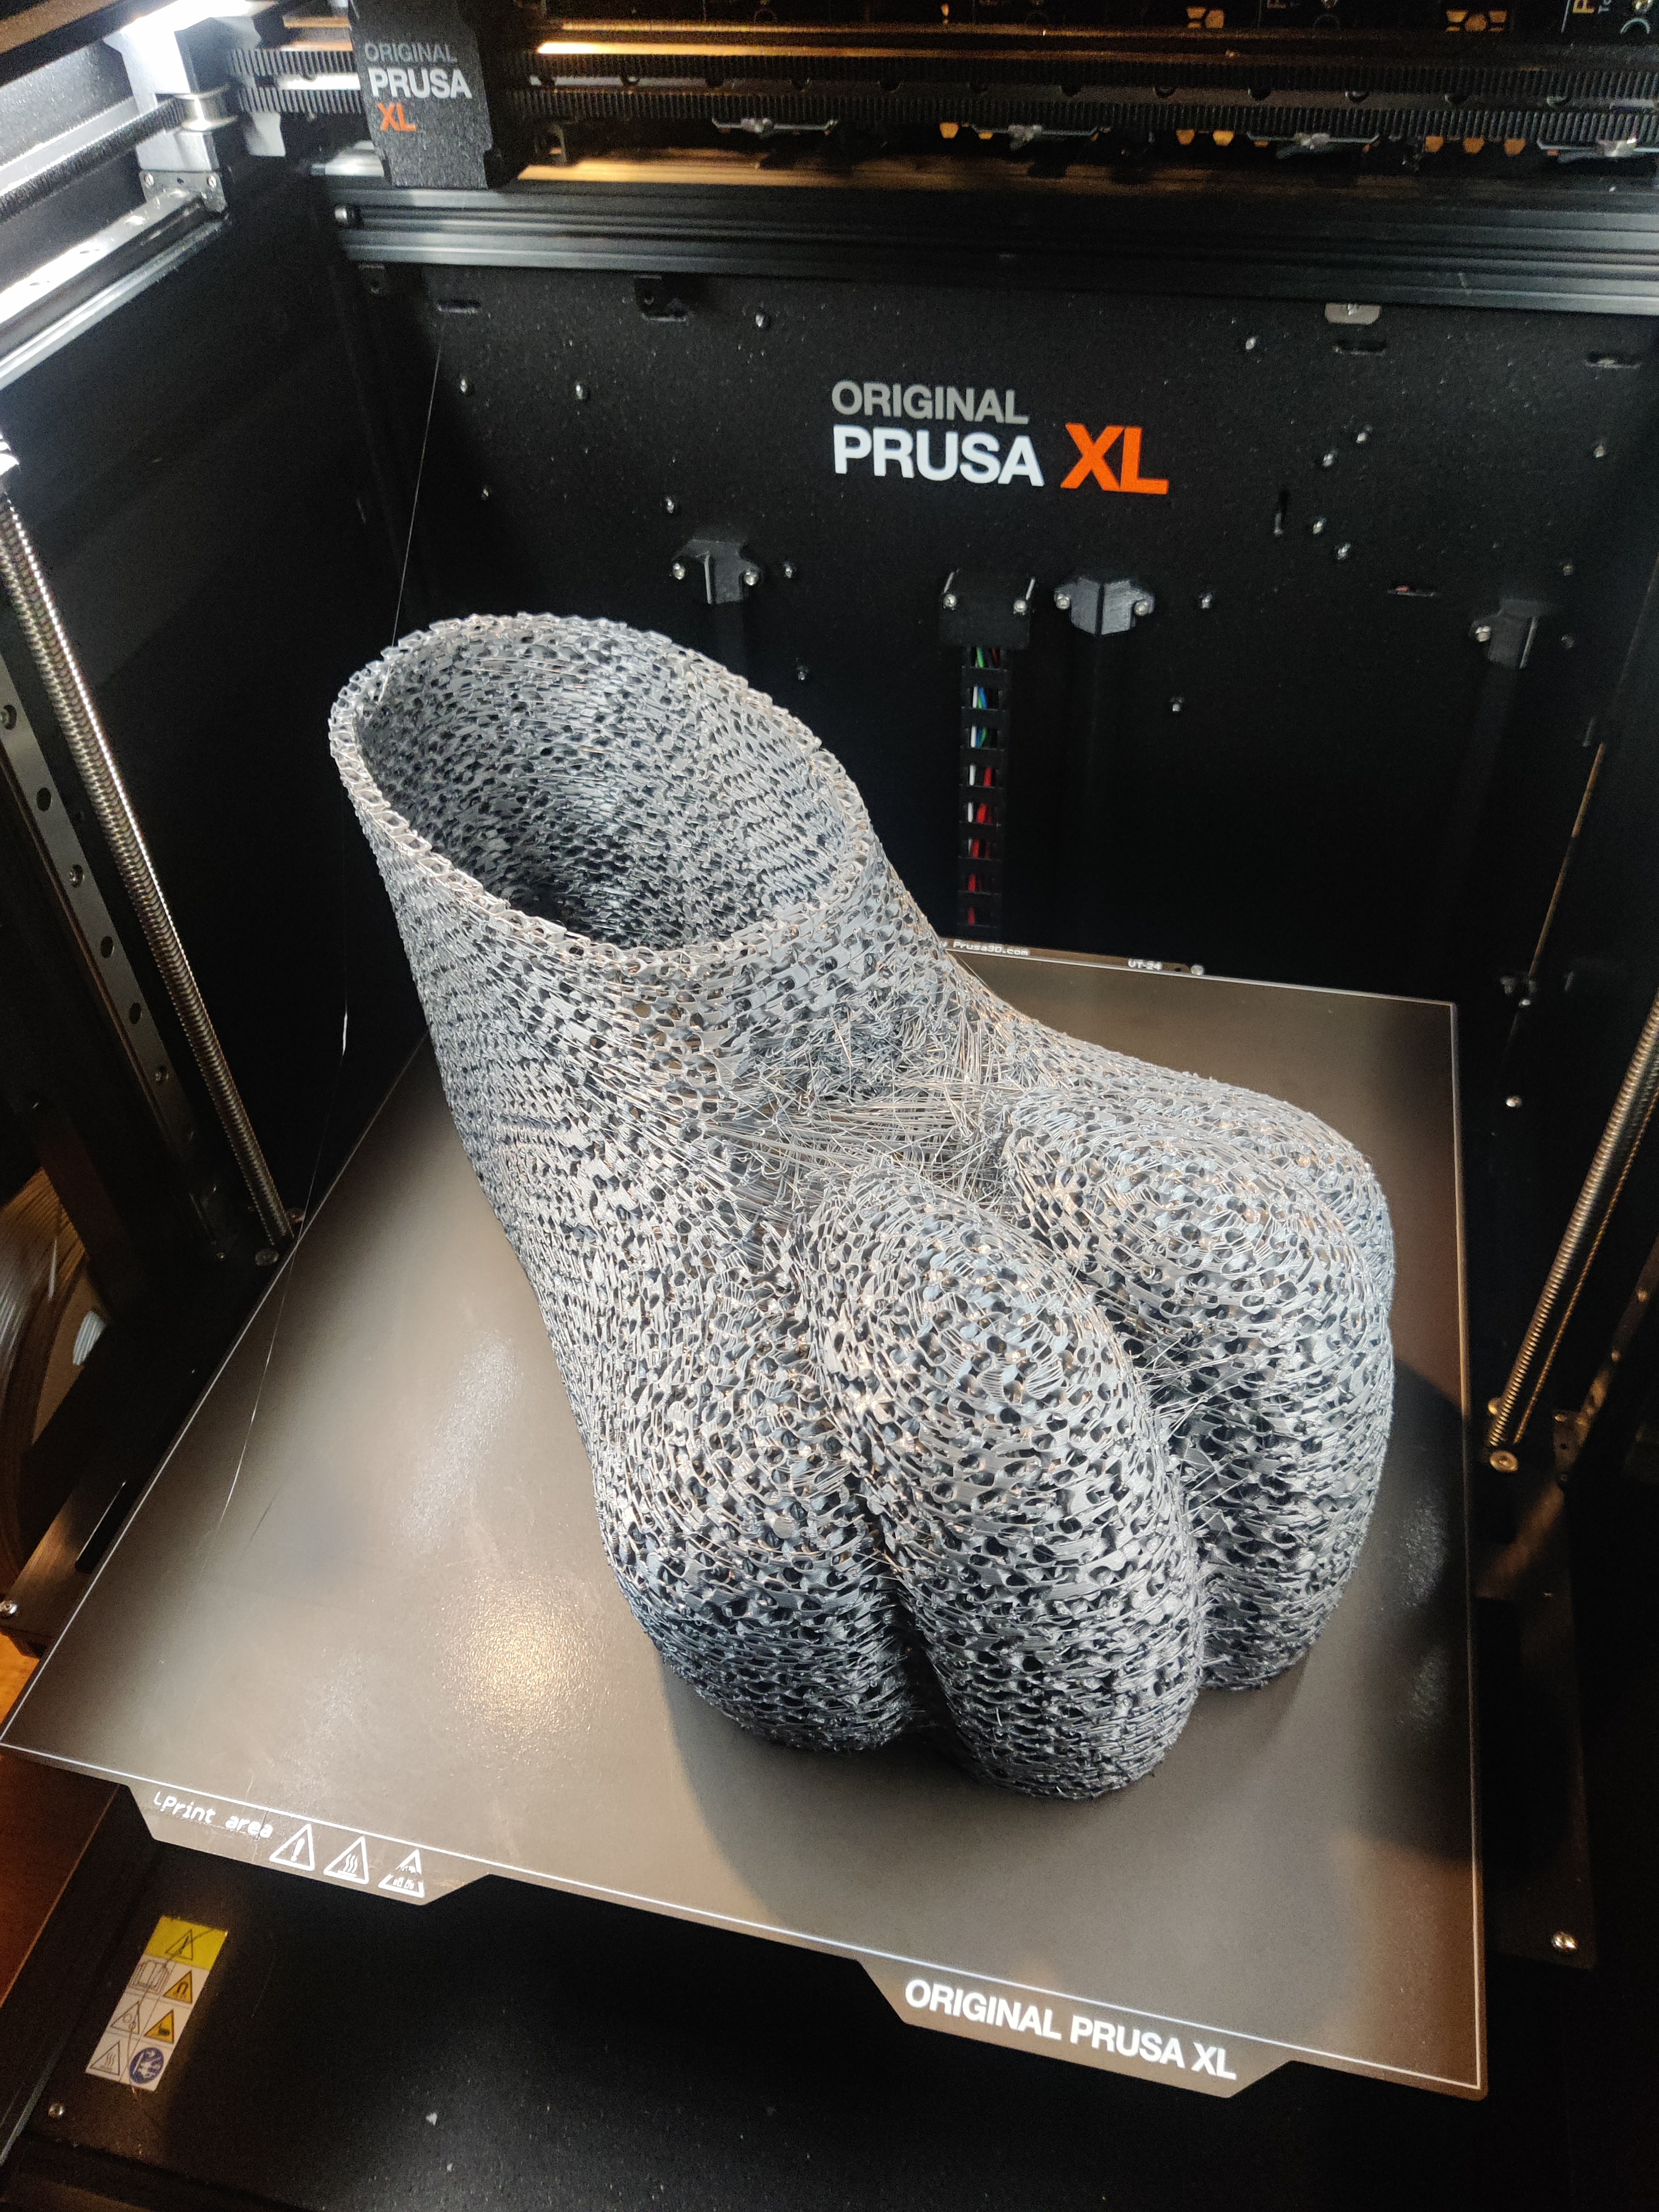
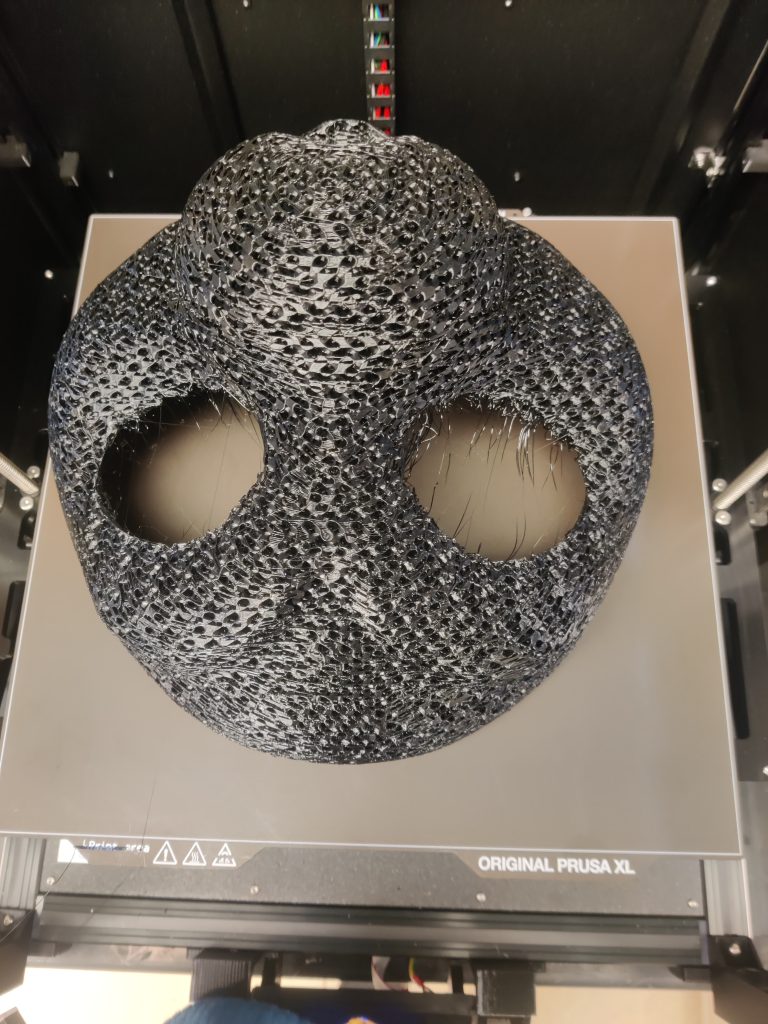
Fursuit head bases– the shells out of which silly animal costumes are made– are typically printed using TPU filament, a squishy, flexible plastic. When printed as a solid, it’s nearly indestructible and can be used for e.g. the soles of shoes. When printed as “infill only”, specifically gyroid infill, it takes on a durable, flexible, lightweight, breathable structure that is perfect for cartoon animal masks.
“Feetpaws” can be printed in a single shot on this machines enormous build volume.
There is just one little problem– The Prusa XL is completely incapable of printing TPU out of the box, and there is not only zero mention of this in the small included booklet, there is outright false information on Prusas website on the matter.
I first tried to print TPU with some test cubes, each at varying infill percentages. When I came back the next day, each of the cubes successfully printed, but only up to a little under half of the height I had expected. I shrugged this off thinking I had misremembered and moved on to my next PLA job. This would turn out to be a mistake.
Around January, I needed to print a head base for a collaboration project with a friend. I set start on the print job and went home.
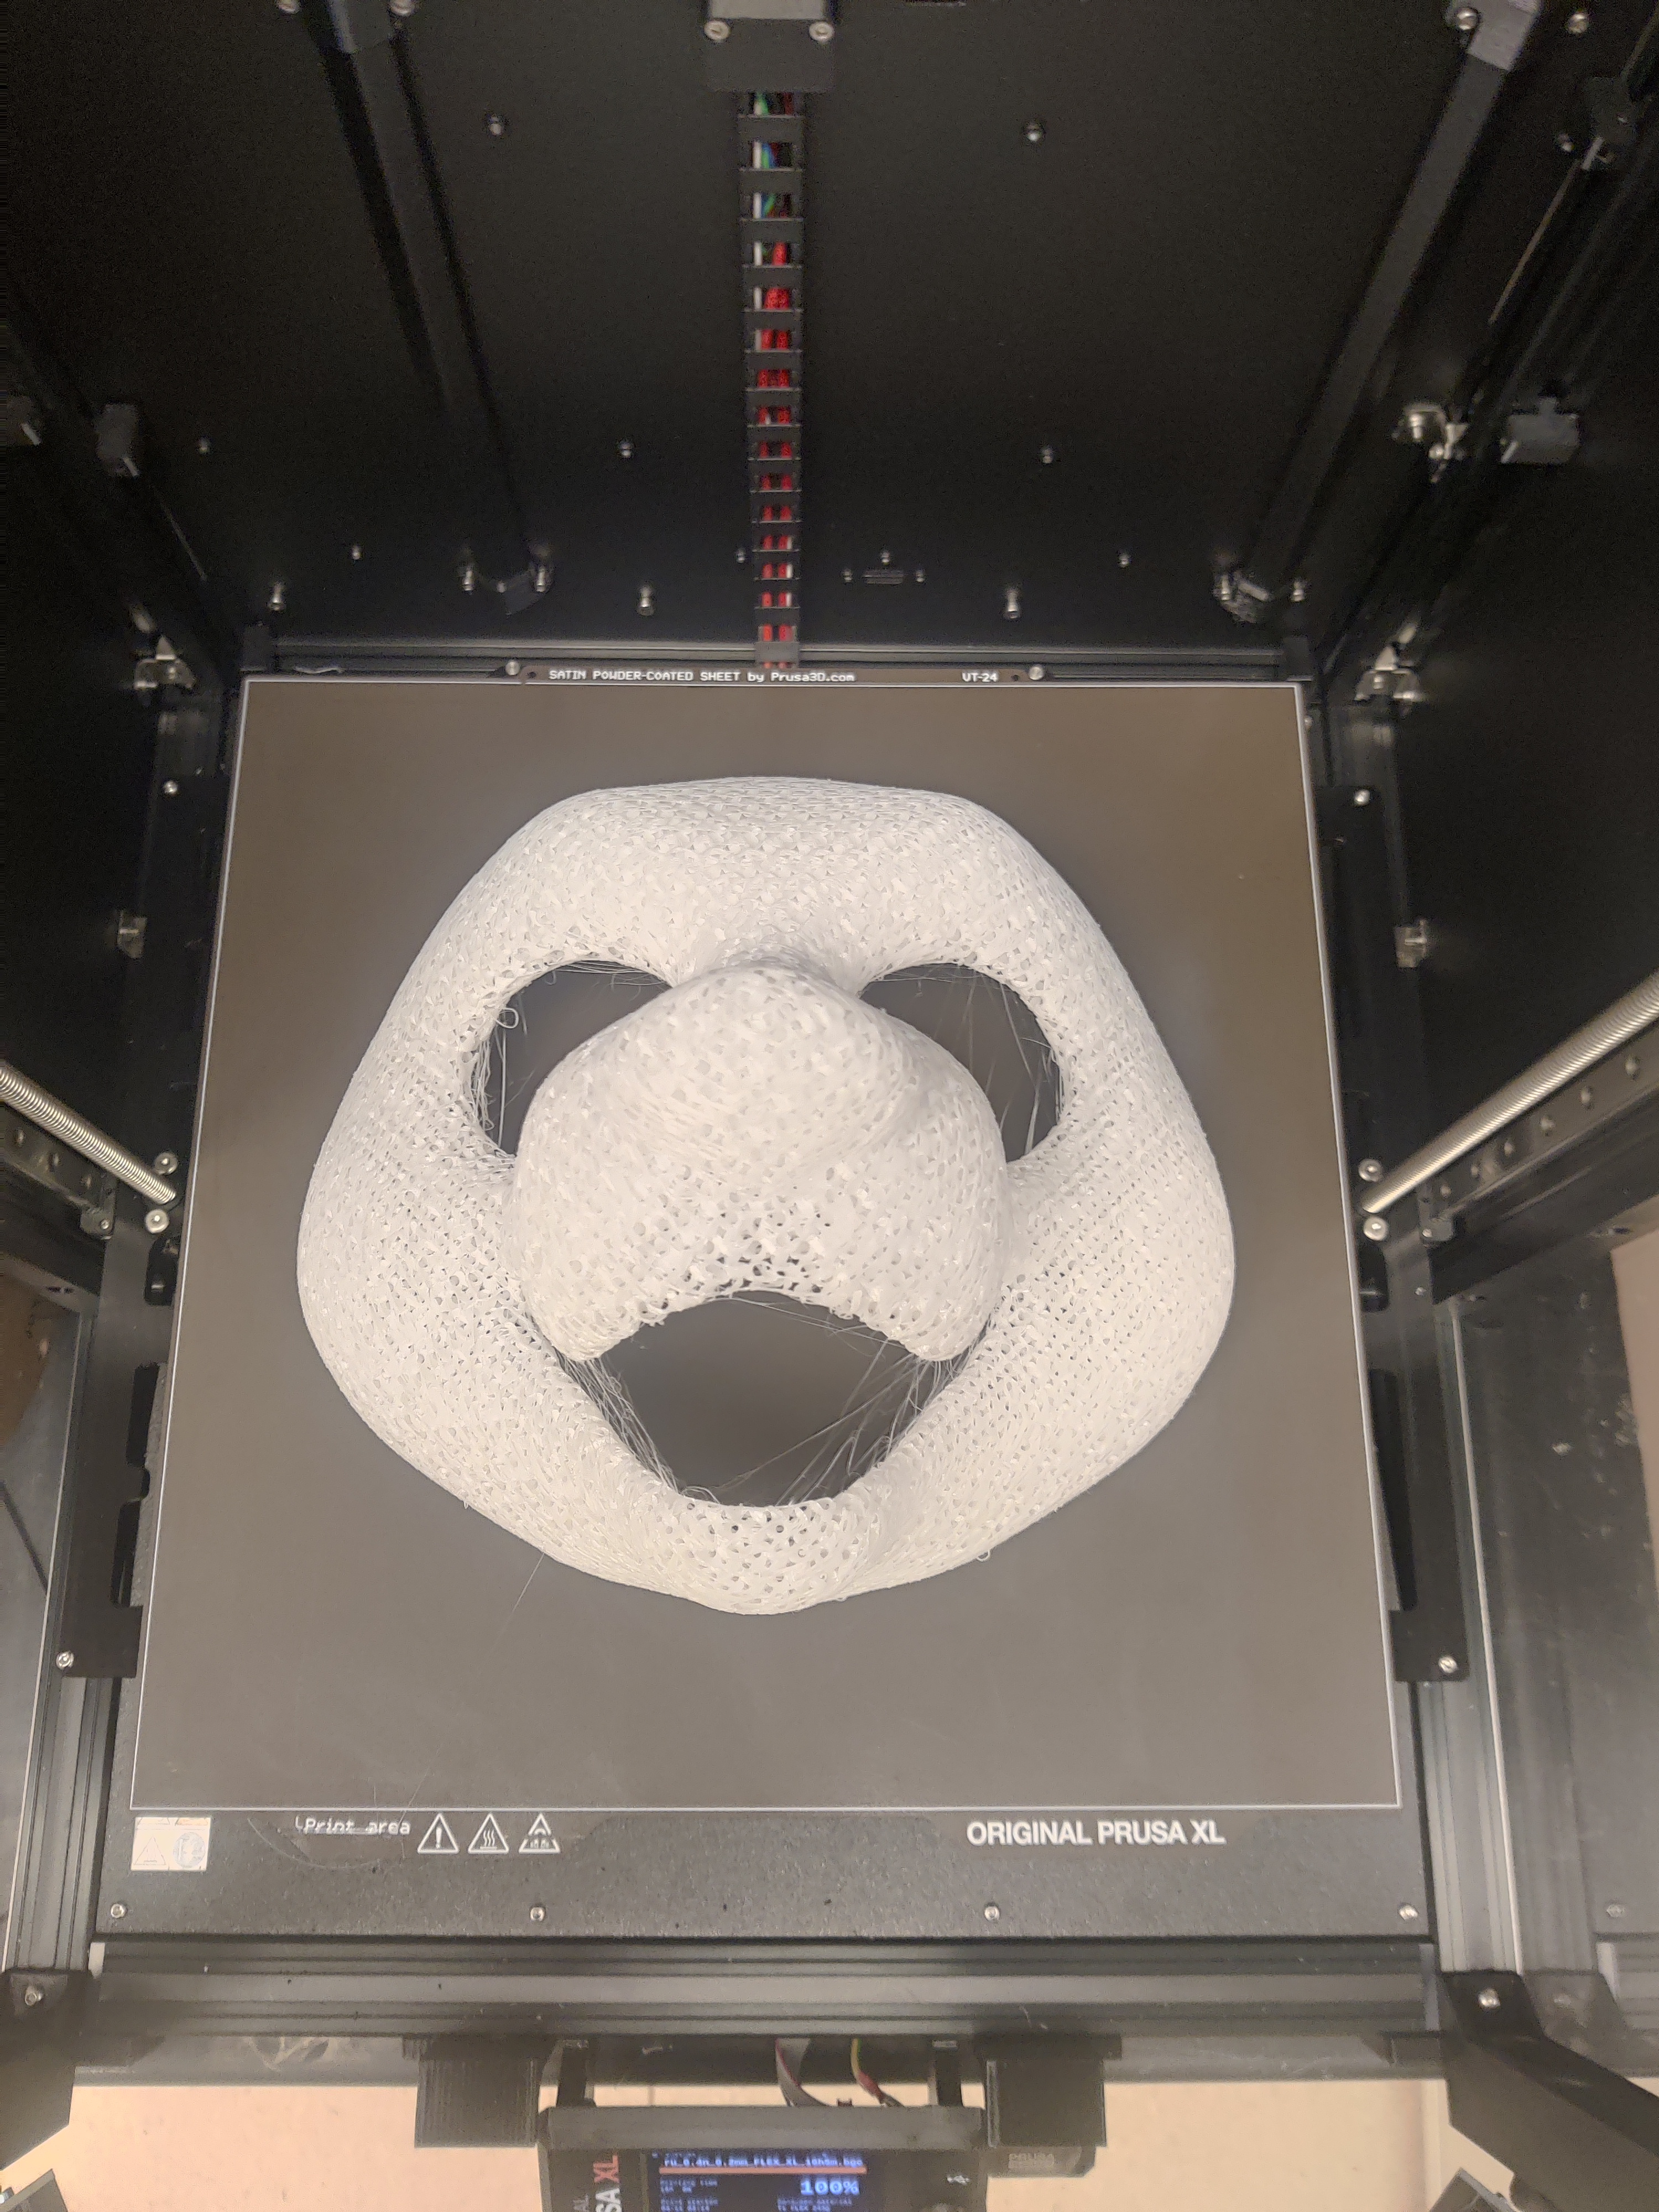
I came back the next morning to see the printer moving the extruder around in midair. It had extruded nothing at all beyond two layers the previous night.
I would later learn that this is what happens when the extruder jams. It creates a little squiggly line of fliament inside the extruder that looks like this.
Why was this happening?
It took nine days of nonstop printing to find the solution.
With the help of some printing enthusiasts, I tried a great many options. First, we started with Prusas official instructions. Their website links to a YouTube video showing how to guide the filament through the extruder by loosening the lengthy PTFE tube and loading it by hand. It also states to loosen the idler screws. I tried both of those things. The printer still jammed.
I tried lowering the print speeds. The printer jammed.
I tried using the second extruder instead of the first. The printer jammed.
I tried many more things I’ve forgotten. The printer jammed.
I tried bypassing the tube and loading it from the top through a crappy filament dryer the owner had purchased. This was promising. I watched that print for 2.5 whole hours and went home. When I came back in the morning, I found that it had jammed mere minutes after I left.
Eventually I bugged a peer so much that she came out to the printers home and helped me thoroughly investigate the cause. We partially disassembled the extruder, developed a brand new print profile and installed a new non-stick extruder nozzle, staying up well into the night. We loaded a new roll of known-good, freshly dried TPU, set the printer to run again and crossed our fingers as we went home.
The printer jammed.
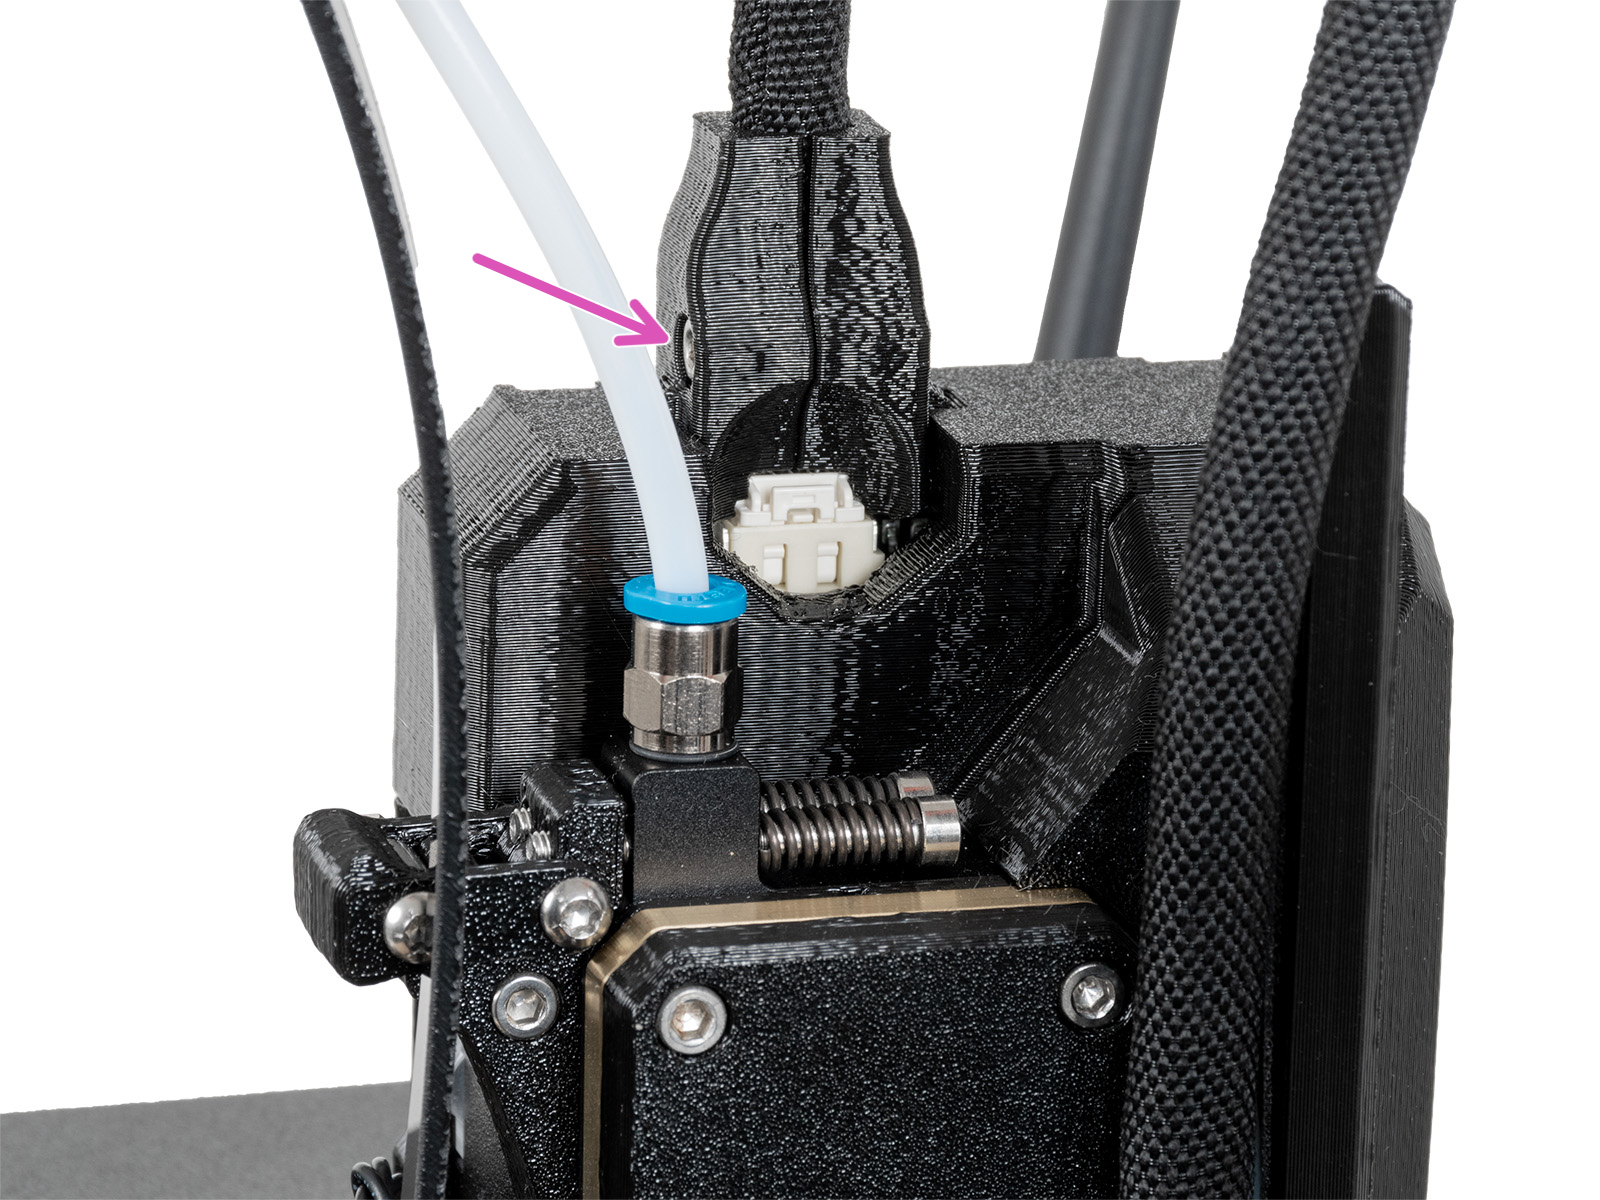
I was starting to lose my mind at this point. I had been at this for over a week and had spent a good chunk of my time in this abandoned room with fluorescent lighting, a giant printer that didn’t work right, and nothing else… Lyude had one more suspicion– the side-loading filament system and the lengthy PTFE tubes were applying far too much tension to the soft filament and making jams inevitable. She gave me a new ball-bearing powered filament roller and asked me to try using it by loading the filament from above, on the roller, and bypassing the tube entirely. She also gave me a modded part that allowed me to stow the tube when not in use.
The printer did not jam. It finished the job.
This is how I do all my TPU prints now.Patty, my first successful print after 9 days of trying. I’ll write about her someday…
Lesson learned: You CANNOT load TPU filament on the Prusa using the stock loading system. It absolutely must be bypassed, there is no way to print it correctly without printer mods.
The Prusa XL has been out for nearly two years and there is no mention of this design flaw in Prusas documentation. Now that I finally knew the source of the problem, though, I found dozens of posts on the Prusa forum with other people coming to the same conclusion. Naturally I did not find these while investigating…
Multi-material prints
While browsing Telegram while bored one day*, I came across a friend of a friend asking if anyone had some 3D printing and/or Blender experience.
* I don’t have a problem…
She wanted to make a cosplay of Elesa from Pokemon Black 2/White 2, and needed to figure out how to make the headphone cones.
I sculpted these in Blender using a 3D scan of her headphones as a base. Since the 2-head XL could do two colors at a time, this would be no problem!
I now know that this would also be possible on a regular printer just by doing a layer color change, but it’s OK, this is easier!
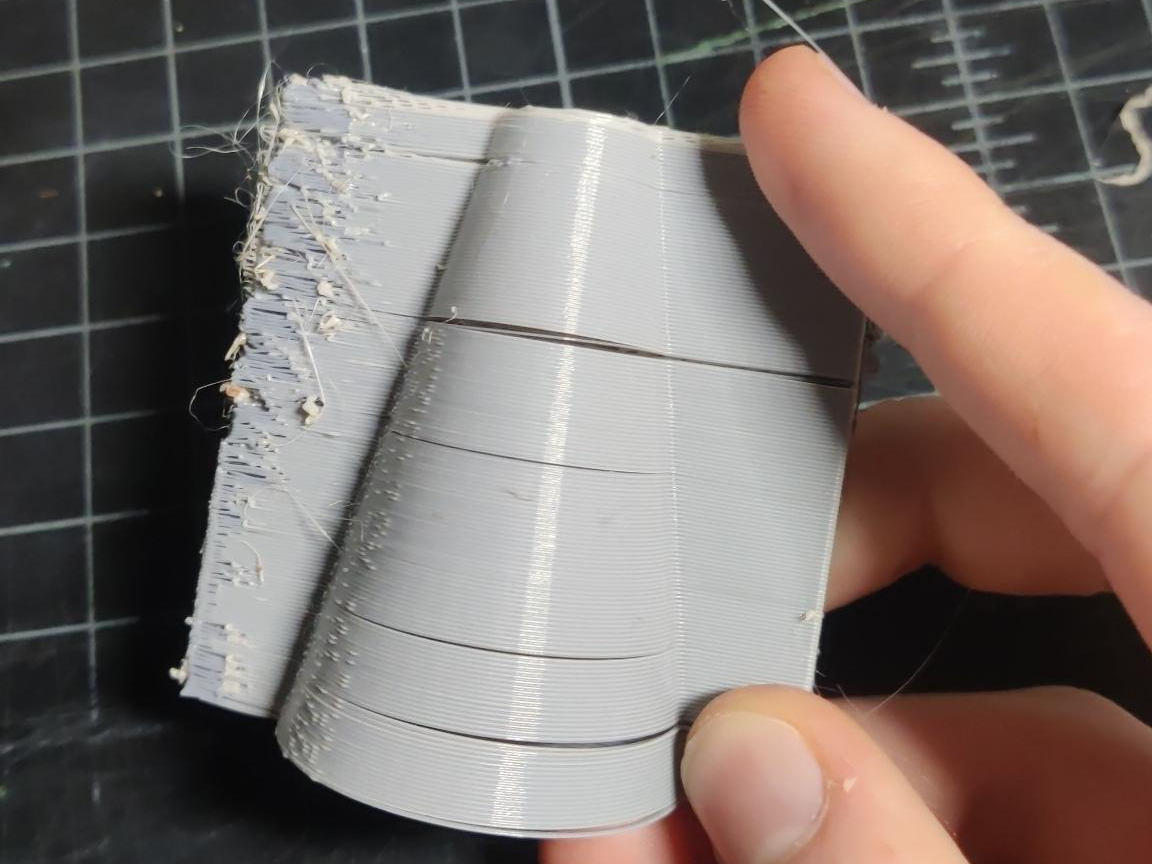
Unfortunately the first cone fell apart. It seemed like there was some awful layer shifting issue that caused the print to literally fall apart.
I was largely fed up with the printer at this point. The last time I had used it, I’d spent 9 whole afternoons babysitting the damn thing trying to get it to print, and now this? I resolved to try one thing and then give up if it didn’t work.
Thankfully, my intuition this time was correct. You see, when I had replaced the extruder nozzle, I had messed with the toolchanger offset calibration, a procedure the printer does to learn about the precise position in space each individual tool on the printer occupies. Things such as different nozzles on each extruder are precisely why this calibration exists. Re-running the calibration resulted in a perfect finish afterwards.
TPU again, upgrades, and part failures
I had spent so many hours with the machine in its little room that the world had forgotten about that I was about ready to either give up on the hobby or purchase my own. My own XL was (and still is) somewhat out of my budget, so this was the point at which I proposed the rental arrangement I have now to the owner. We moved it a mile down the road to my house one evening and it was back to printing… Or so I thought.
I needed to print some ears. These have an unfortunate bit of curved geometry that requires supports to print correctly… But TPU supports are rather difficult to remove. So I wanted to use the mixed-material functionality of the XL to print supports out of PLA and the main part out of TPU.
I ran the job. It printed the supports in two hours… And then the TPU jammed.
What the hell? I had already done this song and dance.
I fiddled with the idler screws. The print jammed.
I fiddled with them some more. The print jammed.
I moved the print to a different part of the bed. The print jammed.
Now four days in to nonstop failures (again), it was at this point that the owner purchased a 5-head upgrade from his 2-head printer, due to worries about tariffs driving pricing even higher than it already was. It came in and we installed it.
It took about 5 hours in total. It was a somewhat tedious, but straightforward procedure. I got caught out by the toolchanger calibration procedure, however– it turned out that I hadn’t paid enough attention to a critical step, which meant that I had to undo a lot of very tight screws and redo them.
I moved the print to a different part of the bed. Instead of the print jamming, I got this nice flashing error screen that said “Modular heatbed MCU overheated.”
Yes. The controller. For the thing that gets very hot. Overheated.
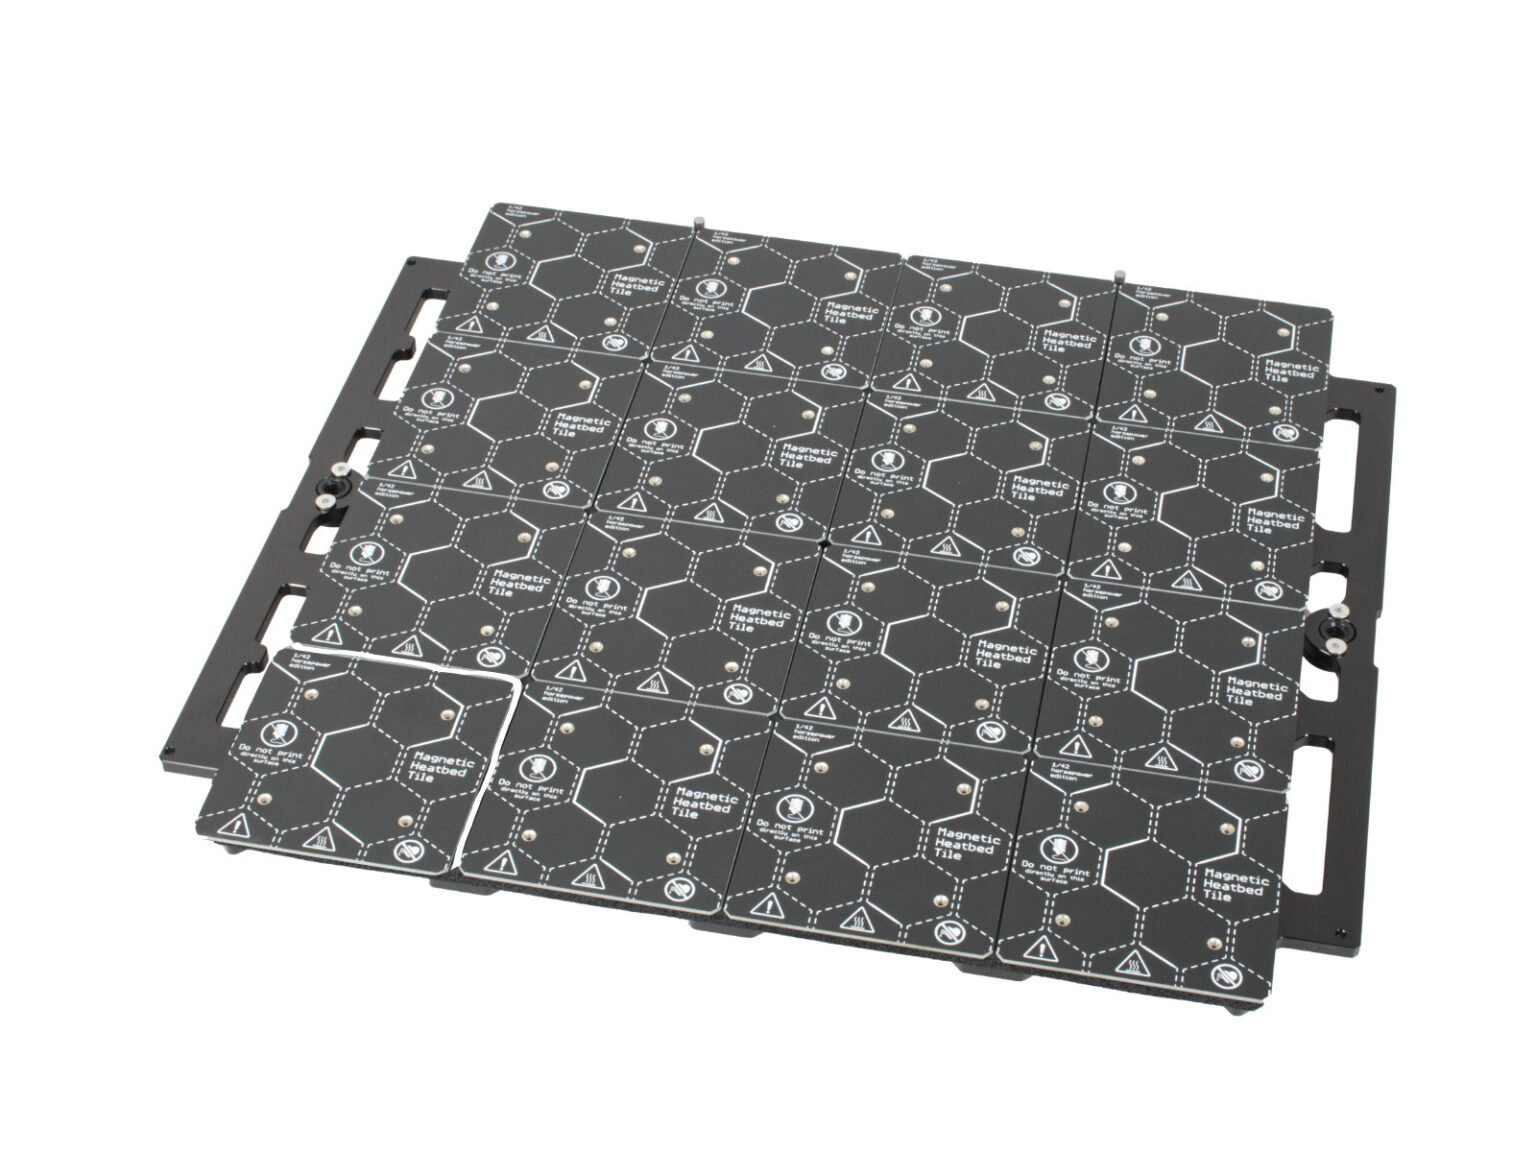
The XL has a very fancy modular heatbed with 16 individual tiles that can heat up at will, saving energy when not using the full bed. The MCU for this sits directly underneath it. Apparently, I am far from the first to notice the consequences of this decision.
After rebooting the machine, it immediately errored out with the message “Heatbed tile no. 1: Damaged tile or wiring. Follow online guide to diagnose.” Further reboots yielded the same result. Through the online guide in question, I concluded that the heatbed controller had killed itself.
Credit where it’s due
If you ever see someone complaining about a broken Prusa printer, defective part, etc., chances are you will within a sentence or two also hear them describe their experience with Prusa customer support. And they will most likely say that said support was excellent, and that they promptly received a replacement part, or a fix or suggestion.
This lines up with my experience. Within an hour of clicking on the 24-hour chat option, a new heatbed controller was sent my way, and it was in by the end of the week.
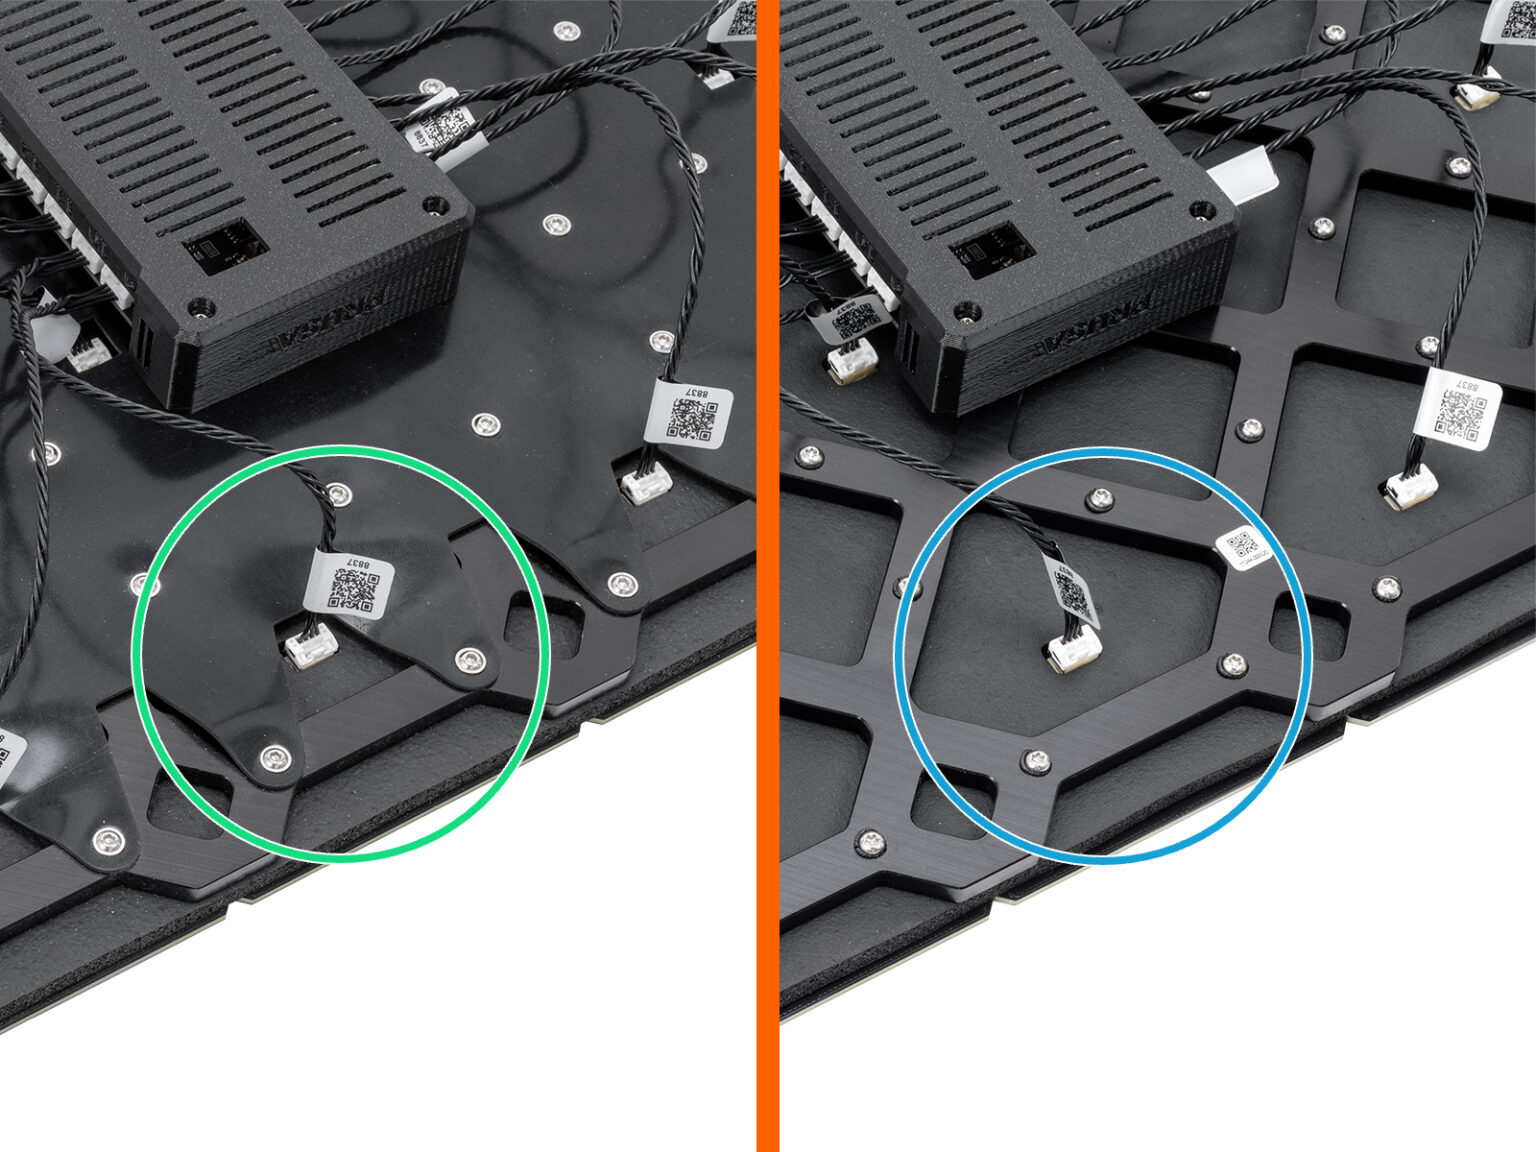
Starting from April 2025, you may receive a new heatbed. The difference is the black rubber band on the bottom side of the heatbed. The assembly of both versions is the same.
⬢New heatbed version: With the rubber band.
⬢Old heatbed version: Without the rubber band.
I might be wrong, but that rubber cover looks awfully intended to prevent the exact problem of a suicidal microcontroller mounted right under it. So, cool, I guess they fixed that, but only on new units.
Well, on to trying this TPU print again. Surely all would go well this time, right?
It jammed again. I fiddled with the idler screws and did what I should have done the first time– printed a Voron test cube. That led me to messing with the idlers yet more, accidentally jamming the extruder so hard the filament wrapped around the drive gears, and eventually getting something that looked nice. Back to trying the big ear print– this will DEFINITELY work now, right? Sitcom laugh track plays in background
So this time, the printer crashed with another red screen of death and an error: “Extruder motor not spinning on tool 1.” This leads to an error page which outright states that there’s a defective part connecting the toolhead to its cords. If you remove it and it works, you need to replace them.
I removed the defective part. The print finally succeeded.
13th times the charm, right?
I replaced the defective part with a freshly printed PETG version, which, wouldn’t you know it, had already been fixed with the three new toolheads that I had just installed. That was the second back-to-back part failure that had silently been fixed in a new revision of the printer, with no warning and no notice unless you had already had a print fail because of it.
If I ever try to print ABS or ASA myself, I’ll have to figure out whether or not this printer has PCCF parts or PETG parts. They switched to PCCF on June 1, 2024, since the printer designed to operate in an enclosure will melt with PETG parts inside 🫠 This printer is right within that cutoff window, making this the third silent replacement that I’d only know about by reading documentation…
I also still don’t know why TPU just stopped printing after a trip one mile in a very large, padded minivan. It’s possible that it got jostled around enough to trigger the defective part failing (it’s a loose connection issue) but all the other issues I had? They make no sense.
User errors
That was my last big adventure of Prusa-based failures with this printer, but I occasionally have prints fail in ways that are only really possible with its multi-material capabilities.
Mixing support materials incorrectly
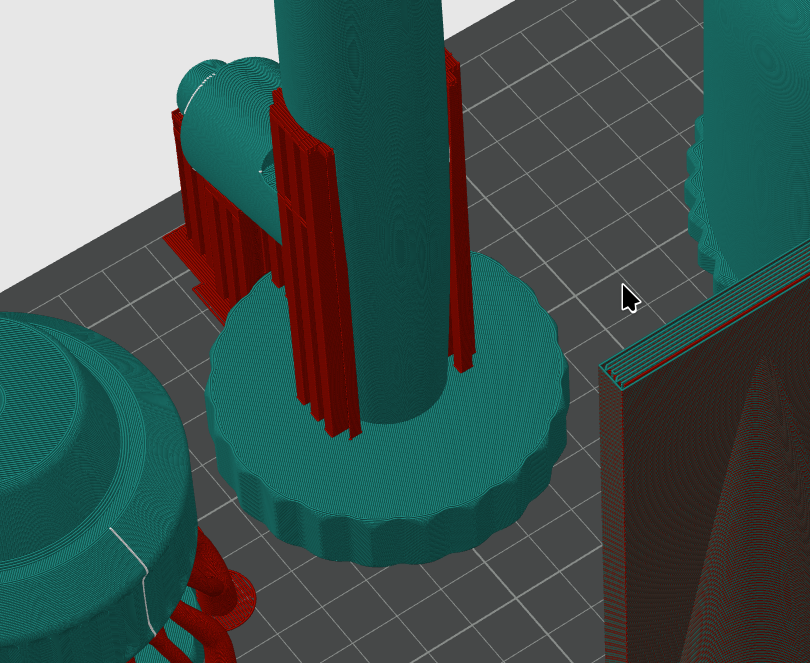
Take for instance this model which I tried to print in PETG using PLA supports. I tried using OrcaSlicer this one time for this machine since the model came from Bambu MakerWorld and had the supports pre-populated in a way that PrusaSlicer couldn’t read, but OrcaSlicer could. This is what those supports looked like:
This is 100% fine on any normal printer, but if you try this on a Prusa XL with mixed-material supports… The PLA structure will not adhere to the PETG, so this tall, thin tower will simply fall right off the bed!
In addition, the wipe tower that is generated on every multi-material print (to counteract side effects of idle extruders sitting in their docks) was brittle and wound up toppling over, which caused the entire print to fail. This is because by default, all extruders contribute to the outer shell of the tower, but since PLA and PETG don’t mix, the structure is unstable.
(Also, OrcaSlicers profile for PETG on the XL did not play nice and caused a very messy print, material issues aside… I’ll go back to PrusaSlicer now…)
This can be fixed by forcing supports to lay on the bed using the “supports on bed only” option and setting a “wipe tower extruder” in print settings, as described by Prusa.
I actually got PLA supports sitting on top of PETG to work fine when printing a side buckle. It was only a few layers tall, so it didn’t have much chance to fail.
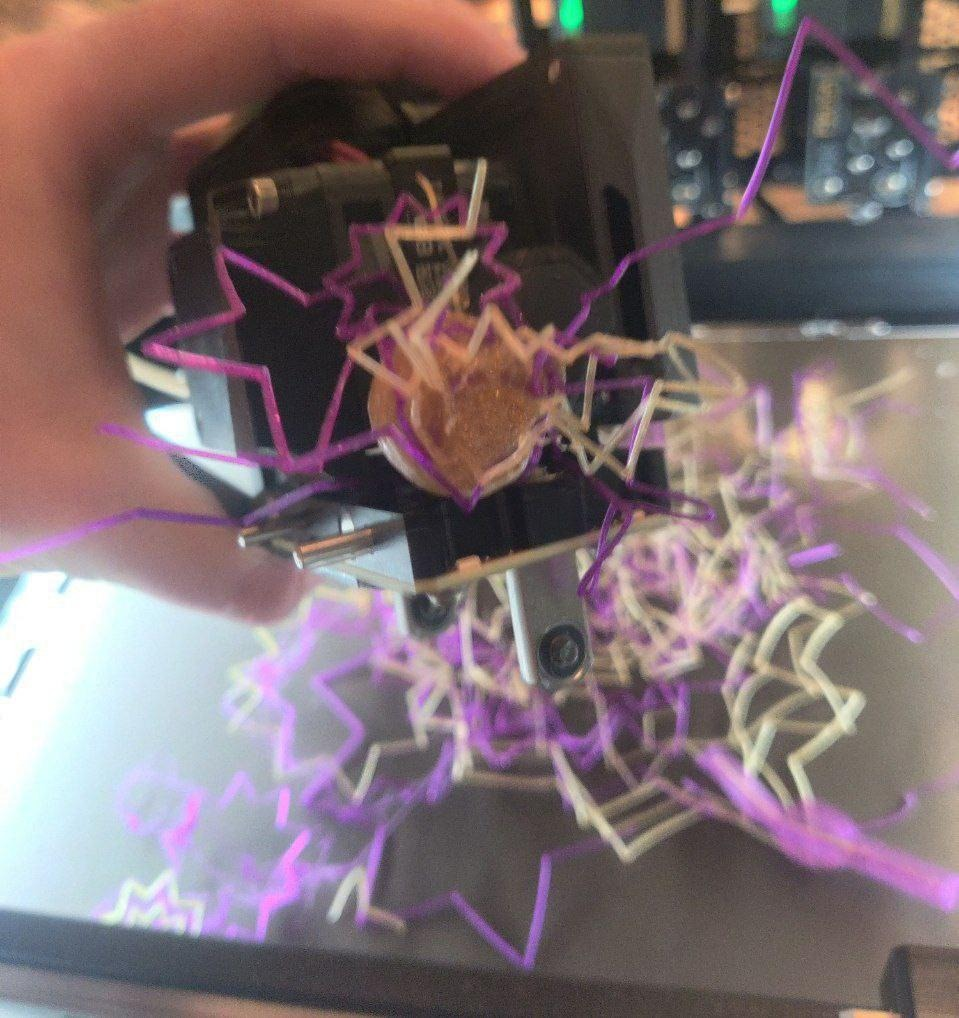
Printing with too wet filament
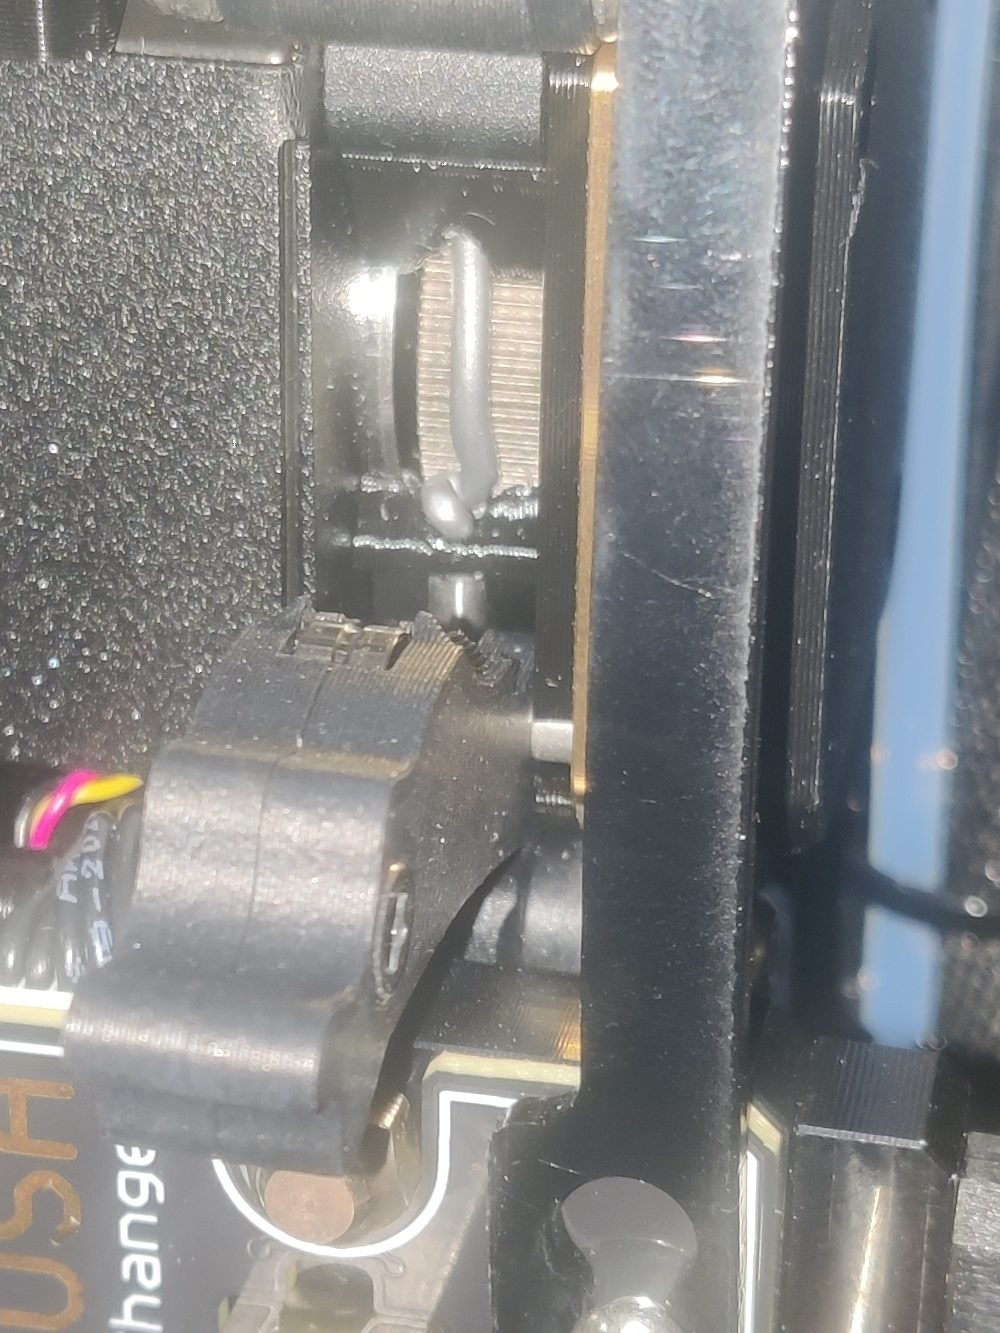
I loaded this sparkly gold filament I had, watched its first layer, and said to myself, “this stuff is too wet, there’s no way it’s going to print correctly.” Then I let it run anyway to see what would happen…
Let’s just say, thank goodness for silicone socks, or this hotend would have been a goner.
Spool Join with crappy filament spools
This just happened the other day and was actually my inspiration for writing this post.
The XL has two filament detection sensors (one on the side, one in the extruder) and if either of them trip, indicating that you’ve run out, it’s possible to seamlessly switch to another extruder with more filament and continue on. This is called “spool join.”
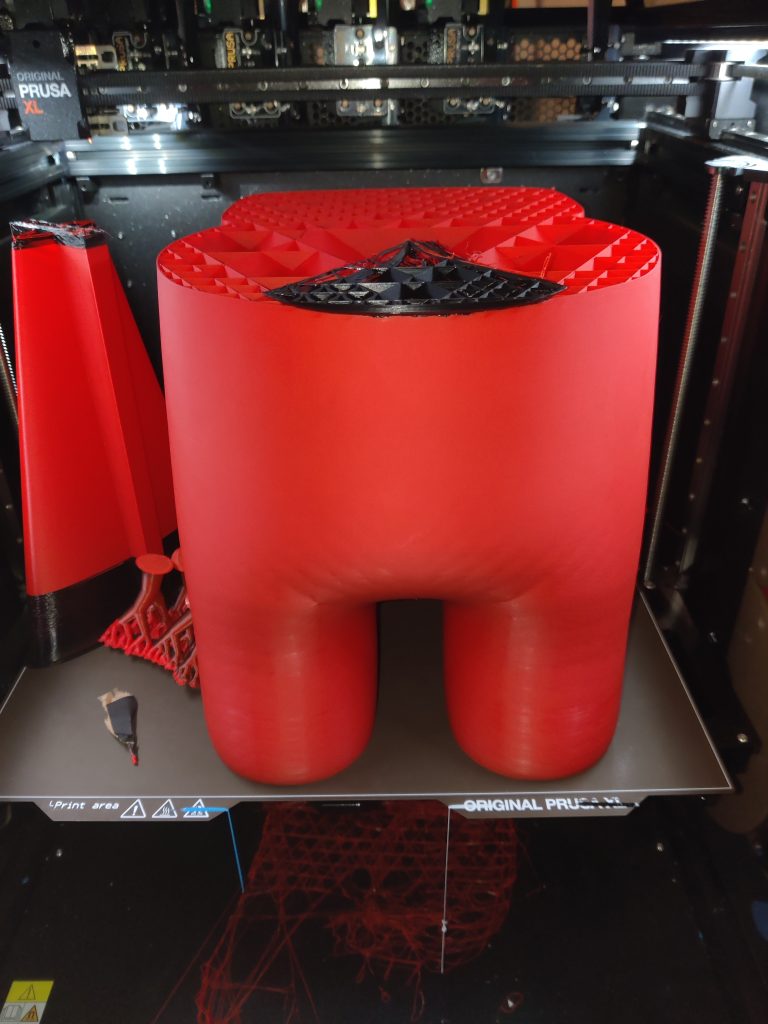
I wanted to make an Amogus XL. This would be nearly 2kg of filament, 1.5kg of it in red.
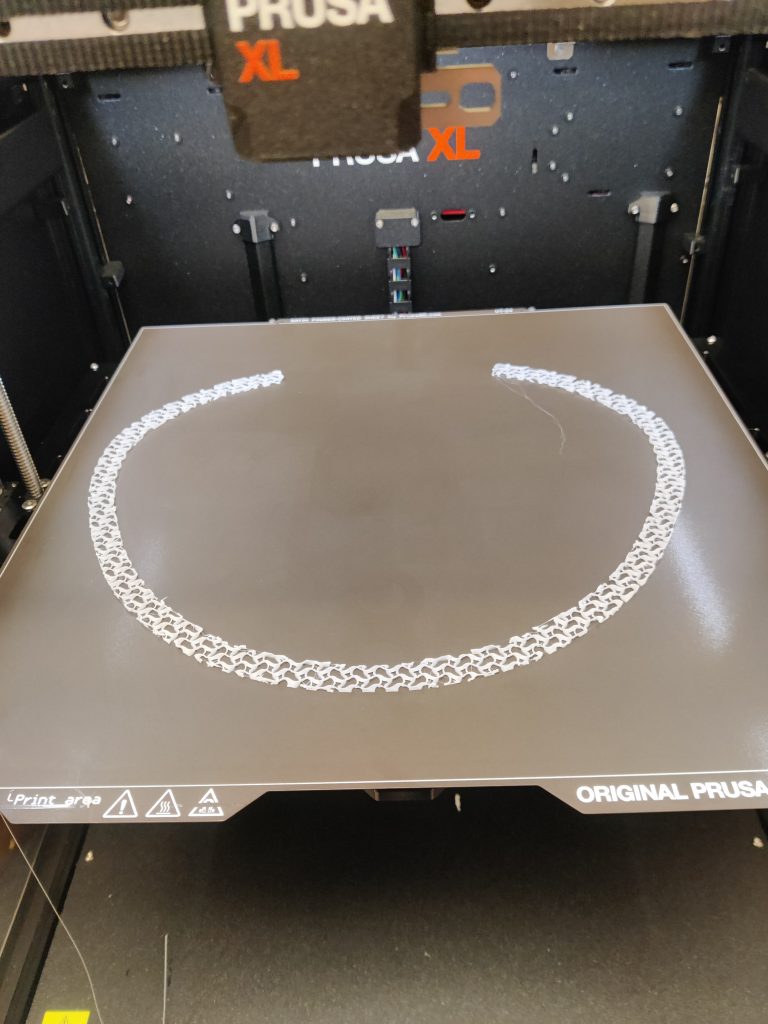
I had two 1kg red spools on hand, planning to use them for spool join. But after 35 hours of printing, I checked on the job and saw the following:
The spool had run out, and a filament with a piece of tape at its end was stuck at the end of the side sensor
The red extruder was printing in to thin air.
So this meant that the print had failed, because Inland tapes the end of the filament spools, causing a jam just before the filament sensor.
In retrospect, this feels like an obvious thing– yes, some filament manufacturers cheap out and tape the end of their spools (naturally Prusa does not do this), and of course that would interfere with the functionality that checks when a spool has run out. Still, that’s a kilogram of plastic that would have been completely toast… had it not failed in just the right place that, with some glue, will work out just fine…
The plan is to model the bone and glue it on.
The Good Stuff
I like the Prusa XL. This printer is capable of some truly amazing things. When it runs correctly, it can create objects that absolutely nothing else can. Not Bambus, not high-end $30k Stratasys machines, the Prusa XL outclasses them all when it comes to raw capability. Just try printing these objects on anything else half as efficiently:
Amogus
Final Verdict
The problem with the XL is that there’s an extremely load bearing when it runs correctly in that statement.
My expectation when I start a job on this printer is that when I print something simple, in a single, easy-to-use material, that would be big enough to fit on a smaller machine, it runs perfectly well, maybe not with the best overhang or bridging abilities (Prusa fixed their cooling after this model was launched) but it’ll come out well.
When I start something more complicated, I get nervous, and pretty much assume something is going to go wrong, either because of the printer being broken in some new way or a new weird edge case I didn’t know about.
I think, averaged over all the prints I’ve started on this machine, my success rate of finishing jobs is probably somewhere at or below 50%.
I like the Prusa XL. I want to love the Prusa XL. But I can’t love a machine that is effectively a coin flip on whether something will come out right or not. I can’t love a machine that makes me want to check on it constantly because I might catch it in the act of botching a job again. (That nervous gut reaction has worked out multiple times and caused me to either save jobs in the nick of time or watch their precise moment of failure.)
Yes, small, single color print jobs are reliable. But the complexity of this machine is the point! You don’t spend $3500 on a printer to run jobs that would come out fine on an Ender 3, you spend $3500 to run jobs that take up the whole bed and use 5 different materials.
And yes, some of those 50% of failures have been my fault, either because of outright silly mistakes, or just learning 3D printing better, or weird edge cases specific to multi material.
But here’s the thing– I have complete and utter faith in the Prusa MK4S I bought for myself a few months ago. I spent three afternoons building it, turned it on, and it immediately popped out a statue with ridiculous overhangs and zero visual flaws.
Here’s my review of the MK4S, by the way: If I press start on that machine, unless I catastrophically messed up the setup (like me destroying a smooth PEI sheet with PETG even though the manual told me not to do that) it will finish the job.
I can walk away and come back in a certain number of hours (it’s really fast) and it will have just worked, and with astonishing quality to boot.
The first job the MK4S ever did.
Even TPU required absolutely zero configuration out of the box. Just set “Generic FLEX” filament and go.
The XL, in comparison, is just not reliable. And I wish it was.
What it needs
I’m not Prusa. But as a consumer who learned 3D printing on the XL, I think it needs two very big things to make it a good product:
A user manual. The “3D printing handbook” that comes with the printer is short and not tremendously helpful. Prusa has actually mentioned in their blog recently that they are working on something quite like this for people who bought the XL as their first printer, so I’ll be excited to see the results.
This is necessary so that all the little edge cases like the ones I’ve found above are explained to the user before they encounter them, and not after a 20 hour print fail.
Hopefully this would also be where Prusa states that the XL cannot print TPU out of the box and offers an official workaround.
A proper second revision. As a prospective XL buyer (when I have to give this one back someday), I’m extremely nonplussed by the various “we fixed it in the new ones” fixes for exact problems I have. I get it– might as well get the fix to market as soon as you have it– but it makes me very disinterested in spending $3500 on a machine only to find out that I lost 15 hours to a problem that they fixed a month after my unit shipped. I’ve come across three of these so far– I wonder what else is lying hidden somewhere in documentation for an error that I’ll encounter at some point?
A second revision would give me the confidence that most of the problems are actually ironed out now, and that it’s safe to buy one.
And this is to say nothing of the people who bought the XL at launch, found out that it was entirely nonfunctional instead of somewhat broken like this one, and to add insult to injury had to pay out of pocket for new .4mm nozzles…
Conclusion
The Prusa XL is a magnificent machine. When it works. The enormous bed, modular bed tiles, toolchanger, Nextruder(s), and all the software to make it go are a sight to behold.
But I would absolutely not purchase one for myself in the state it’s in. And oh boy, have I been thinking about it, with that summer sale going on right now.
If I spend $3500 (plus shipping, taxes, and Fascism Fees in the U.S.) on a printer, I need to trust that it’s going to save me time and energy over the ~3.5ish MK4Ses (or 3 Core Ones) I could purchase at that price. Or if I were willing to accept a closed source, locked down, enshittification-in-progress ecosystem, seven Bambu Lab A1s, with AMS units.
And it just won’t do that.
I’ll continue using this XL as long as I’m able to, before it returns to its rightful owner. But after that, time will tell if it’s in a state where I can justify the splurge.


Leave a Reply