

Members of the furry fandom sometimes go to extensive lengths to project their cognitions of themselves into the real world.
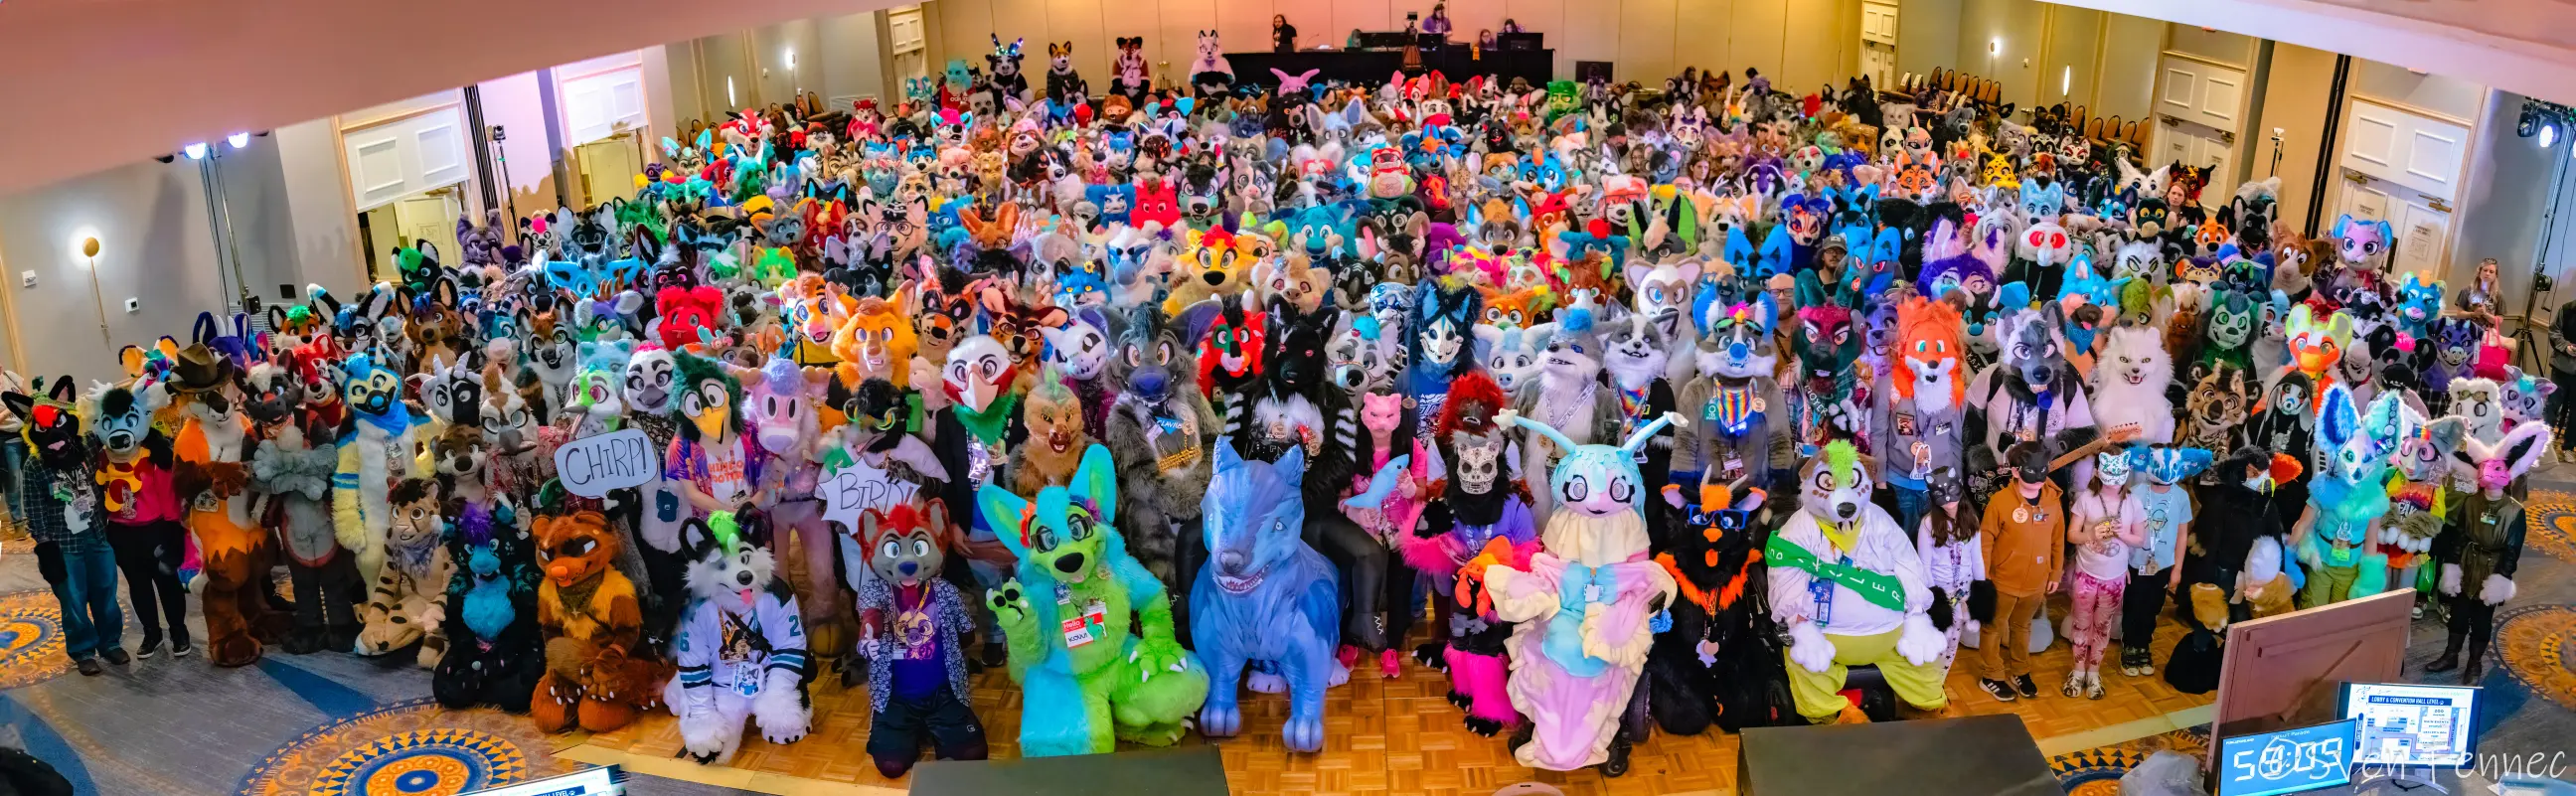
These “fursuits”, as they’re colloquially known, are intricate, complicated— and very, very expensive to make. People who purchase them are known to pay well upwards of $10,000 in the moderate to extreme cases.
This is because the construction of such complicated costumes is, by definition, extremely complicated and time-consuming. Due to the requirement of each costume being unique and the fandoms large-scale rejection of corporate culture, each costume is painstakingly crafted, often from scratch, always by hand. It is not possible to create an “economy of scale” for this type of product— building a fursuit is a task left solely to individual artisans, and the community very much likes it that way.
These artisans must have a natural talent. Some way of seeing the world that others don’t. Building something this complicated is surely out of the reach of the ordinary citizen.
And then there’s me.
I’m not an artist. I’m an engineer, by day and night. This blog is usually about bizarre programming constructions and shitposts taken entirely too far.
This post is different. It’s about making art, from the perspective of an engineer. And it’s about bashing your head into a wall, over and over again, until finally you break through the plaster out of sheer stubbornness.
This post is dedicated to everyone who thinks that a complicated task is out of their reach. Especially other furries. I’ll show you what happens when an ordinary guy with no talent steps outside his comfort zone and takes on a true behemoth of a journey.
The results may surprise you.
How it starts
It began with an offhand comment from a Discord chat room.
04/04/2023 4:45PM
Zin: FYI I have a printer with a relatively large print bed and am a lot cheaper then our local shop ;3
Brian: :O
*makes a note*
Zin: Yeah I printed Zin with it

nocoffei: How does one print a fursuit head
Zin: I modelled my head base in Blender and then printed it out
This caught my attention. It seemed like a neat concept. How did he do that? We chatted for a bit in which he gave a chalk outline of what he did.
Zin: So basically, I'm not an expert on how to do this. I've done it once. I got a 3D scan of my head, which I put into Blender as a rough base. Then I sculpted Zin's head around that with around an inch between the plastic and my face. Then I used pieces of foam as cushioning as a barrier between my head and the plastic.Eventually I said:
nocoffei: Well I've kinda been bored since I finished my robot tail project but I don't really have the time for this now; maybe over the summer...I then promptly forgot about it until the summer began.
Step 1
The real reason this all started was because of phrasing.
To me, saying “oh that sounds cool, maybe I’ll do it” is awfully dismissive of someone elses time and labor for something they clearly cared a lot about. But the words left my keyboard before I knew it at the time, and my self-perceived rudeness started ringing in my head as June approached…
Armed with nothing but two YouTube tutorials and a friend who knew Blender, I set out to take my own commentary seriously.
From here on out, recognize that this is NOT A TUTORIAL! It is a story. This article is an exploration of what happens when an engineer with no talent dives into creation without a second thought, and as such it’s written in the prose of my thoughts at the time and decisions based on those thoughts.
If you treat this article like a tutorial you will have a bad time.
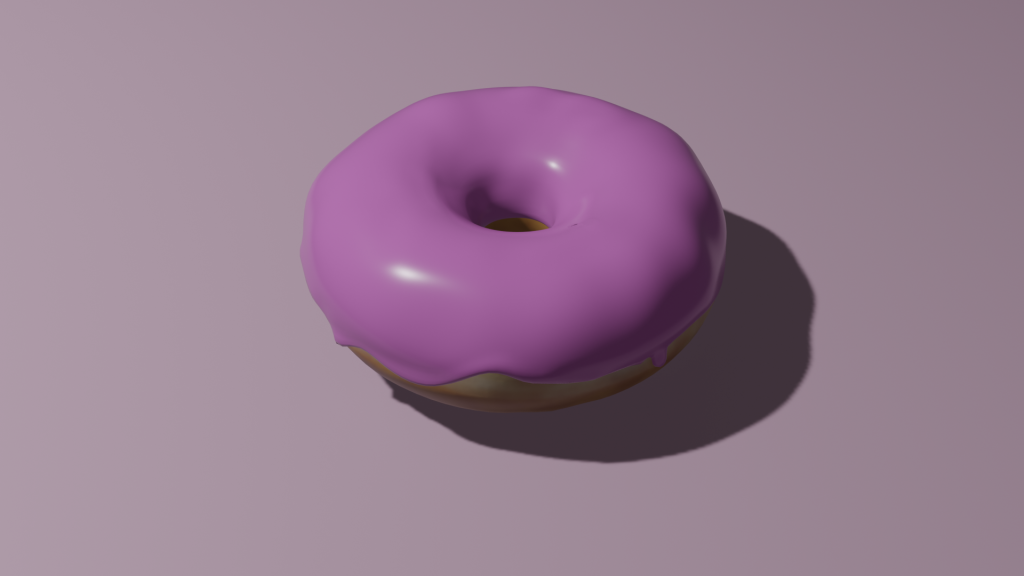
Clearly the first couple weeks would require learning Blender so that I could shape the base. So I added a third YouTube tutorial to my arsenal— the famous Donut tutorial series by Blender Guru.
Two days in, I had a particular insight. The reference for my furry character is a 3D model— specifically, the Flexx avatar from FleurFurr and RisingVexx. I had colored it, changed some parts around, and was happy with the result.
nocoffei: I mean, this is *particularly* easy because the ground truth for the design *is a 3D model already*.

so this will be *significantly* easier than doing it from scratch.
And thus the plan was born. Instead of building an entire head base in Blender from the ground up, I would use the existing 3D model that I was already happy with and try to translate it into the real world.
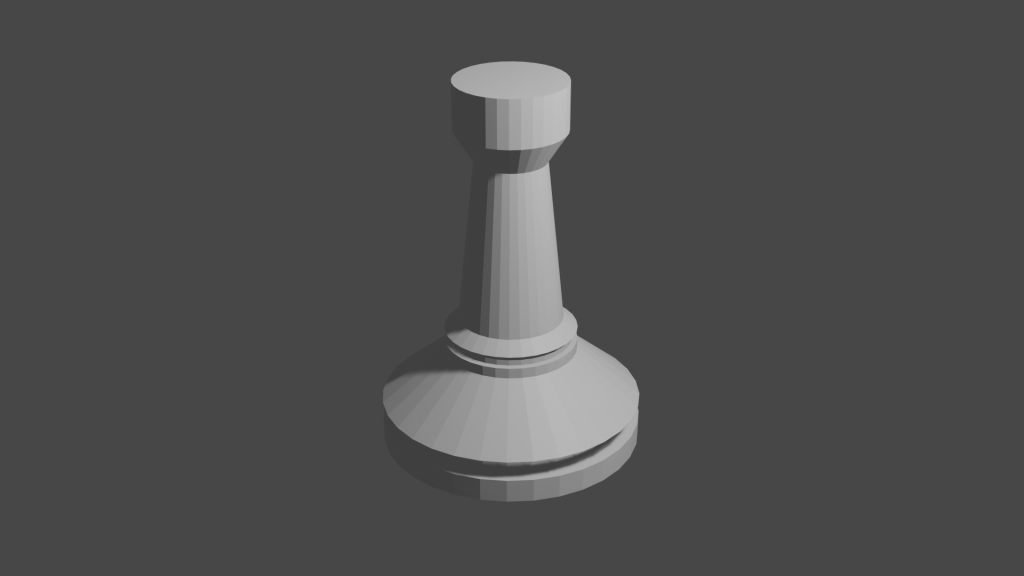
The donut improved. I managed to finish it. Here it is for the world to see:
I made a chess piece.
And then I started working on the head model. But first, I’d need some reference material…
3D-Scanning your own head
This is one of those moments where I was surprised about the state of technology. As it turns out, there are now multiple ways to take 3D scans of any physical object and import them into a computer, many of which can be done with nothing more than tech found in every home.
As aforementioned, the motivation for 3D scanning a human head is to make a reference in 3D space to design a head model around. Ideally, the head will fit tightly inside the model, allowing for perfect, comfortable wear designed specifically for the wearer.
One significant benefit of this approach is that you can place your eye holes in the model precisely related to where your human eyes actually are. This can result in a dramatic increase in visibility compared to more traditional methods, which at some point have to guess where the eyes are.
There aren’t really any drawbacks to this approach, other than the difficulty of getting a good capture.
So how does one get a capture? There are a couple ways:
- Dedicated hardware: Using a purpose-built scanner that can be purchased commercially
- Photogrammetry: Taking many individual pictures of a subject and piecing them together, using either open-source or paid proprietary software
- LIDAR: Taking a scan using true depth-sensing technology such as that found in the Xbox Kinect… Or any iPhone with a Face ID scanner.
I opted for the last approach, using a paid app called Scandy Pro to access the Face ID hardware of a friends iPhone and take a scan of my own head.
As an aside, I recently learned of someone who used a Nintendo 3DS camera for photogrammetry. The resulting model was very blocky, but it did work!
Using Scandy Pro is intuitive for physical objects, but non-obvious when you’re trying to take a shot of your own head. The objective with any capture is to very slowly move the object around in 3D-space, making a full revolution of 360 degrees. The best approach I found for this case was to sit in a swivel chair with no headrest and slowly make a full revolution.
Unaided, this can be very time consuming. I spent a total of roughly 5 hours getting a good shot, but I was also being a perfectionist. Even then, I could forget about color— the textures that were exported with my model had three pairs of eyes and two mouths on my neck. Rather disturbing.
Eventually it did work though, and I managed to get a model of my face into Blender, ready to work with.
Much later I learned a cool tip that makes this way easier– wear a balaclava while taking the capture. This removes all the rough edges like hair that we don’t care about anyway, making it way easier for the software to figure things out.
Destructively Editing a VR Model
This was not, in fact, “significantly easier” than doing it from scratch.
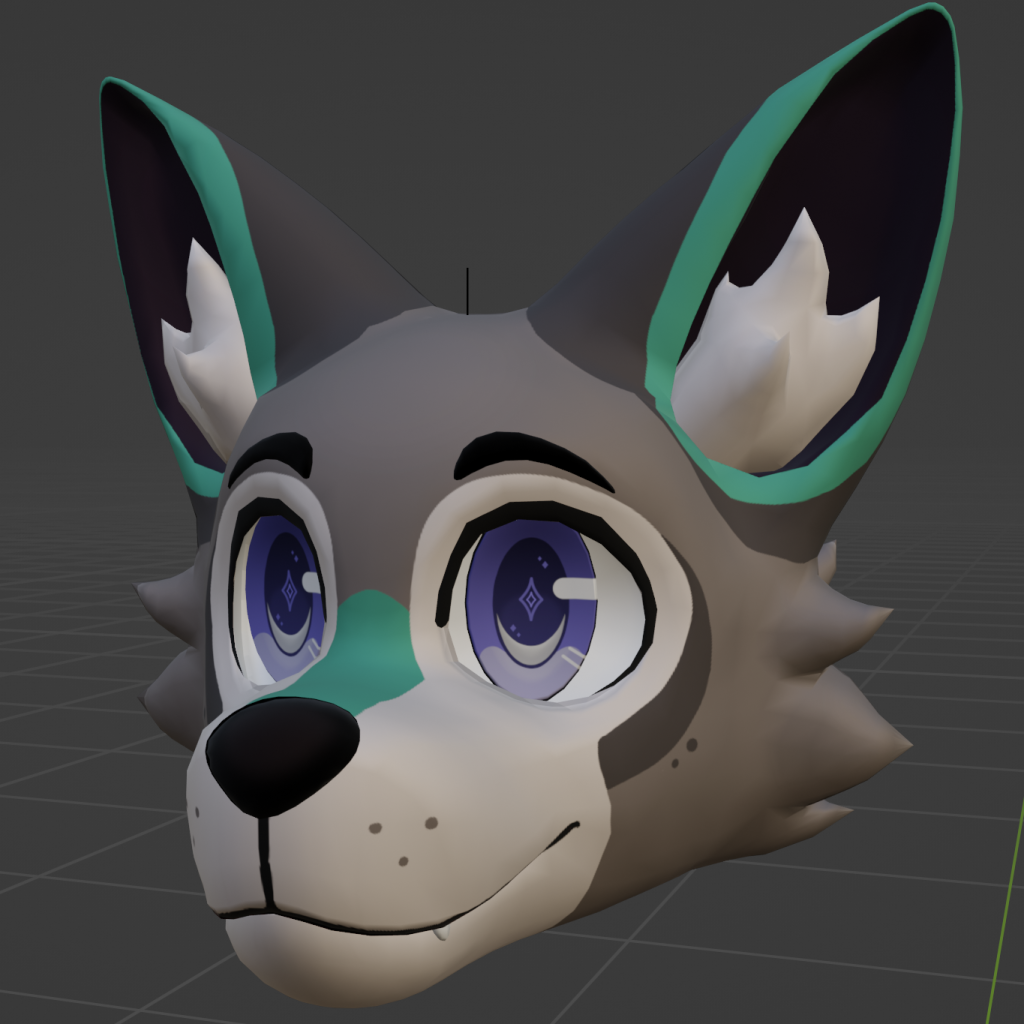
We start here. This is the head of my recolored model in virtual reality. When I enter VR spaces, people see me looking like this (with an accompanying body, not shown here.)
What we need to 3D-print is basically a skull. A single, contiguous piece with no extra components. (The reasons for this will become clearer later.) So a lot of things need to disappear here. The eyes, eyebrows, fluff on the sides of the head, fluff on the ears, teeth, and nose definitely need to go. I wanted a hinged jaw (allowing the jaw to move with my mouth, an uncommon feature in fursuits), so I needed to separate those parts of the model entirely and add hinges to them. After discussion with some others, I reluctantly also committed to removing the entirety of the ears. The reason for this was that making them separately out of foam, instead of 3D printing, usually allows a better, floppier effect.
The problem is that this model was built as a single piece. There weren’t any extra vertices underneath the bits that need to go— for instance, the ears don’t have solid geometry underneath them, because why would they?
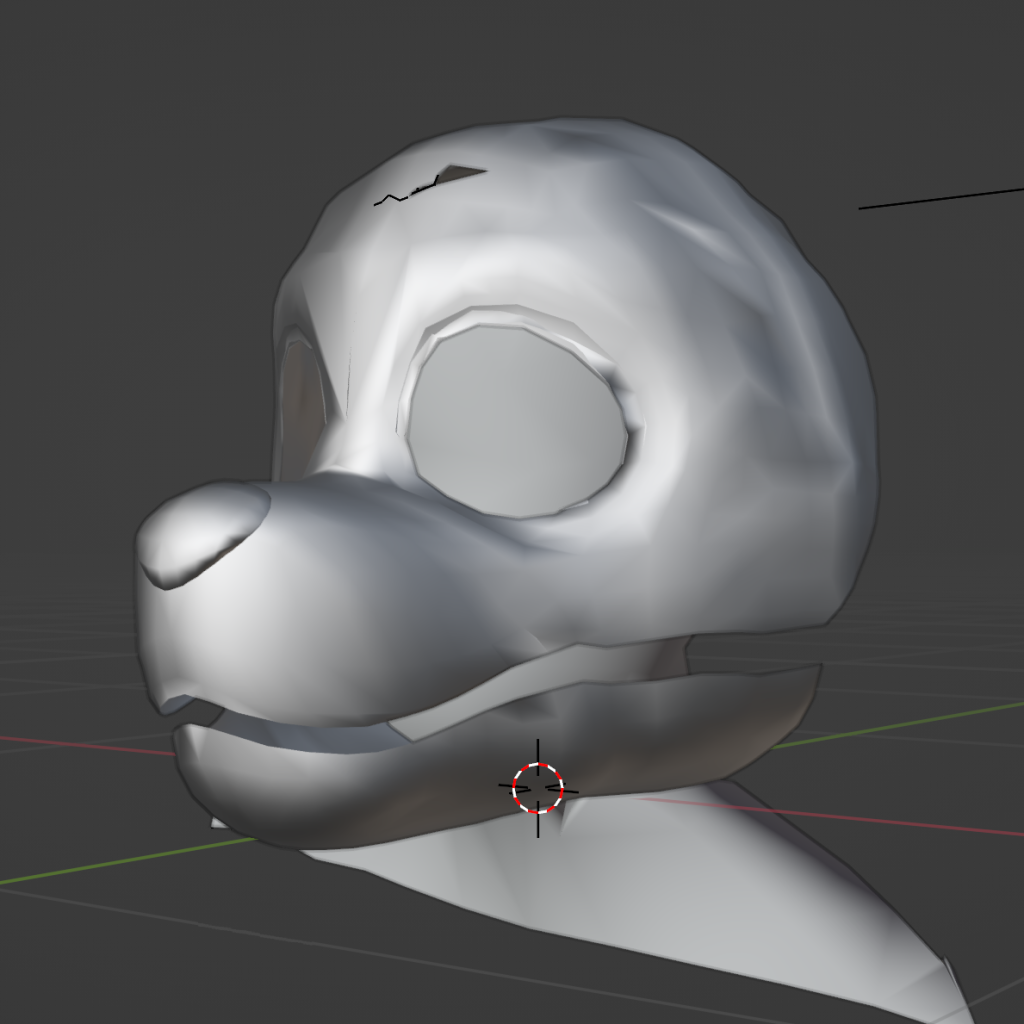
In the end, some things were easy to remove, and some things were… Painful. It took a couple weeks of back and forth between myself and my Blender Buddy to strip the model down to its core components. Here are some of the progress pictures.
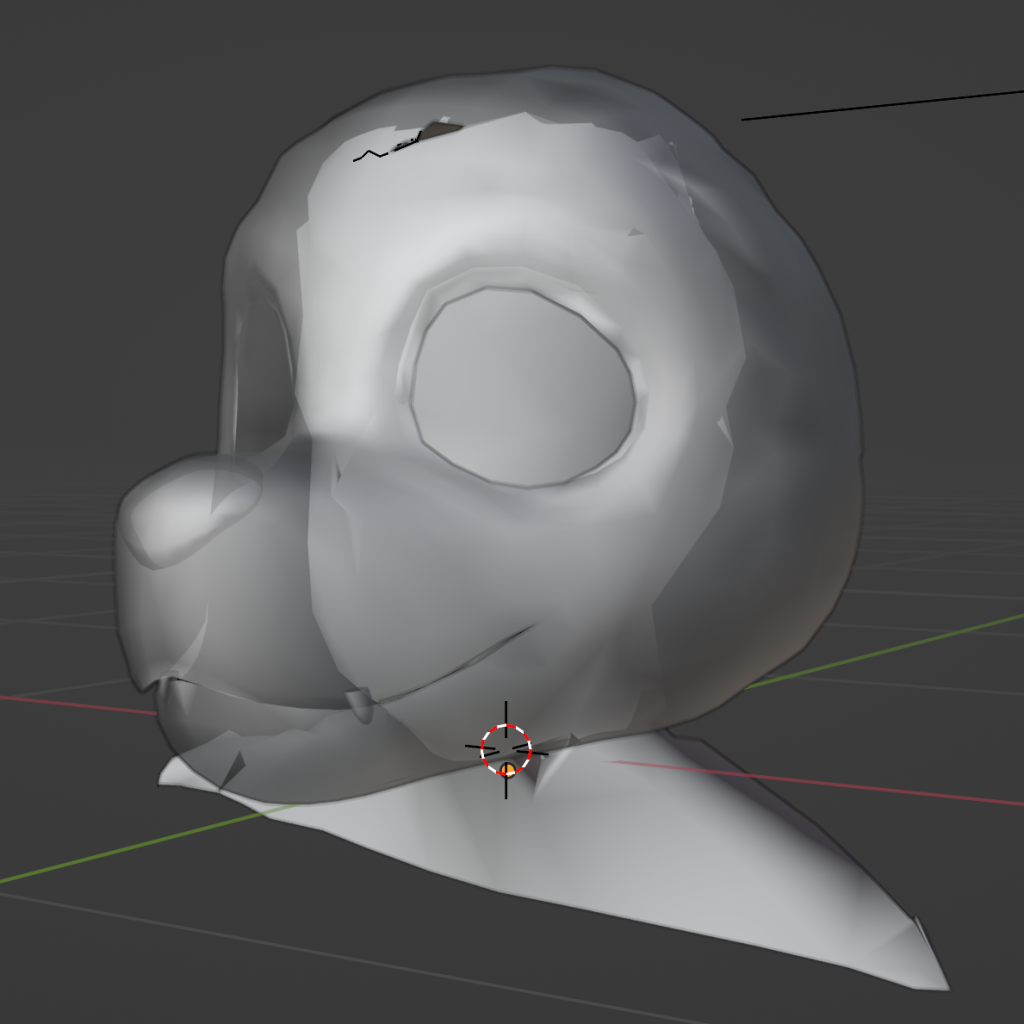
Note that I’ve decimated the model of my face so as… Not to show my face on the internet. The original quality of the model is much higher.
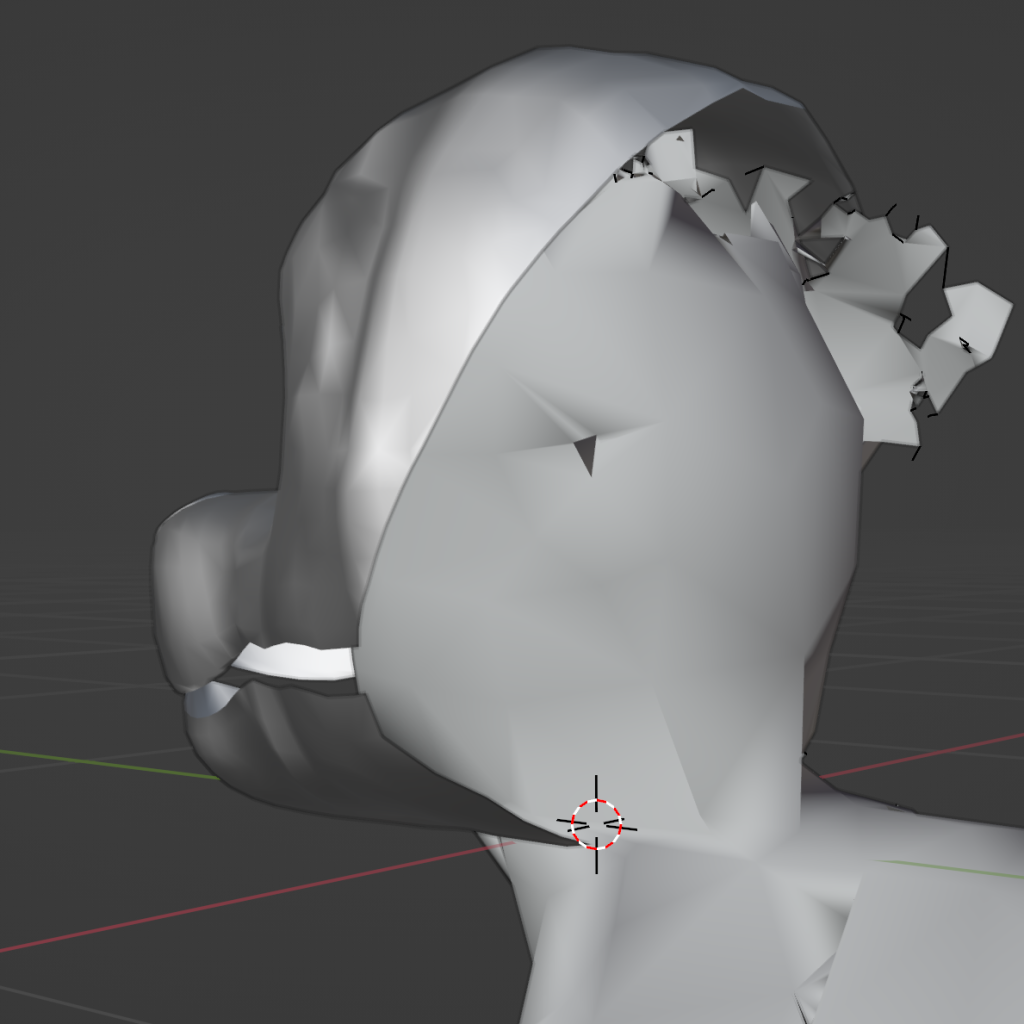
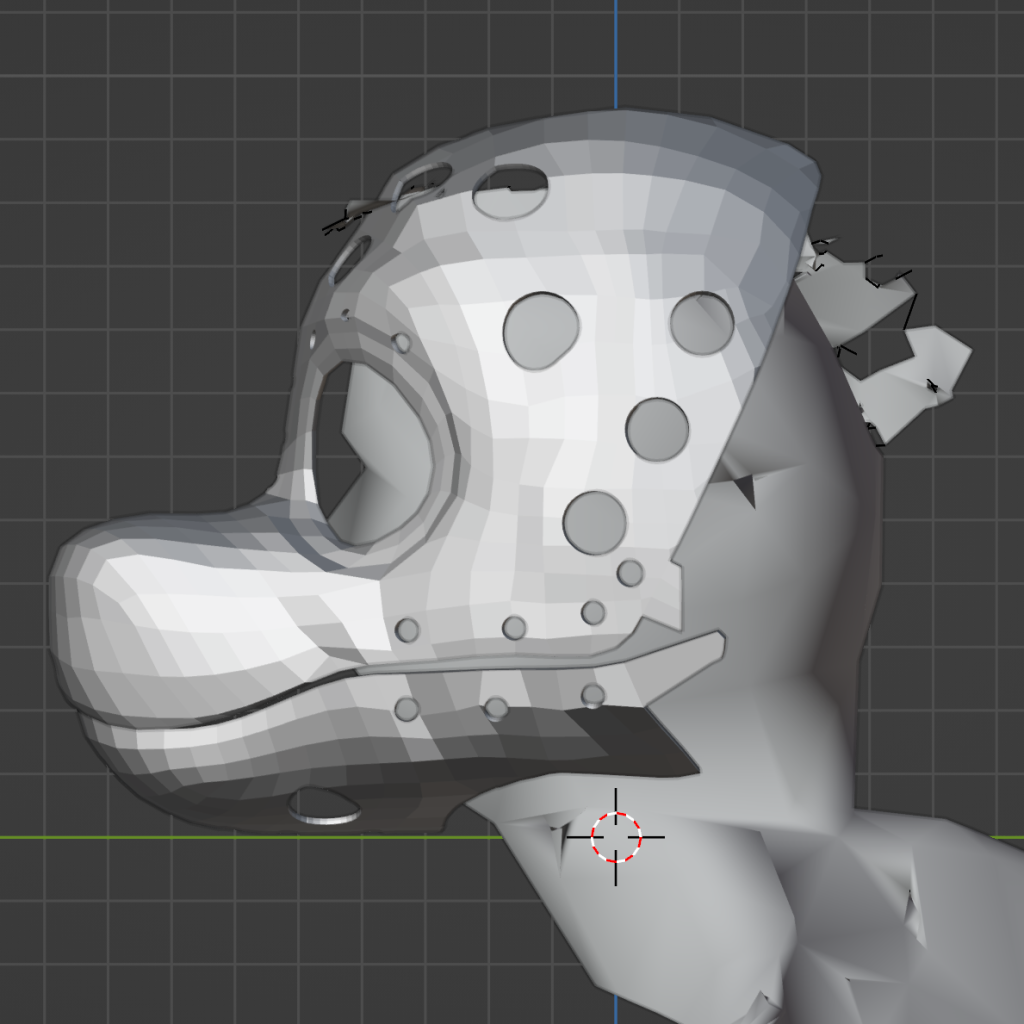
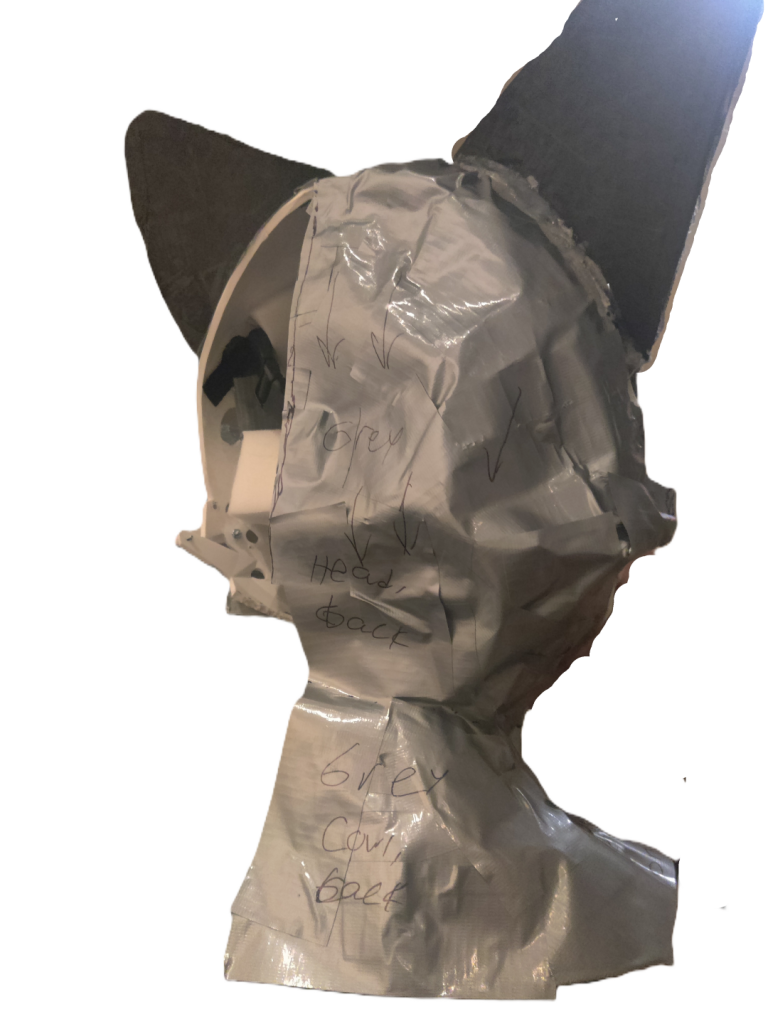
It was necessary to cut the rear of the model open so I could get my head inside. Most heads are designed to enter from the bottom, but I felt that my hinged jaw design would work best entering from the rear.

This view of the rear cut deserves special attention, as we’ll see in a bit.
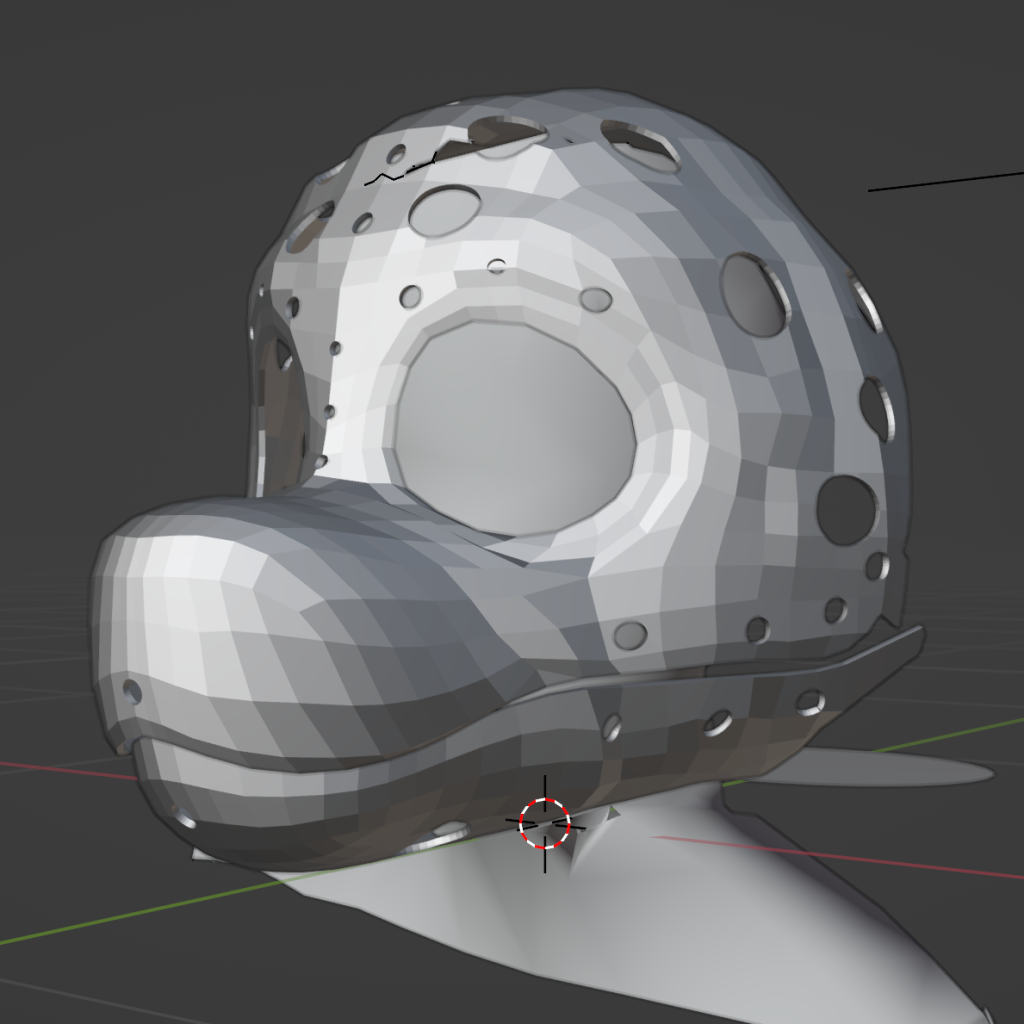
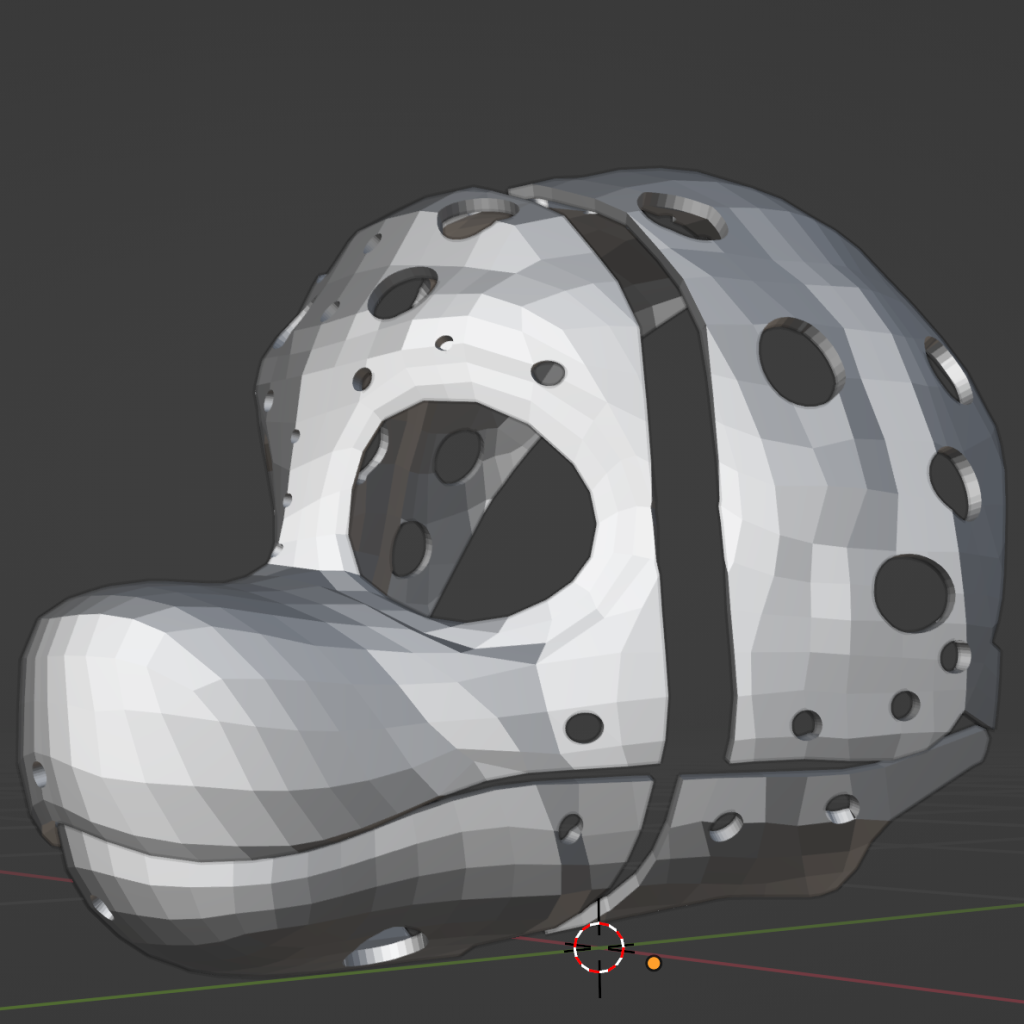
The near-final draft. Holes added throughout the model to promote airflow.
Small wings were added to each side of the jaw to place a hinge.
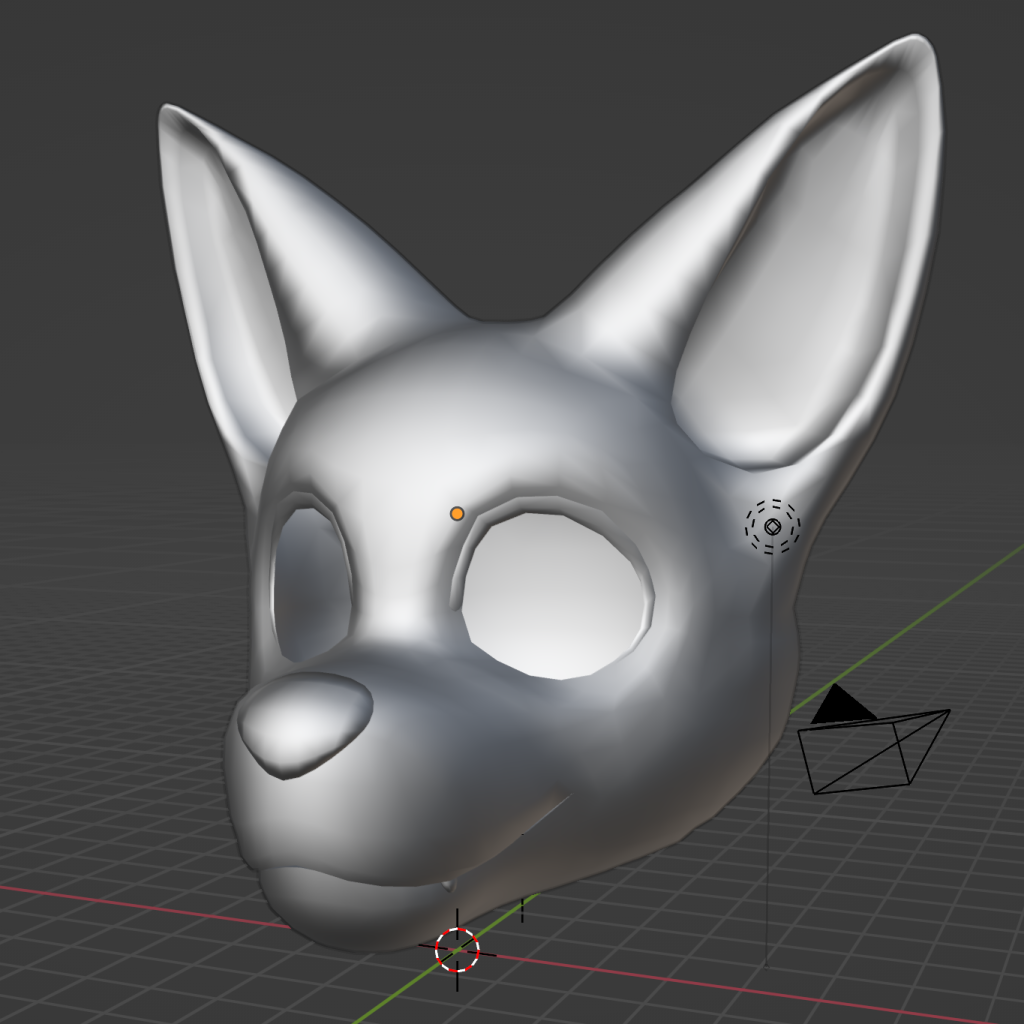
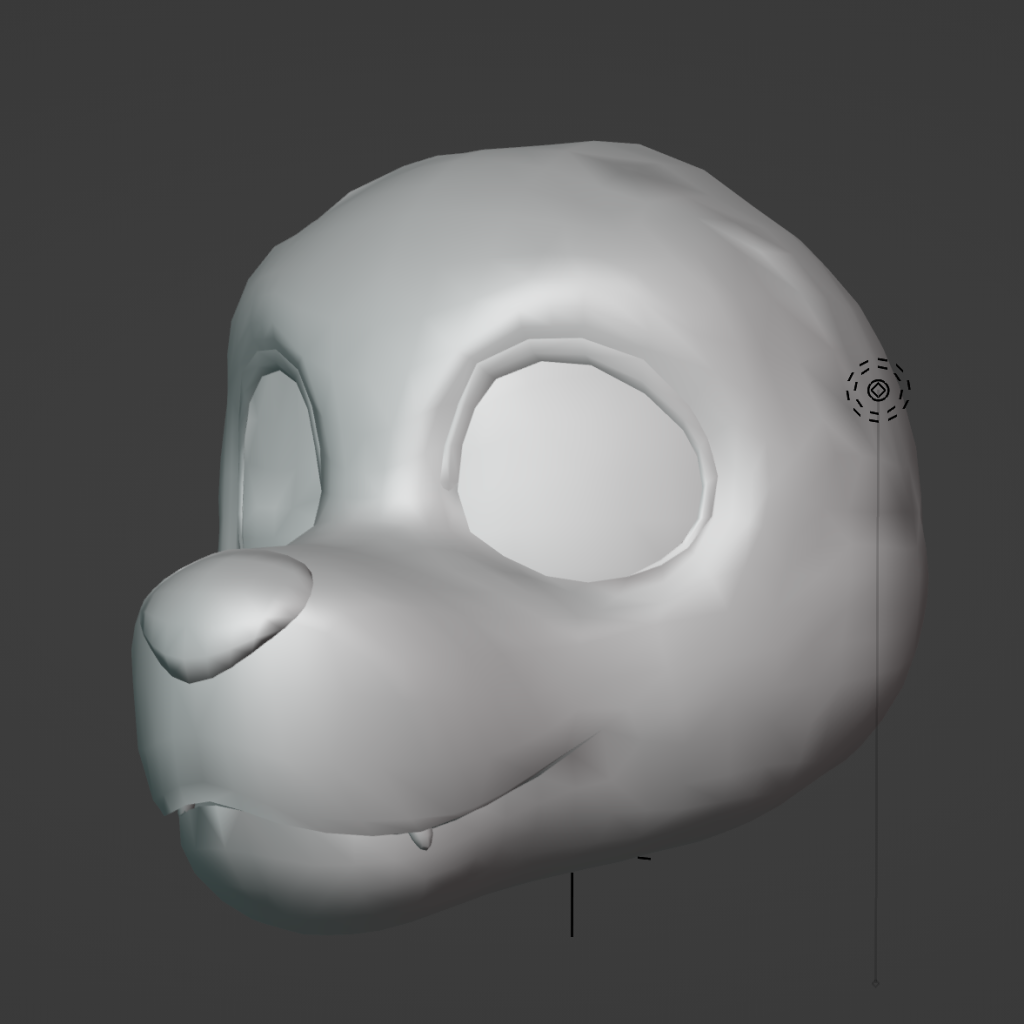
The final draft looked like this:
Originally, I had desperately wanted to print the head in a single piece; only after much persistent commentary from my peers (and an inability to find a sufficiently large printer) did I take to heart that it was OK to split up the model and glue it together later. It took a couple tries to figure out how to best split up the model to fit; These cuts were the approach I took.
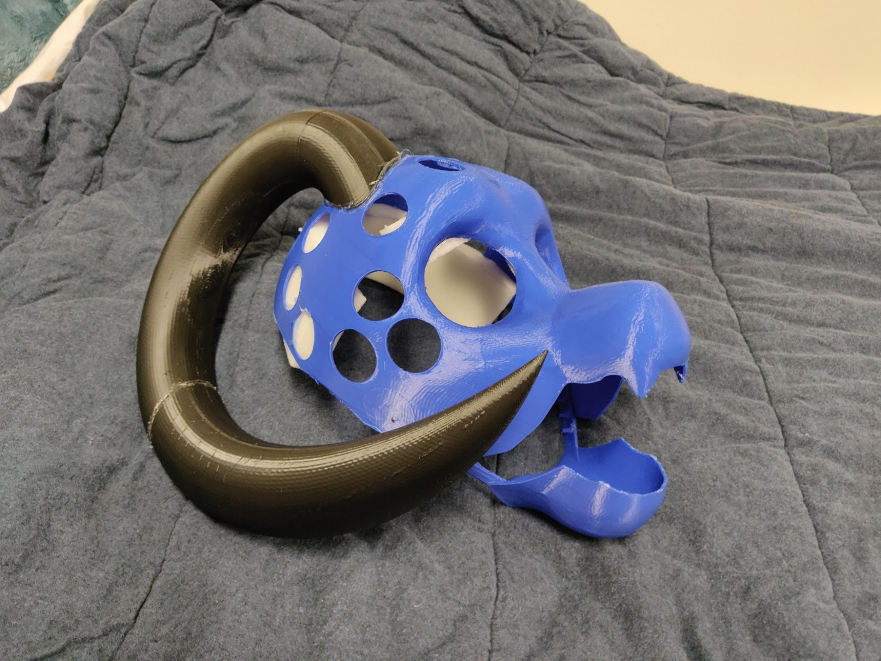
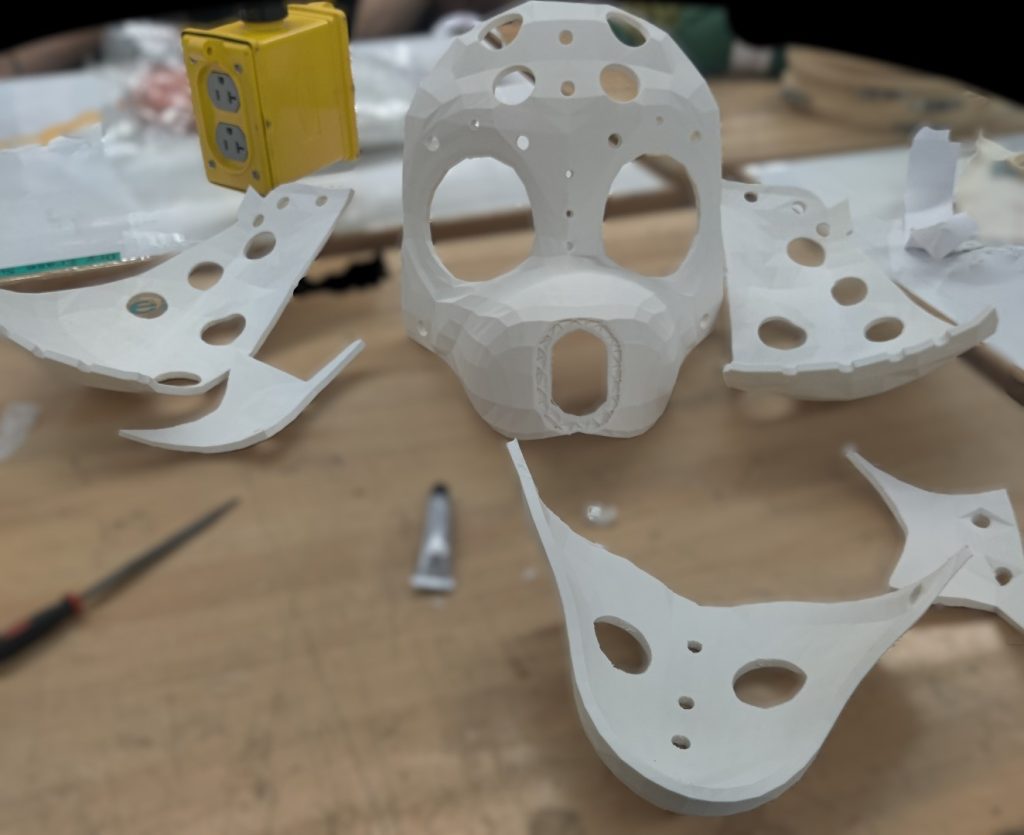
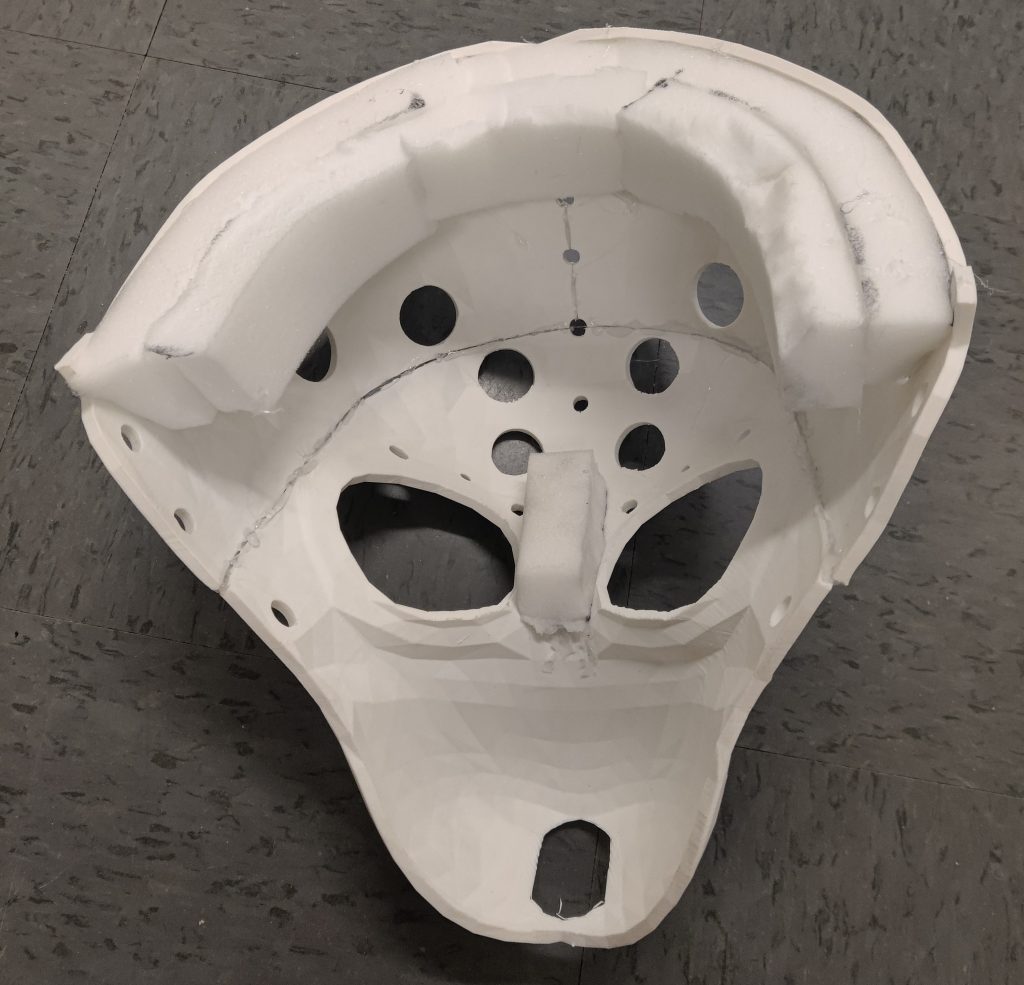
After a week and a half of printing attempts, thanks to multiple printer failures, redesigns of cut lines, odd opening hours of the shop the print was located in, and simply lengthy print times (I believe the final attempt was 25 hours) my model had been brought to life.
When necessary, I blurred or removed the backgrounds of these images. I spent a long time looking for a good tool to do this, but only found Photoshop or sketchy websites that require you upload your image to them– until I found out that the Photos app built right in to Windows can do it with ease. So that’s why it feels so bloated!
Due to constraints of a personal nature, this would be the only time I would have access to the shop the printer was located in. This skull would be my first and only draft. I had to hope it was sufficient!
The Principles of Construction
(I mayyyyy want to put this section earlier…)
At this point a (brief) explanation of how construction of fursuit heads goes will help explain the rest of the article.
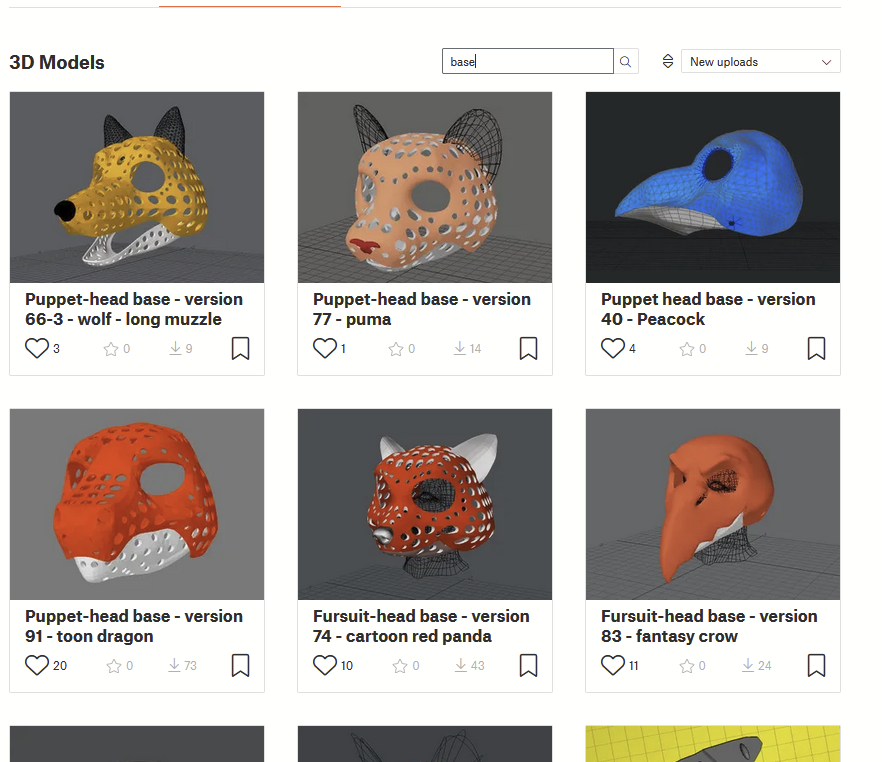
A maker always starts with a base. This is the physical structure from which everything else is born, and what I spent 6 weeks designing and printing. Bases can be made out of foam (wherein a maker takes many pieces of craft foam and carefully glues them together and cuts them apart to make the shape) or, in recent years, can also be 3D-printed, as I did. If the latter approach is taken, people usually purchase the bases online, which they can then print at home with ease. (I did not know this at the time.)
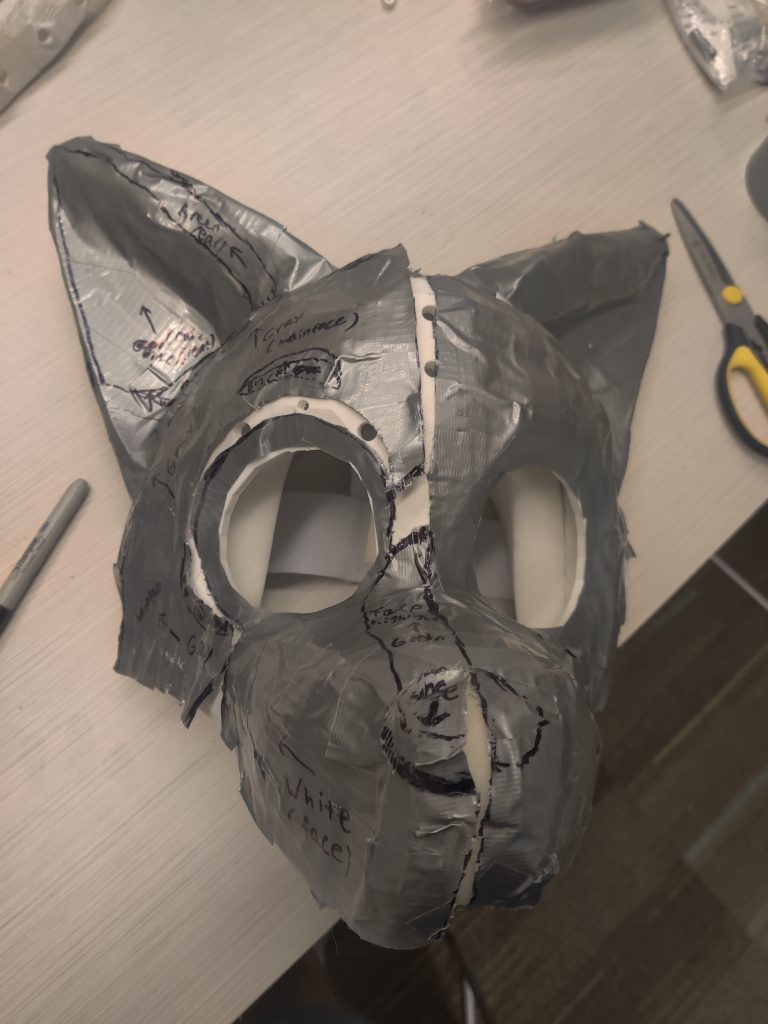
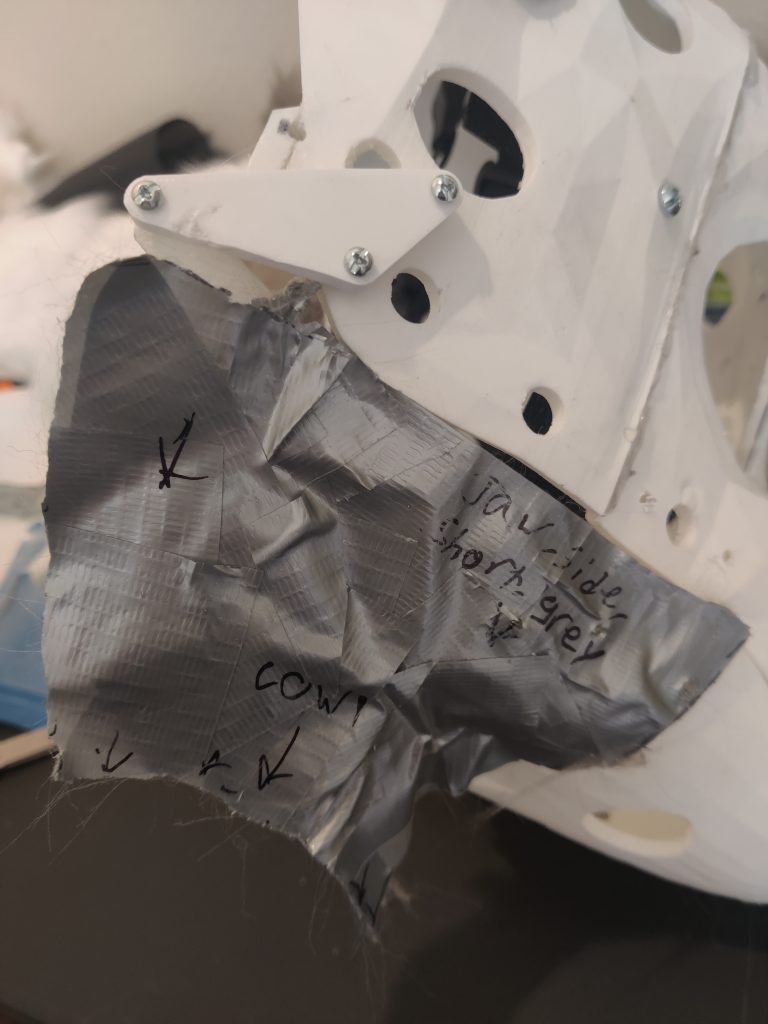
From there, after ensuring that the base can be worn on the head correctly, the process of taping occurs. Taping is a simple technique in which many pieces of duct tape are overlaid onto the entire base and extending to the shoulders below. This process creates a canvas on which a creator can draw their desired patterns, the way in which they want their pieces of fur to look on the final product. The tape is overlaid onto the shoulders as well because we want a cowl, a section of fur that also covers the shoulders. This gives the head a more seamless look, especially if we go further and design a body suit as well.
After the canvas has been filled with patterns, the duct tape is cut out with an X-Acto knife and each pattern piece is laid flat. Laying a piece flat is often not trivial, because each piece will often curve and rotate in various directions given the complex geometry of the head design. It’s usually necessary to cut darts in the design, little snips on tension points, that allow it to fully lay flat.
Physical Construction, Act 1
At least behind a computer screen I still felt somewhat at home. With a bare skull sitting in front of me, now I was truly in uncharted territory. Touching things with my hands was an experience I was not used to.
The first step was to glue the pieces together. At first I attempted to use some extra-strong bonding glue, but it didn’t quite stick right, so I quickly resorted to hot glue, which worked just fine.
There were a couple of next steps that I tackled in parallel.
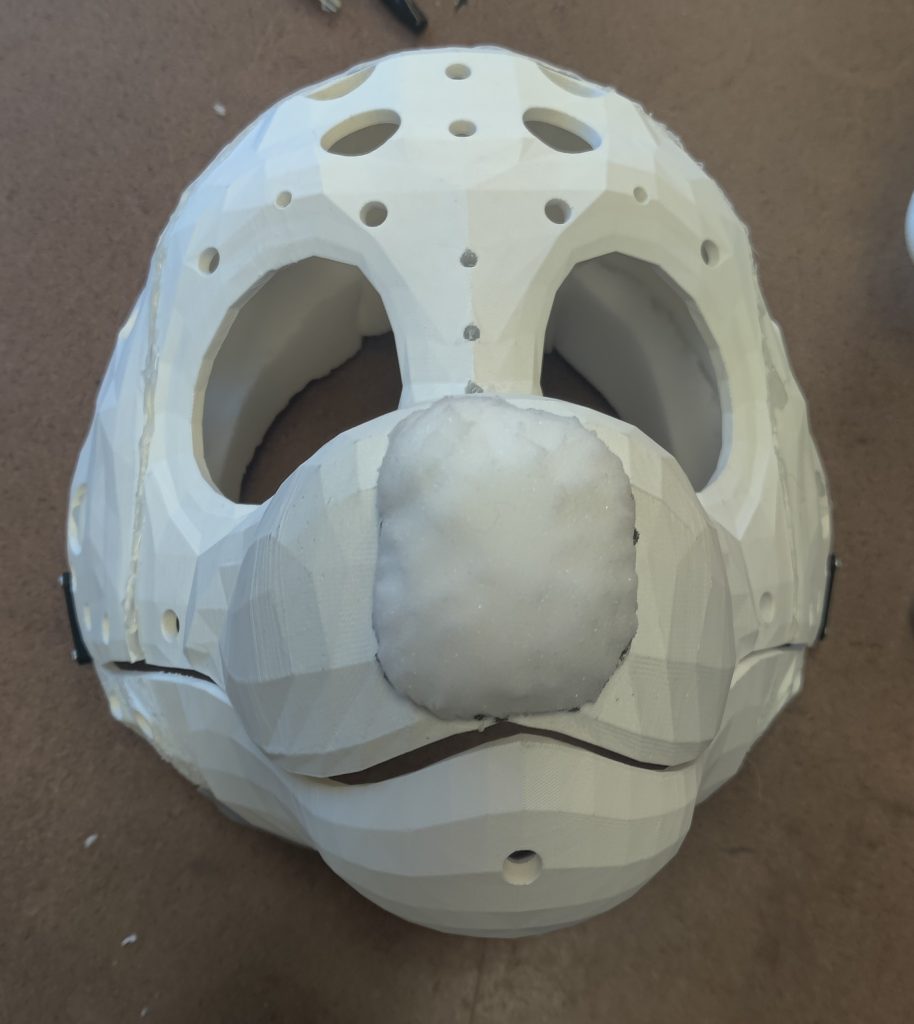
The print job failed at 95%, which just left a small portion of the snout unfinished. I cut some foam to rebuild the original shape.
Next, the skull ended up being too big for my head, so I needed to add some extra foam so that my head could rest comfortably inside of it.
Finally, I’d have to design a hinge. This was something I explicitly chose to do after the print was complete, as I was new to Blender and didn’t want to attempt to design a complex object like a hinge while I was only barely getting by with assistance in designing the head. I referred to one of my tutorials, in which the 3D-printed jaw was separated and the creator added a hinge after printing, to design it; I created a simple two-point connector which would screw into the “wings” I added to the jaw and skull, and hot glued it into place.
Without an opposing force, the hinge will just flop open. Solving this is simple enough— we need to add some springs. The specific name for this type is an extension spring, and they look like this:
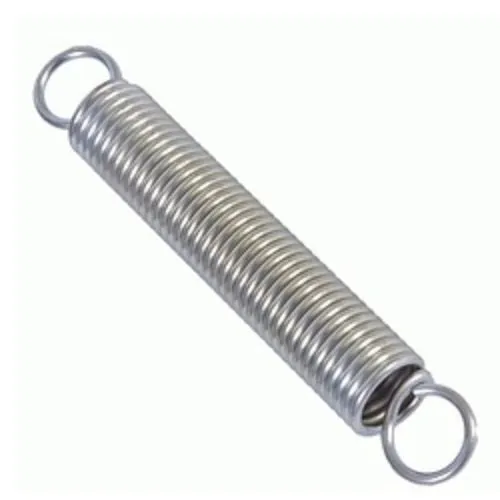
I searched around for a while and eventually found some springs that had the exact level of tension to comfortably open the mouth, but still closed when the mouth closed. Too much tension and it can’t be opened with the force of your jaw, too little and it won’t pull up enough to close.
I hot-glued the springs in halfway down the jaw.
In the midst of all that, I took some night lessons on how to use a sewing machine, and the faux fur I ordered arrived. Having learned some basic stitches, I turned next to the ears, and finally taping.
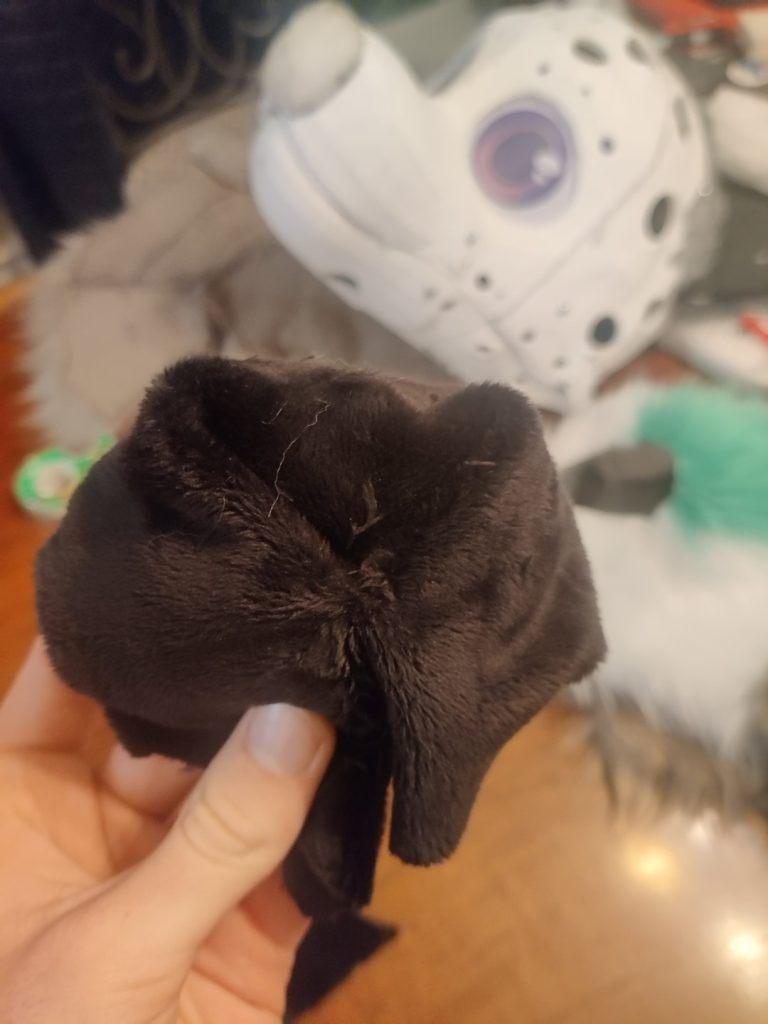
The ears were fairly straightforward, but poorly crafted. I used two layers of thick EVA foam hot-glued together, but since it turned out that it was then too inflexible for the curve I wanted, I added some craft foam at the edges. The resulting effect wasn’t great, unfortunately.
Everything Falls Apart
Well, everything falls apart
Everything Falls Apart, Dogs Eye View, Happy Nowhere (1995)
Then I get to try to put it back together
Who knew that going at a project of this scale alone with almost no prior research and zero talent would cause problems?
As mentioned, I only had one shot at a print. This is a problem, since it turned out that I had made many serious mistakes along the way. These mistakes all presented themselves at the same time…
The Hinge
Let’s take a look at that hinge design again.
Any competent engineer will be shaking their heads right about now. For the rest of us, let’s see why this is broken.
This hinge is intended to rotate about the lower axis such that the jaw can move up and down. But there’s nothing to stop the top piece of the hinge on the skull from rotating as well! I attempted to solve this using hot glue to secure it, but after two breakages of the glue it was clear that it would have to be redesigned.
Worse yet, with the second glue breakage, I accidentally tightened the screws too far and destroyed the “wing” I had built on the skull to support the hinge on the right side. This is how I learned what infill was in a 3D printed part— the model should have been printed thinner, but with much more infill, which would increase the ratio of plastic to empty space inside the model.
The Springs
Hot-gluing a piece intended to sustain a large amount of force with a large number of duty cycles is somewhat self-evidently a bad idea when you say it out loud. No amount of glue re-applied over and over again could withstand the pressure; it all broke eventually. Without any clear ideas to proceed, and with the hinge broken anyway, I took the springs off and left them for the time being.
The Bridge

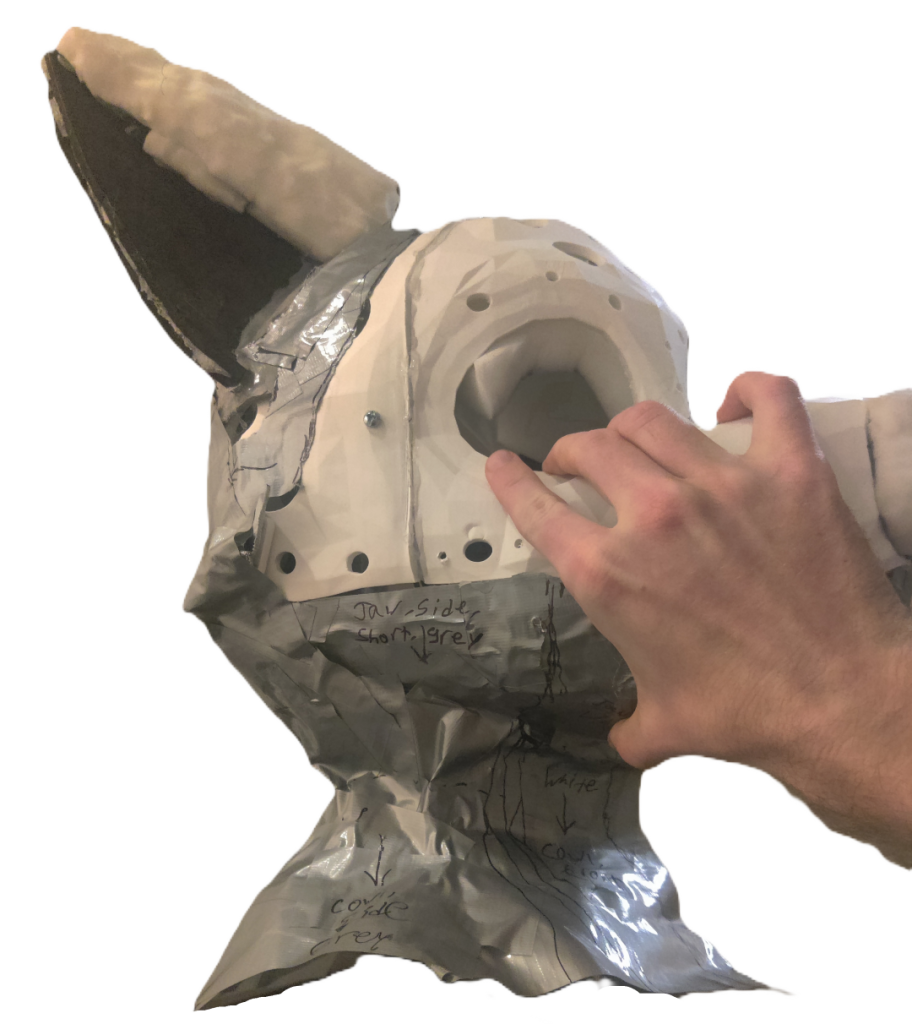
The taping process revealed that the bridge between the eyes was simply too narrow. This can be seen in the above image, which shows that there’s no room for the white ring around the eyes! Thankfully, this wasn’t fatal, but it would prove to cause problems with sewing down the line…
The Fit
And now for the problem that stalled the project: the skull wouldn’t fit my head.
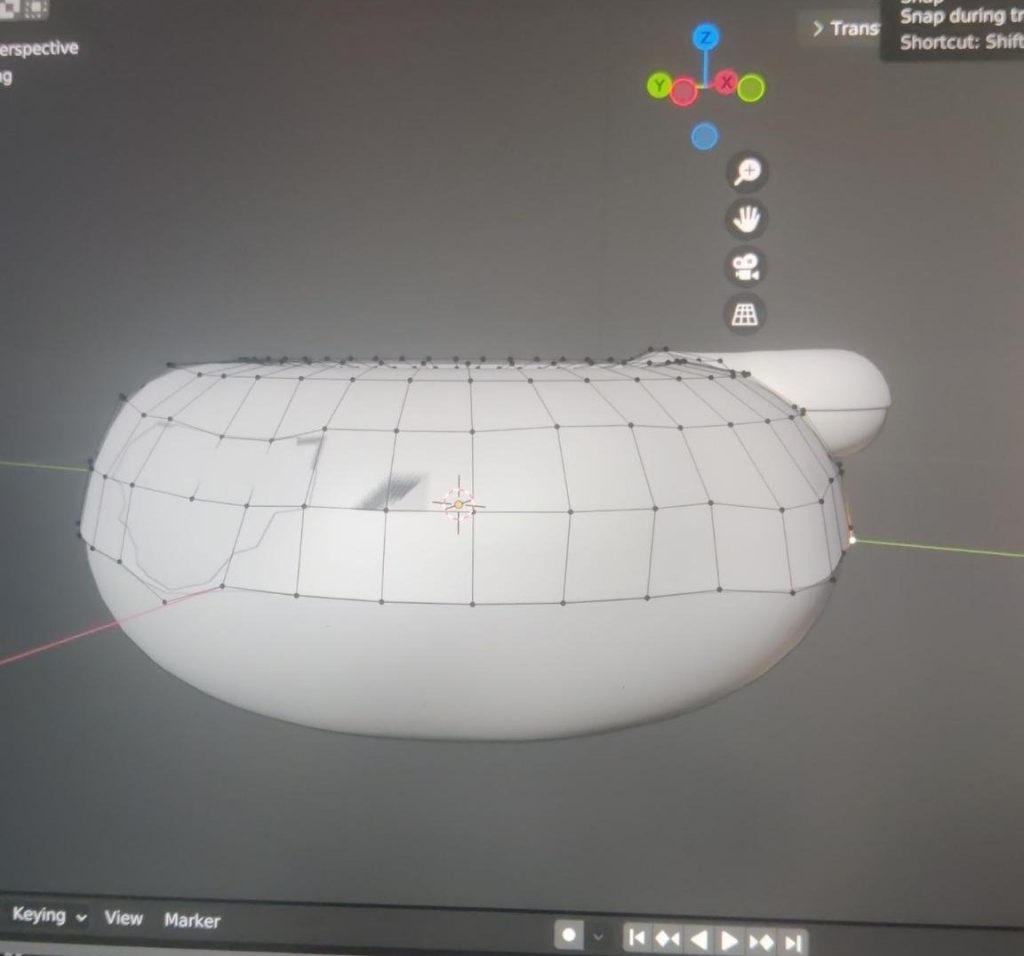
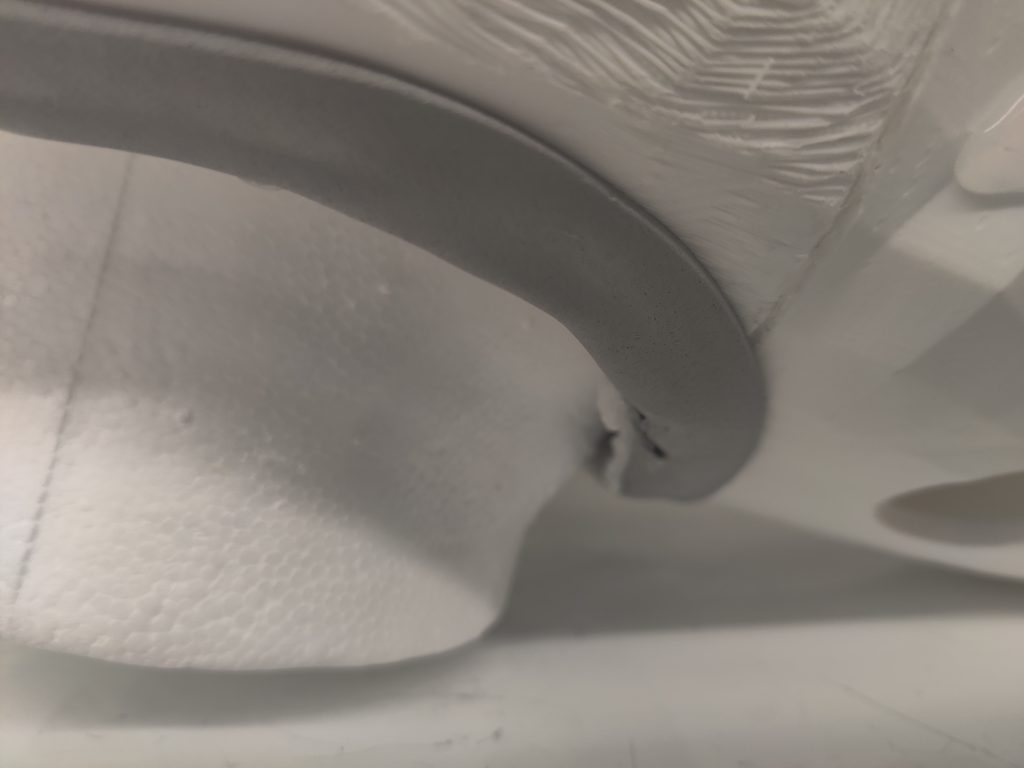
Let’s review the rear view of the skull in Blender.
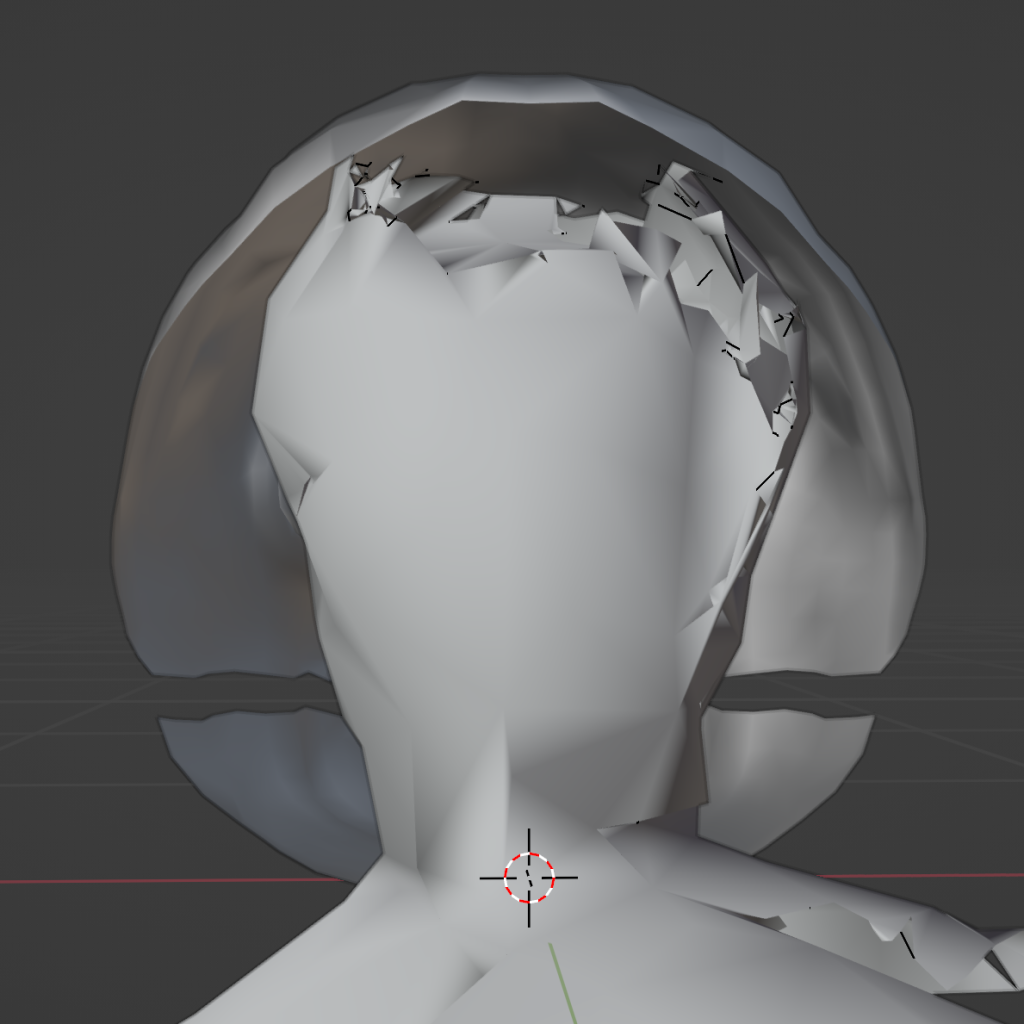
The front of the skull was precisely sized to the front of my head. I intended to leave some room in the back so that I could add some foam for comfort, but it was far too large. Additionally, the material stretched far too long into the back of my head; enclosing it, instead of creating a mask.
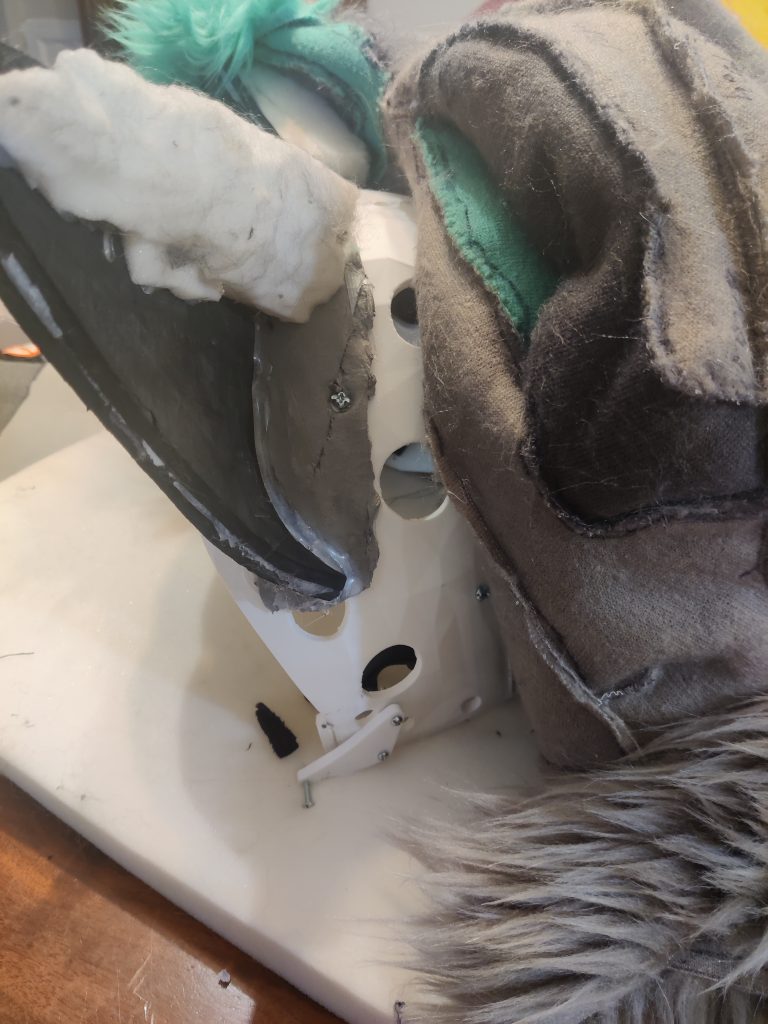
These two defects combined to devastating effect. Heads like these are often constructed with elastic straps in the back to support the head. But let’s see what happens when one actually tries to put it on…
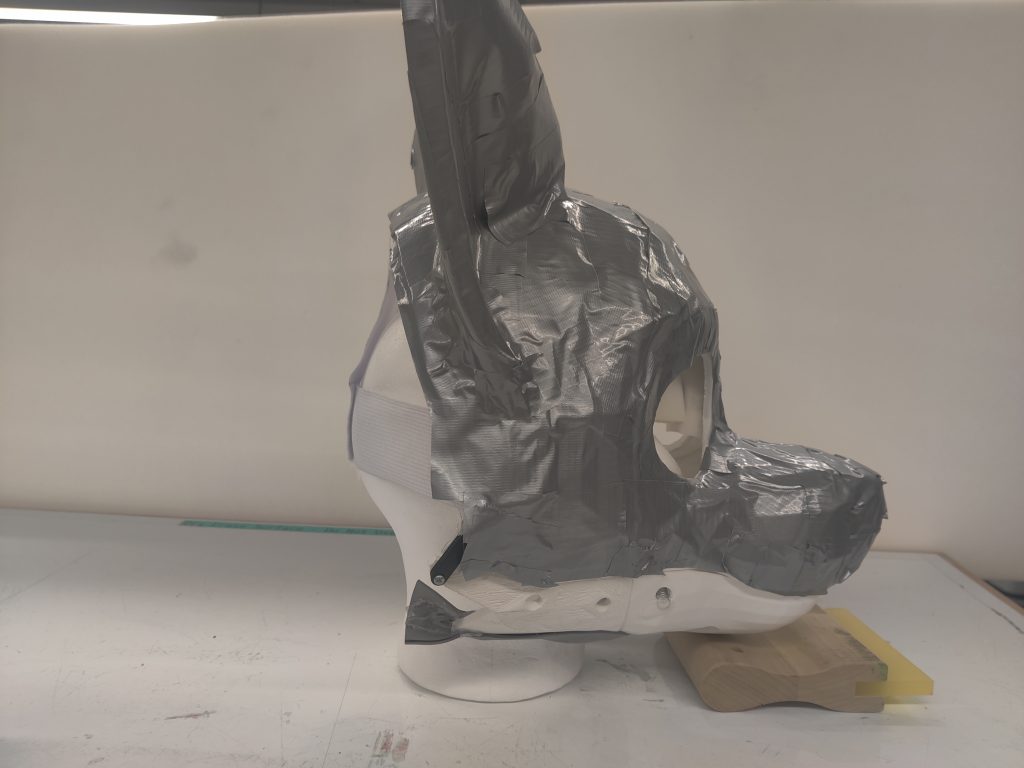
This is the head, with a foam human head underneath wearing it. A wooden block is used to support it.
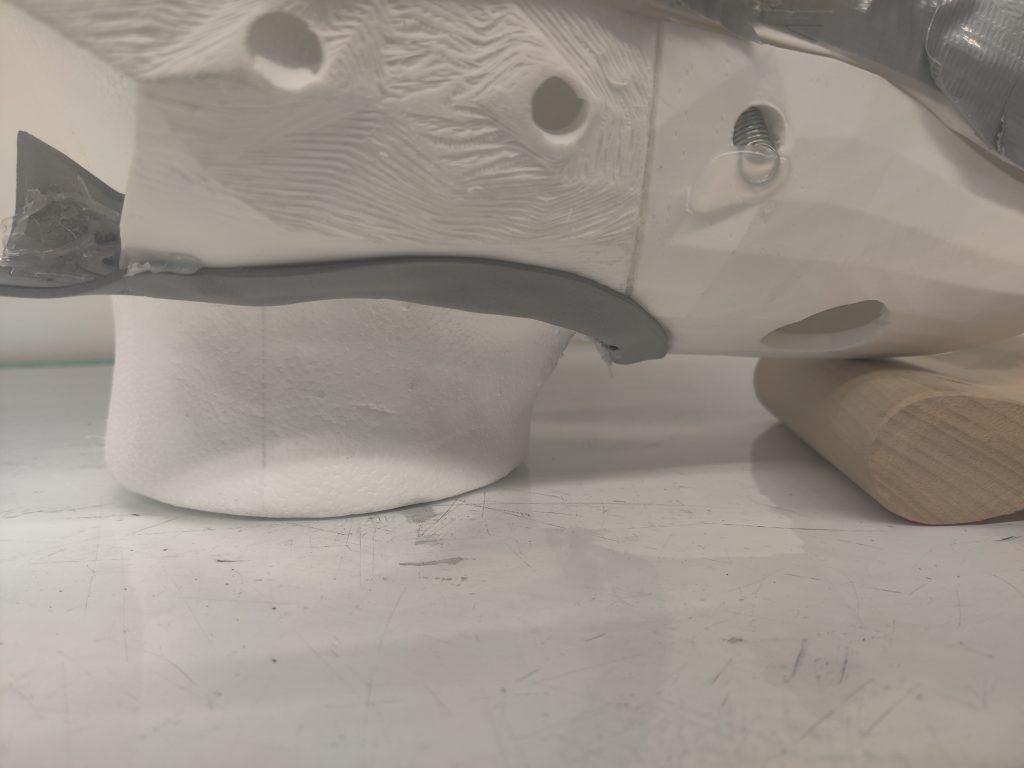
Closeup of the wooden block.
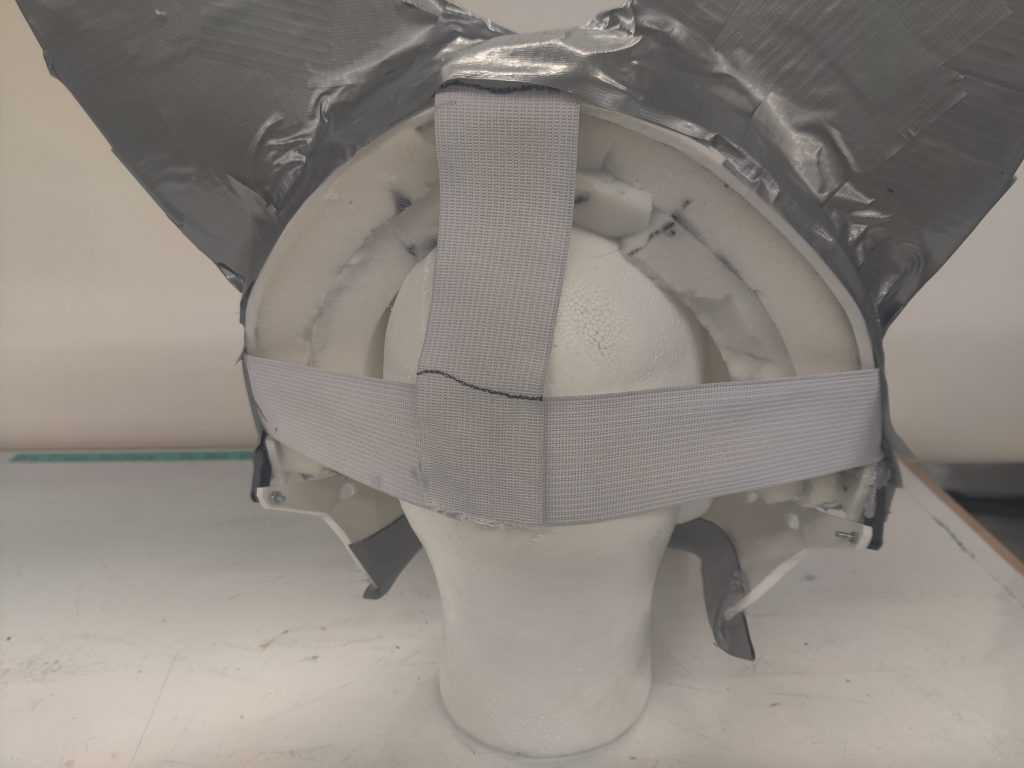
Elastic strap in the back. Notice how so much material is present that the elastic barely provides any support. Also notice the excessive amounts of foam necessary to position the head correctly.
Now if we remove the wooden support block…
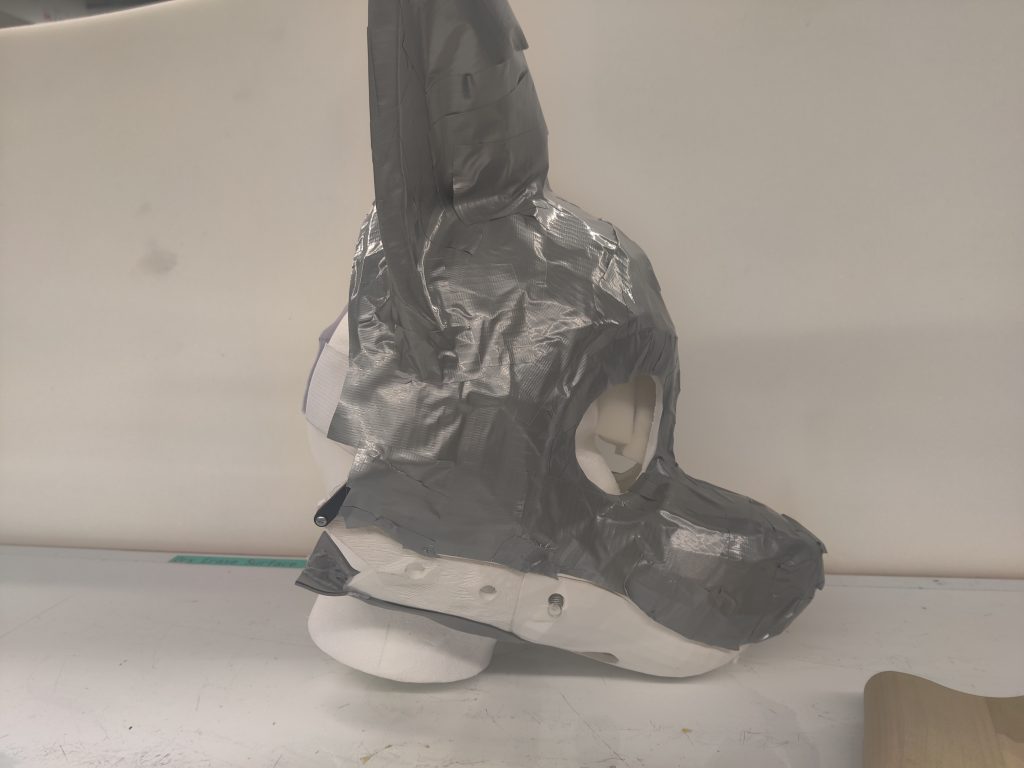
The weight is too unbalanced. The elastic can’t support the head from behind, and with the heavy plastic in front, the whole assembly leans forward, crushing the wearers throat.
Keep Going
The project proceeded poorly for a while. Without a good knowledge of how I would comfortably wear the head, my options to proceed were limited.
I managed to design and print a rudimentary new hinge mere hours before losing access to a 3D-printer for the rest of the year. But it would have to be heat-molded to the exact curvature of the skull as I didn’t have time to account for that in the design, and I didn’t have a heat gun so it would have to wait.
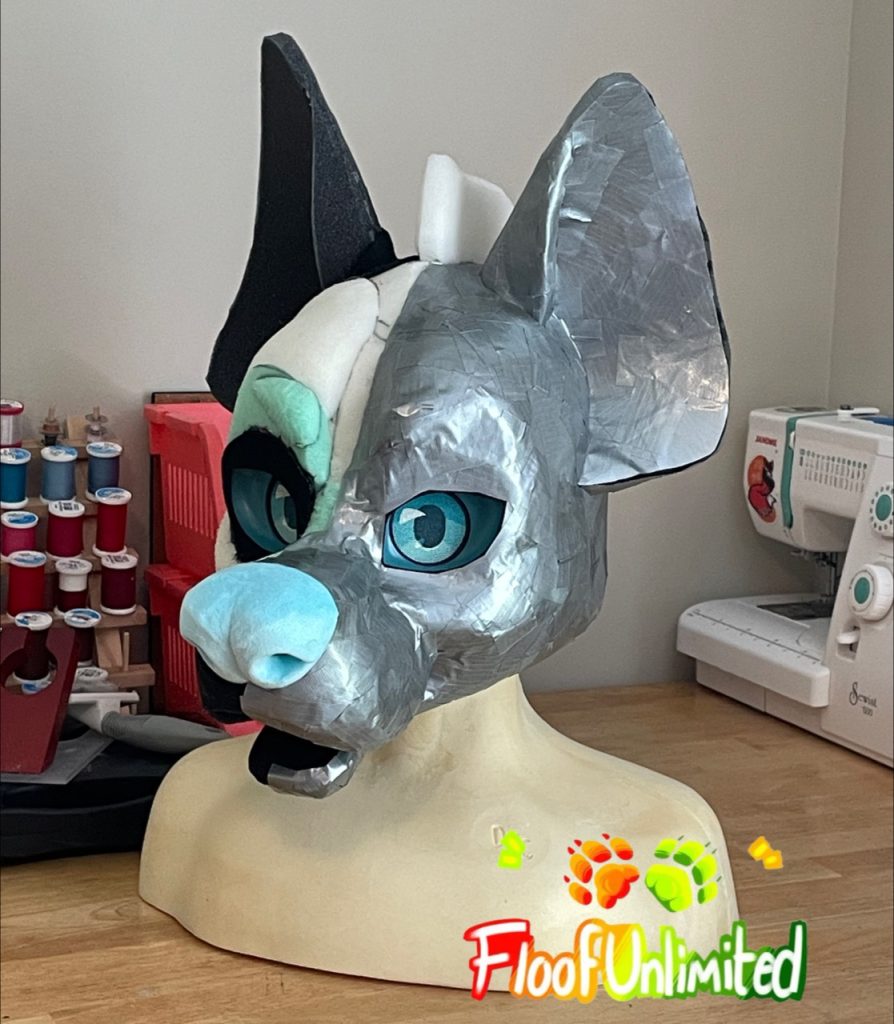
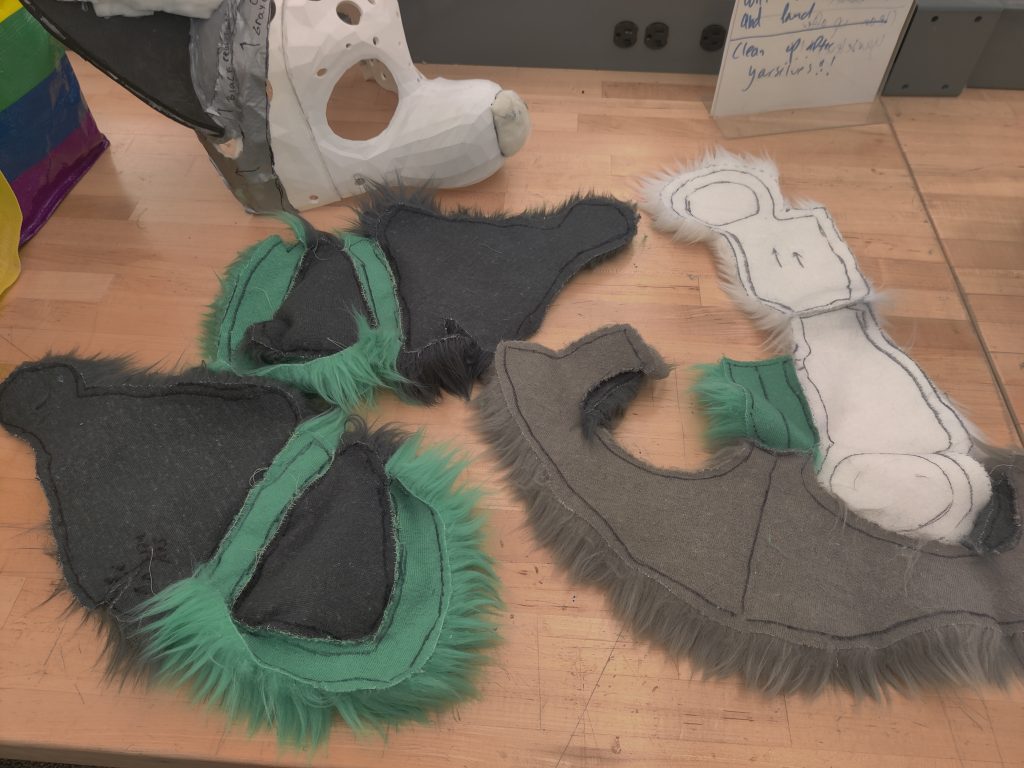
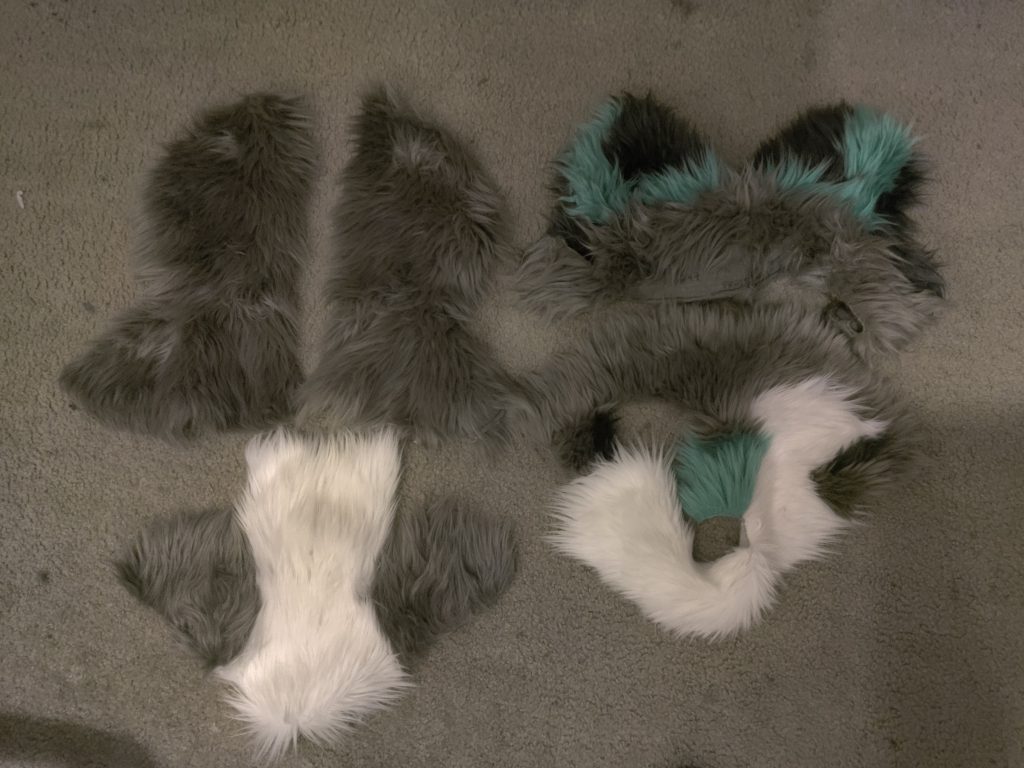
While ruminating on the solution, I finished patterning the front of the head and the ears, as shown earlier.
These parts of the pattern were still possible to do given the knowledge I had; on the other hand, finishing the back and shoulders would require full knowledge of how my head would rest inside.
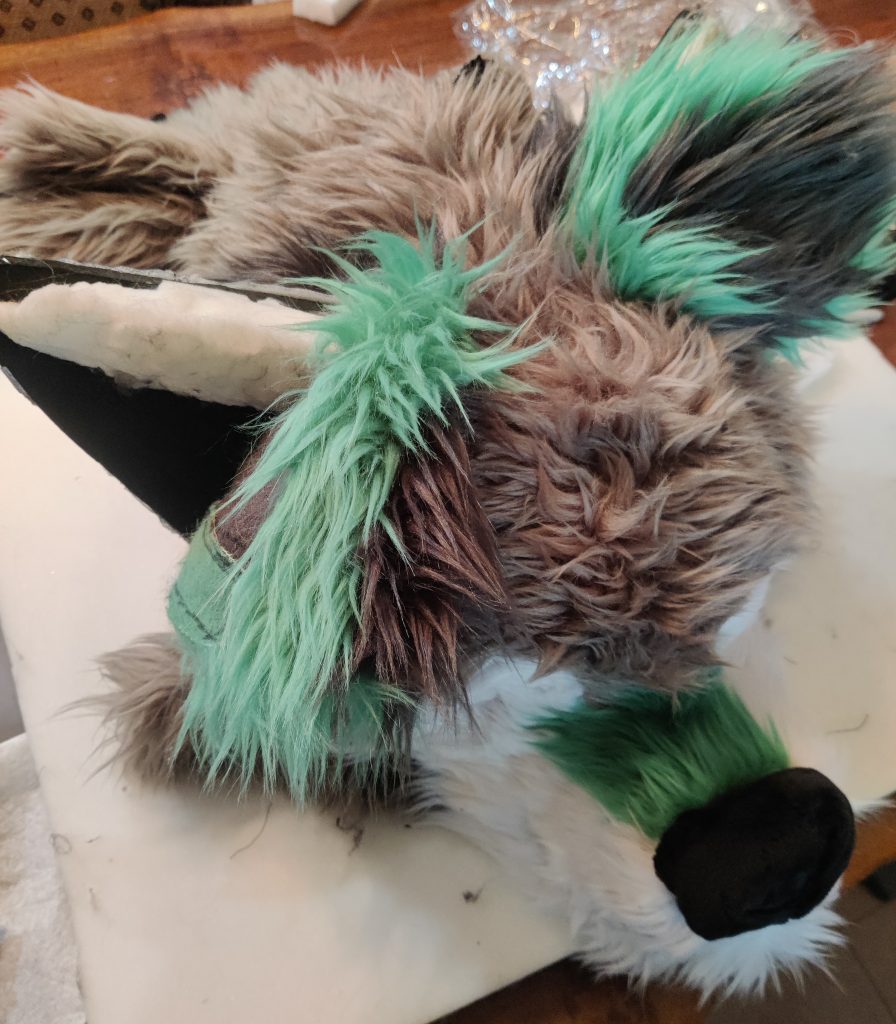
The pieces of the front slowly came together in the next month and a half as I learned to cut and sew fur. Per the suggestions I received, I hand-sewed every piece at this stage.
The next three pictures illustrate roughly a months worth of labor making my first stitches.
Also, it took me over 6 hours to cut my first pieces, because I was using a carving chisel. Yes, really. I got an X-Acto knife the next day and was stunned about how much quicker the cutting proceeded.
Physical Construction, Act 2
While working on this, I asked around to seek solutions for salvaging the mess of making my head fit inside this thing.
The most promising solution seemed to be this item:
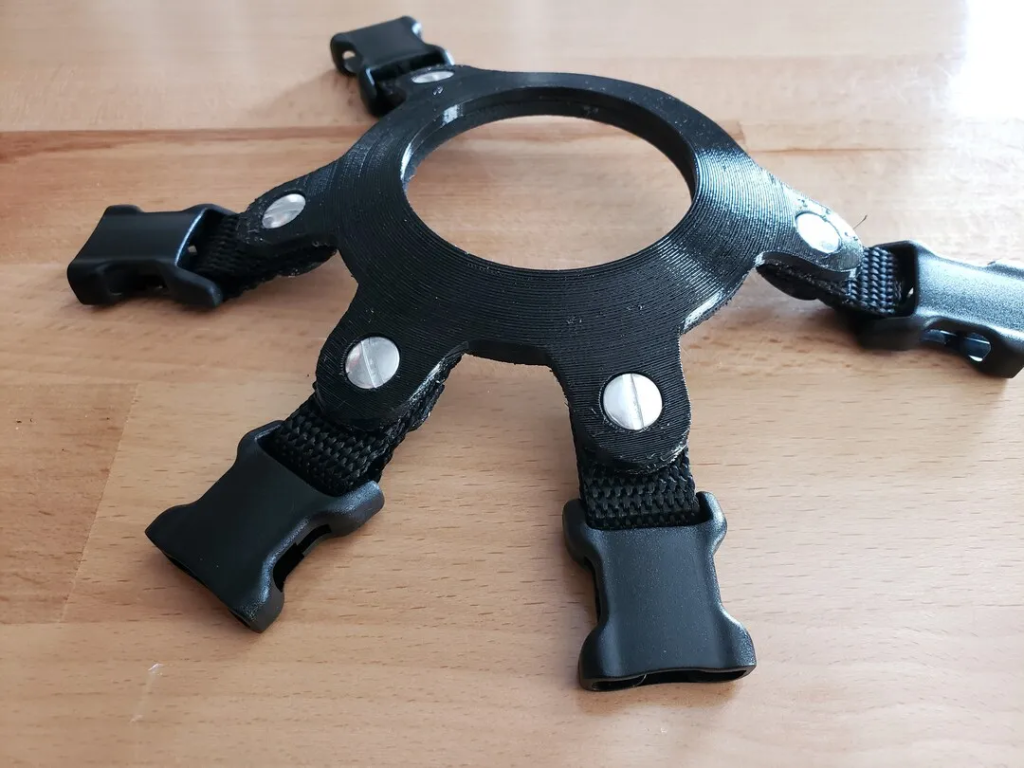
This 5-point harness was specifically designed for fursuit heads. It’s intended to screw into a head at 5 different points, then allow the user to resize it to their heads and finally clip in. It looks like this when attached:
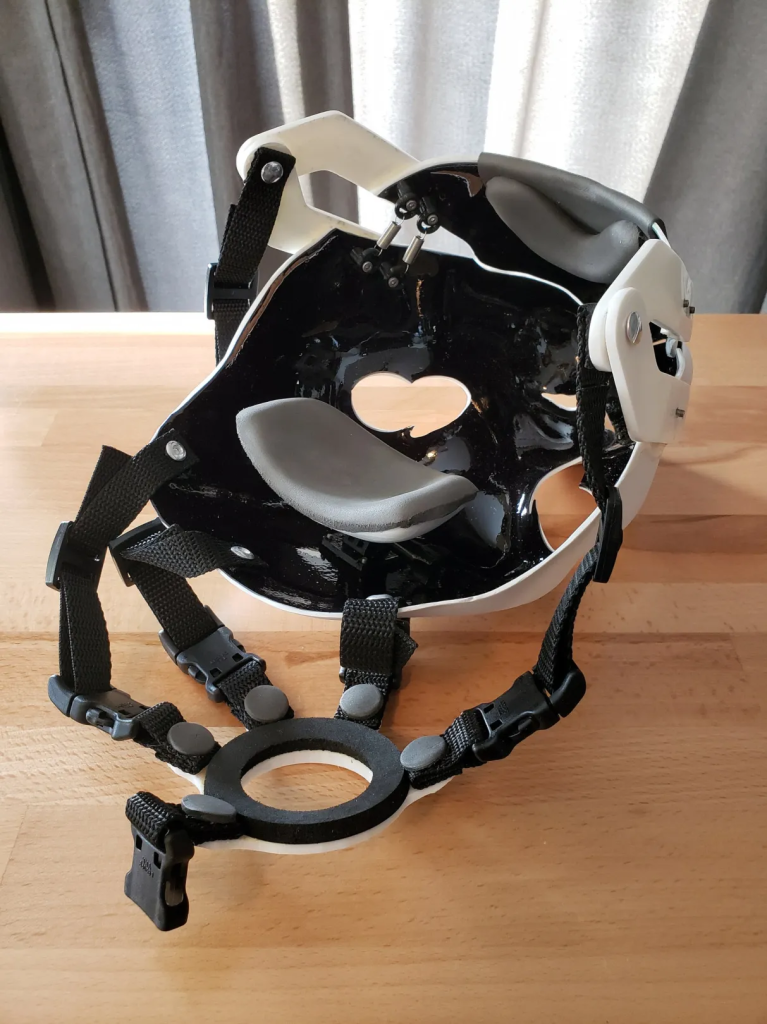
I purchased one of these, and also wanted to purchase the forehead and chin rest shown in the above picture. Unfortunately, mere days after I purchased the harness, the Etsy shop that sold it shut down permanently; after a few weeks of trying to acquire the other parts in spite of the closure, I gave up and started mounting the harness to the head. In place of those other components, I used a piece of craft foam wedged into the forehead and some sculpted EVA foam for the chin.
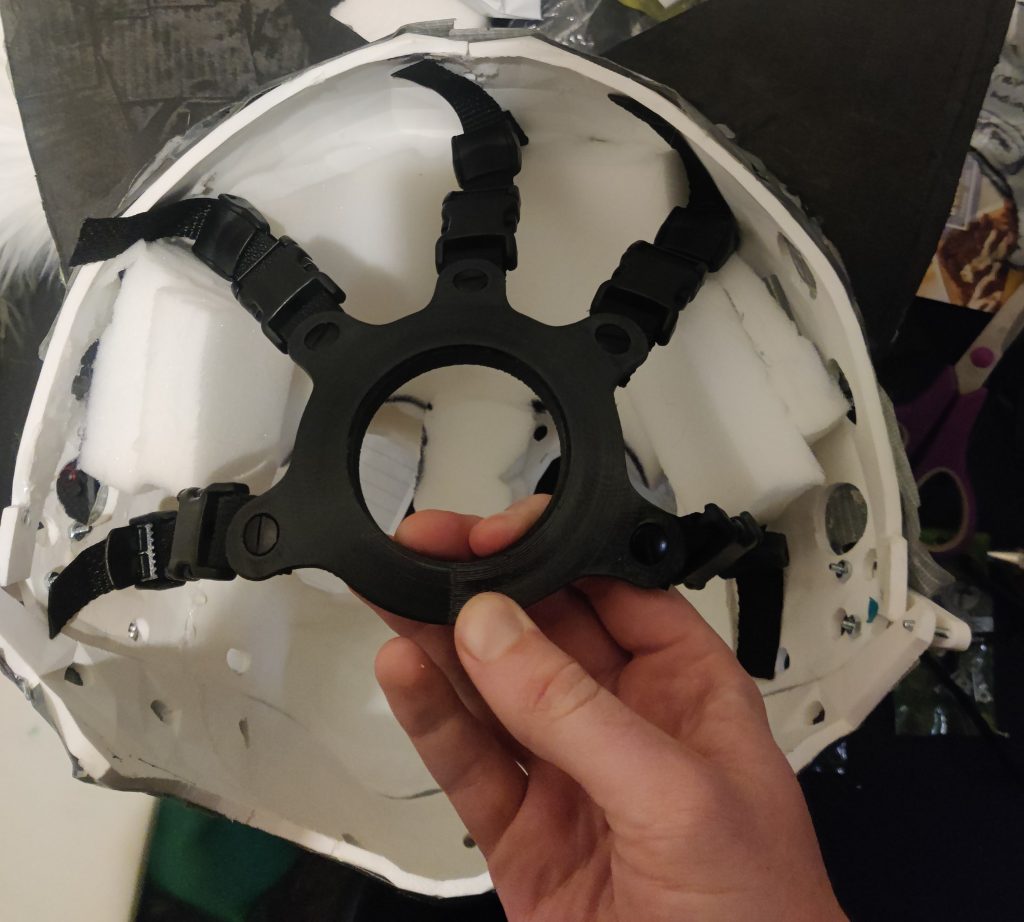
Getting the harness into the head was frustrating; the screws weren’t long enough to break through the thick skull. I ordered screws off McMaster Carr, a specialist machining website, and waited two weeks for them to arrive; when those screws didn’t fit either, I went to the local Home Depot and bought screws that fit. A classic example of overthinking.
Meanwhile, I found myself looking at the hinge again. My desperately printed V2 hinge was still waiting for me, months later, and this time I had access to a heat gun. I managed to heat-mold it into a usable shape and drill screws in to properly secure it.
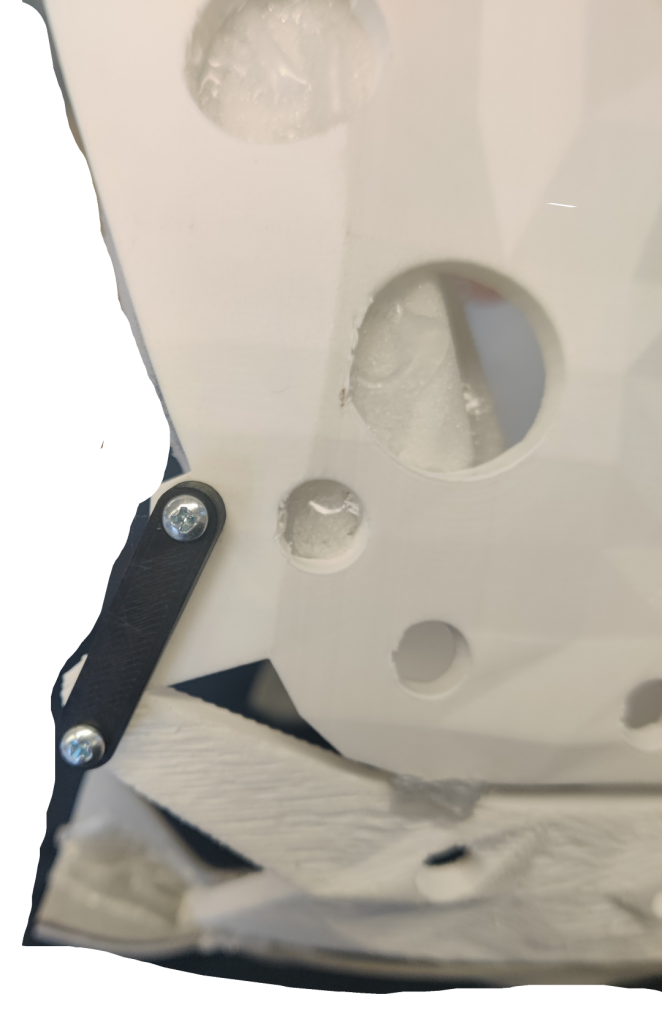
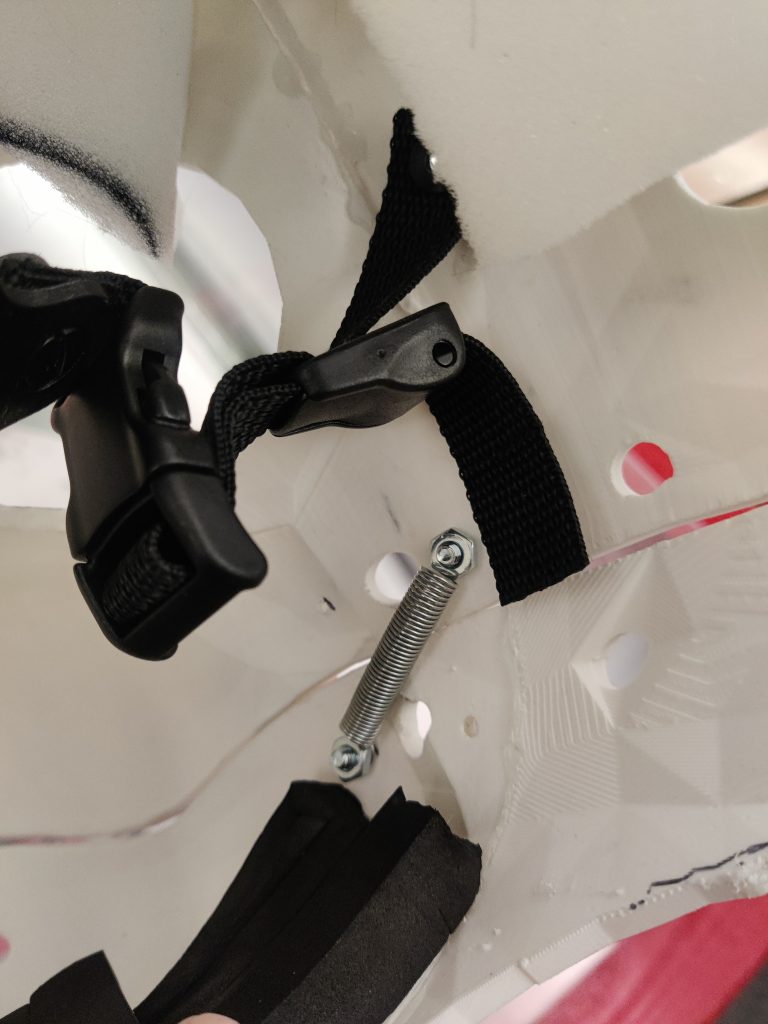
How to properly attach the springs still eluded me, so I ended up asking around for ideas. A simple one that I can’t believe I missed was brought up: just drill some screws in, slip the springs over them, and attach a nut at the end.
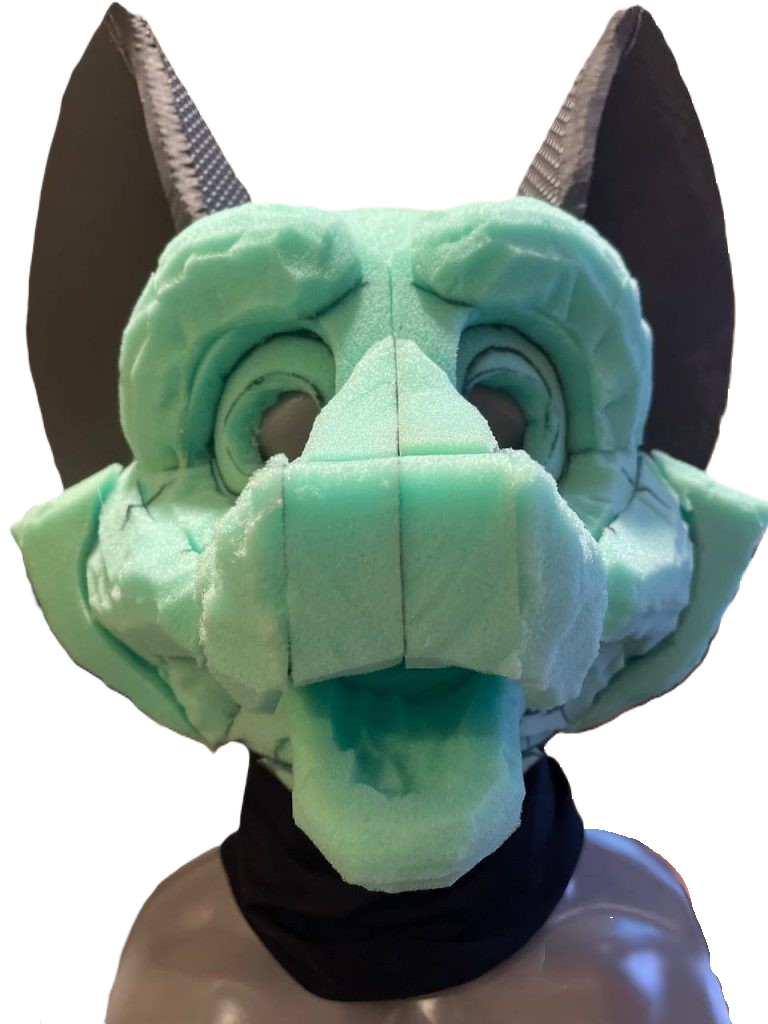
By implementing these solutions, I had gained enough confidence in where my head would sit to finish taping the rest of the head.
Patterning, Act 2
Most people tape the cowl while it’s sitting on an “Ed Head”, a large, plastic human head meant for molding and cosplay design. This is because the shoulders that the cowl sits on aren’t part of the physical structure of the head, so the tape needs something solid to sit on. I didn’t have an Ed Head, so I had a friend tape over my shoulders while I was wearing the head, and then was very, very careful not to crease the tape until I cut it off.
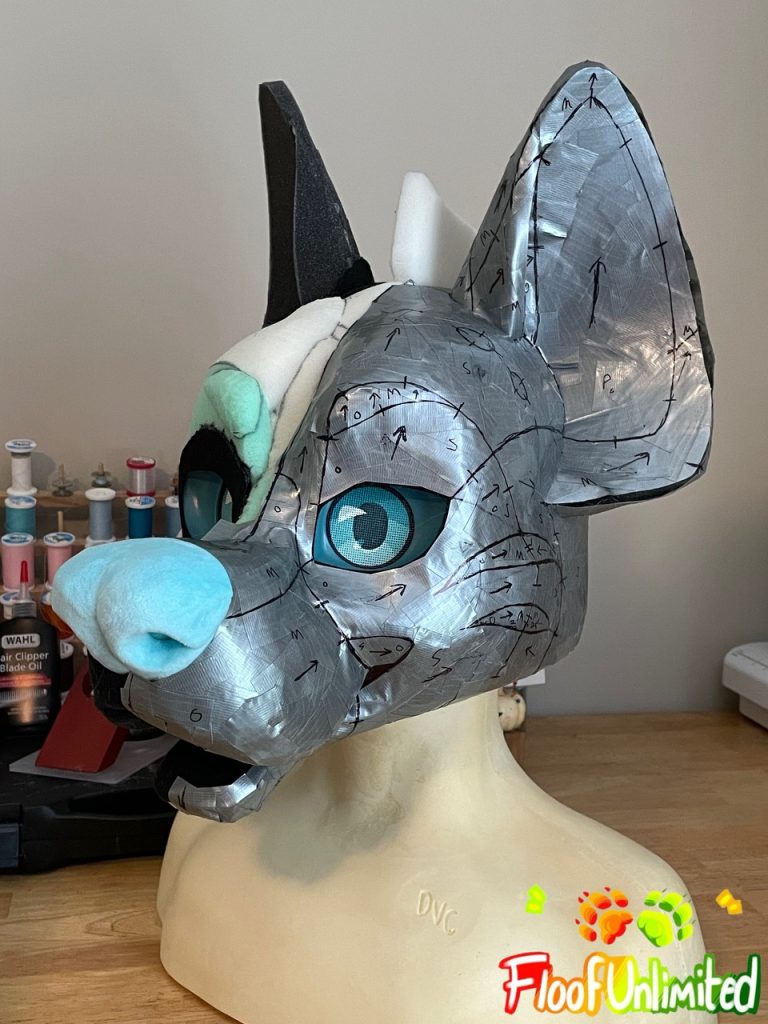
Thanks to the lesson learned from trying to re-assemble pieces of my first patterning with no visual aids, I took extensive pictures of the tape this time and added guide lines to all my cut fur pieces.
I spent two 10-hour days in one weekend cutting and hand-sewing these newly acquired fur pieces. 20 straight hours of hand sewing is not great for your back… But after that was done, I could finally see all the pieces starting to line up on the head!
Eyes
Fursuit eyes are a straightforward illusion— the material they’re composed of is not solid, but a mesh. Pressed up close to the wearers eyes, the many holes in the mesh ideally allow the wearer to see straight through, while presenting an image of the characters eye to onlookers.
I had originally purchased Lowes window mesh and some acrylic paints to paint my eyes. Window mesh is fantastic for visibility; if one puts their face up to it they’ll be able to see through quite clearly.
Unfortunately, at this point, my self-imposed deadline of Halloween 2023 was mere weeks away. With far too many other tasks left to attend to, I decided to take a different approach and commissioned Stxrcane for some dye-sublimated eye inserts. She designed the eyes based off of my input and measurements and had them on my doorstep quickly and easily. She’s extremely pleasant to work with and is also, as I later learned, very active and helpful in the making community; I’d highly recommend her for anything she has to offer.

Act 3— The Rush
It’s October 18, 2023, two weeks before the Halloween deadline. I’d been burning the candle at both ends for nearly five months trying to finish what at many points had felt like an impossible project, all while keeping up with some particularly stressful events in my day life.
Merely looking at my workspace in the week since I had grinded out that 20-hour sewing weekend was repulsive. I had finally completely burned myself out, and as things stood there was no way I’d finish in time.

In short, I asked for help. A recent marriage into the family had left me with a new in-law I didn’t know well nearby, and she had a sewing machine and an interest in getting to know me better. I packed up my entire workspace, moved it to her dining room table, and on the morning of October 25, we got to work.
There was a deceptively small list of things left to cover at this stage.
- Design and put together a nose.
- Sew together remaining pieces of fur that could be sewn from the outside.
- Sew a zipper into the back.
- Get all pieces of fur in place and glue them down.
- Sew together the last pieces of the cowl and any other pieces that couldn’t be sewn from the inside.
- Glue in the eyes.
- Shave the fur.
Naturally, none of this came easy. We worked ten-hour days together over the next five days straight in a frantic bid to finish on time.
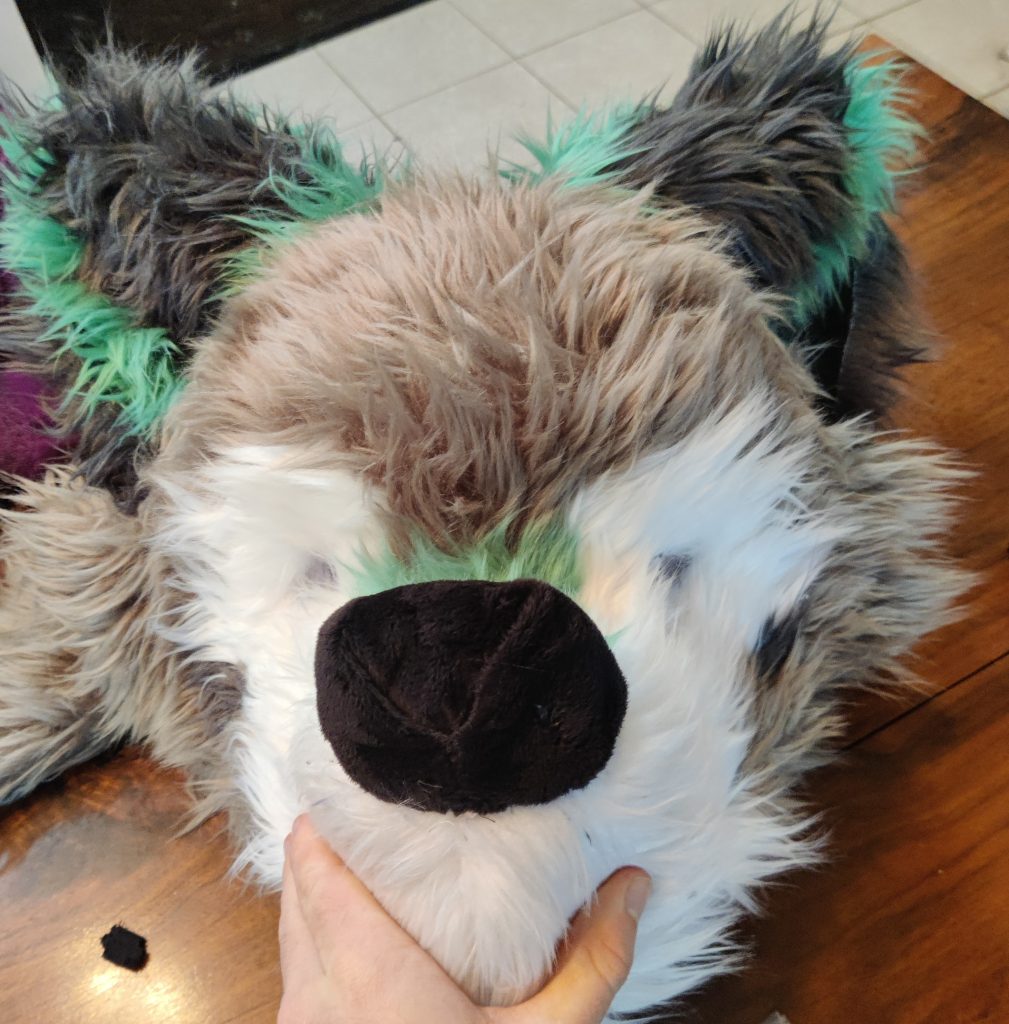
Nose
By this point I should have learned my lesson about designing things from scratch without help. Nevertheless, we spent nearly two days off and on agonizing over how exactly to design a nose without once considering looking up some suggestions.
We ended up coming up with this design.
More sewing
For the final pieces, with very large seams, I used a sewing machine. After machine sewing these last parts, I can confidently say that I will not be primarily hand sewing much in the future, and I disagree with the people who suggested I do so.
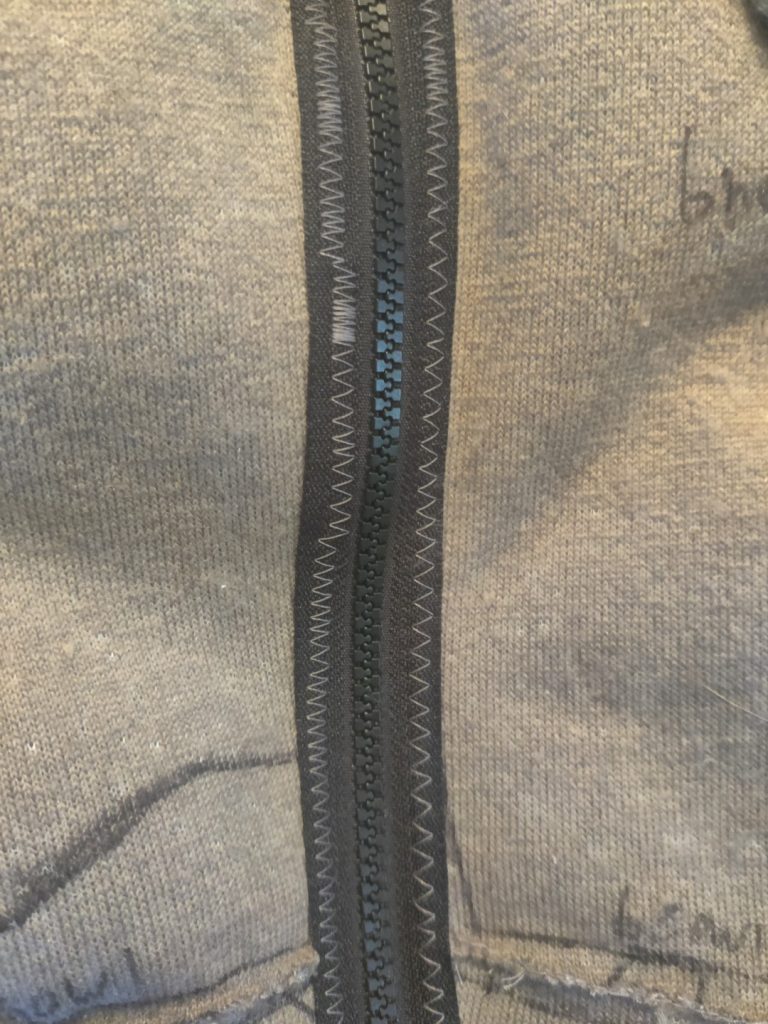
Something that worked pretty well was to use a zigzag stitch with a large gap size. This dealt with a common problem with machine-sewing fur— the sewn fur gets trapped underneath the stitches. With a zigzag stitch, this still occurs, but there’s enough space between stitches to brush it out with a slicker brush. After a few brushes, the seam is virtually unnoticeable.
This worked especially well for the zipper, which was a YKK-style zipper known to not catch and tear fur, unlike their metal cousins. I also hand-stitched in a zipper stopper, since I couldn’t find one in the exact size. (The stopper was made of raw thread, carefully and tightly sewn across itself over and over. Not exactly clean, but easy enough and effective.)
The exact point at which I became competent with the stitch is pretty clear.
Placement and glue
The mere thought of hot-gluing the fur was nerve-wracking, considering how easy it would be to ruin five months worth of work with a single false placement of glue.
Unfortunately, this was made even harder by a mistake I made with the sewing earlier on. Before even attempting to glue, I would have to address this error.
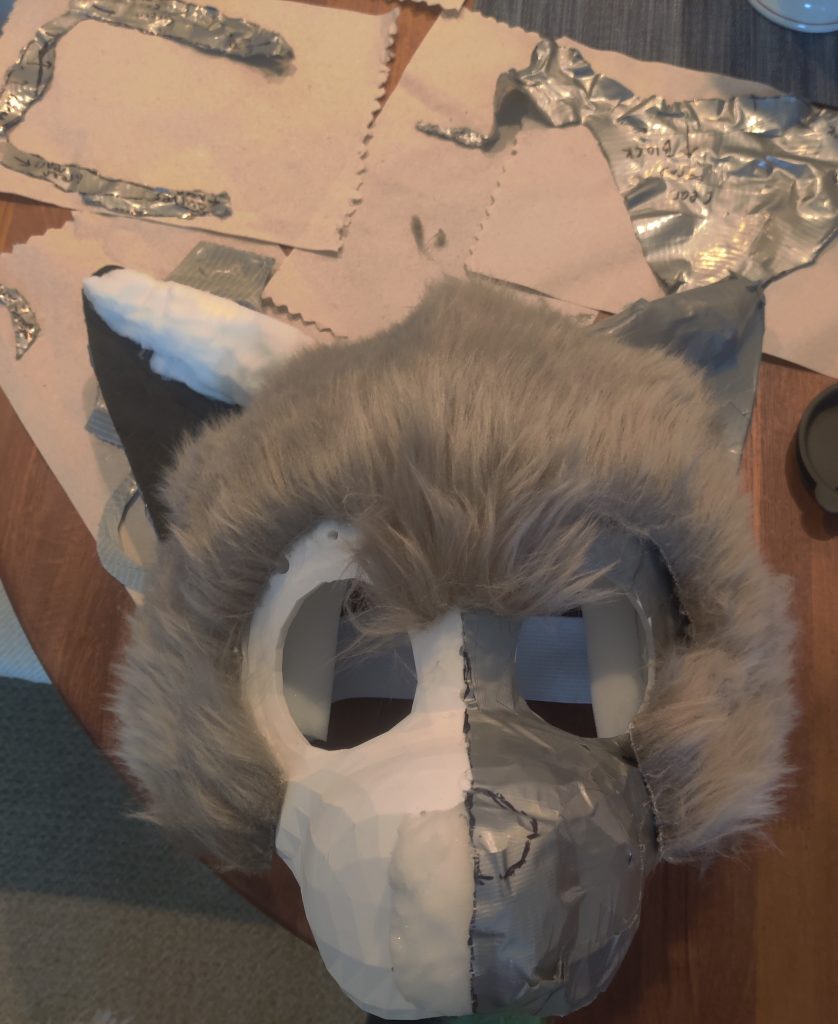
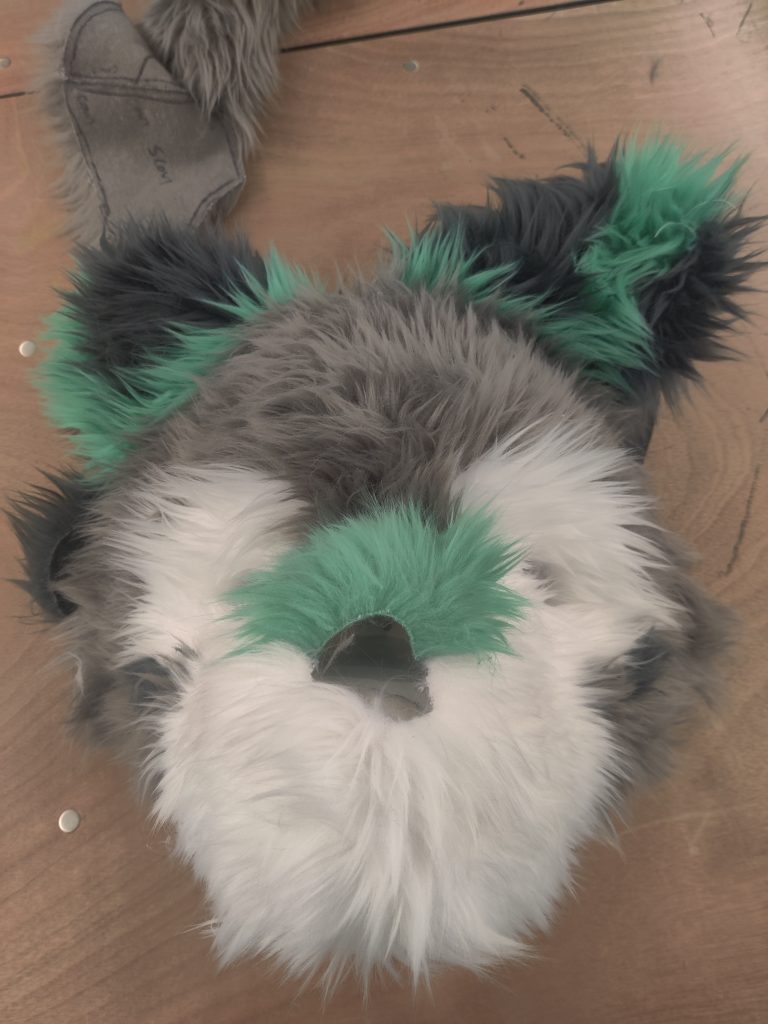
Let’s review this picture from earlier:
You can clearly see that the top-right piece has the ears sewn in. By the time I got around to hot-gluing, I had sewn the top piece and the front face. But this presents a problem— it was now impossible to properly fit the ear fur over the ears! While I could get one over, the other ear was set at such an angle that it wouldn’t set.
I would have to break some seams to get the ears on. But which ones? I’d be tearing up hours of labor either way. (I pictured myself doing each individual seam while considering this) There were two choices:
- Break the seams holding the ear fur down to the rest of the head. The ear fur would then be like an inside-out sock— when gluing, I’d hot glue the entire surface, back and front, and then quickly flip the sock down over it. Then I’d have to stitch the ear back in to the fur from the outside.
- Break the seams of the ear fur itself, and leave the bases sewn in to the rest. Hot gluing would be easier, as I’d have access to the actual surface while I was gluing instead of taking one giant leap of faith all at once. On the other hand, more seams would be broken.
There was, in hindsight, a right and wrong choice to this, and if you’ve read this far you’ll know that indubitably I chose the wrong one. I chose to break the ear seams.
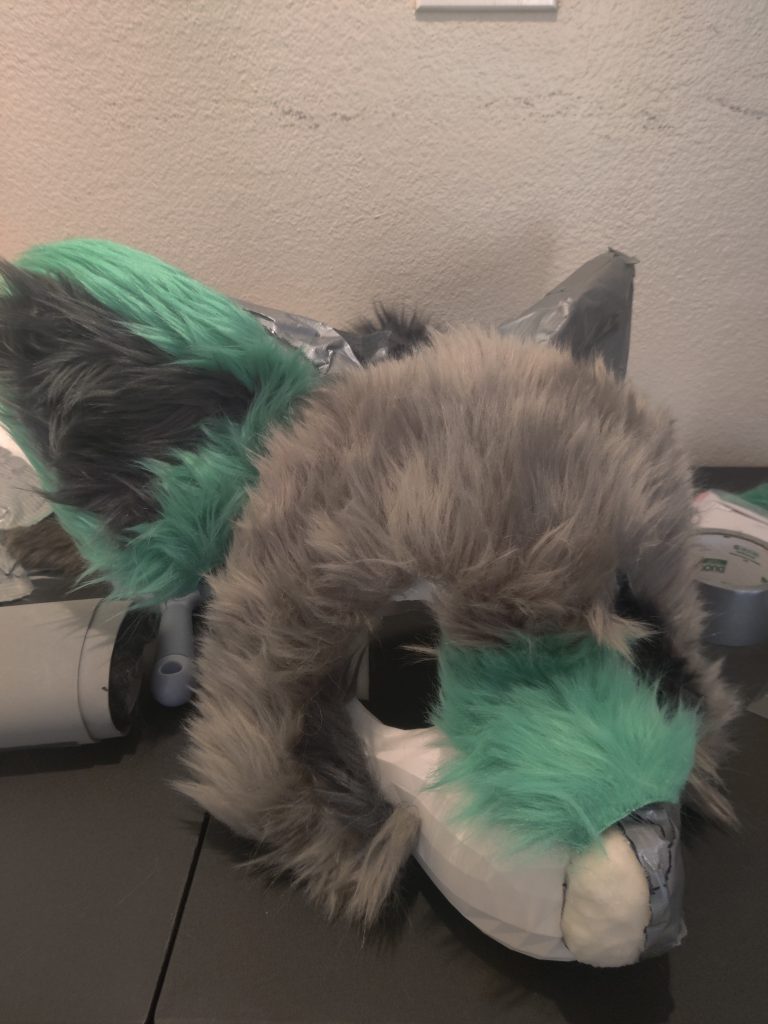
While I was a nervous wreck hot-gluing, being patient and careful paid off and it proceeded relatively smoothly. Unfortunately, the effects of ripping out the ear seams became apparent quickly. Not only was this choice a lot more work to re-assemble, having to sew up the entire ear from the outside, it also had the destructive effect of somehow misplacing how exactly the ear fur sat. The green stripe was supposed to be present all the way around the front; instead, it sort of got distorted, being pushed more to each side.
Would you believe it, more sewing
Immediately after discovering the joy of machine sewing, I was forced to revert to ye olde hand stitches to close up the final pieces of the cowl after gluing. This proceeded fairly easily, if not a little destructive to my soul. My relative and I passed this job off to each other as the other got tired.
Give me my eyeholes!
These should probably be cut out before you hot-glue the fur on, though a completely eyeless furry could make for a good creepypasta.
Cutting this fur out made apparent for the last time the error described much earlier–I hadn’t left enough space between the eyes for the fur pattern I wanted. I ended up leaving a small bit of white fur with nothing at all backing it. It just sits in the field of view of the mesh.
The End— Gluing in the eyes
Last step. All that’s left here is to attach the eye mesh.
Unfortunately, adapting a VR model to use as my head base would bite me in the butt one last, modest time. This picture from earlier in the project best shows the issue:
The mesh of the eyes had some geometry that wasn’t quite smooth with the rest of the head; on the inside, it jutted out a little. This is absolutely no concern in VR since that geometry would never be visible anyway, but for gluing in eye mesh it’s somewhat significant, being that there’s effectively no material to actually bind the glue to. It took about an hour for me to find just the right points where I could apply a small dab of glue, and then another half hour to re-apply when those contact points failed.
Shaving
It didn’t happen.
After all the effort I went to over the last five days to piece together the rest of the suit, it was Sunday evening and I was exhausted. After considering the thought of starting another very difficult, time-consuming step that could, with one false swipe, destroy the suit, I took a good look at what I had built and decided to not shave at all.
This is subpar. It means the final result looks very shaggy. Some people like the look. Others, myself included, aren’t as much as a fan of the style.
If you’re skimming, stop now
Look. If I’m being honest, while I did just compose an enormous writeup documenting in painstaking detail every step of my making journey, I didn’t really expect most people to read it all the way through. This is the important part that all of those words are leading up to.
If I managed to finish this fursuit head in spite of every false step, every mistake, every screwup, a critical lack of understanding and an evident lack of talent, then you can do pretty much anything you can put your mind to.
The message here goes out to other furries first and foremost, since that’s what the article is about, but it can really be applied to anything. That project you have in your brain? Just start, and don’t stop, and eventually something will happen.
Quitting crossed my mind many a time, but I didn’t, and now I get to have the experience of wearing the head I put together with my own sweat, tears and blood (literally, I cut and burned myself plenty of times).
Postmortem
So yeah, making fursuits is pretty hard, and every other maker in the community I’ve spoken to remembers the pain of their first. I suspect, however, that because of my natural lack of talent my experience was even more difficult than others.
So this is an advice column, the one I wish I’d been able to read when I started.
- You can do it. And if you need proof, I suspect the preceding academic-paper length article will suffice.
- Price is surprisingly a non-issue. I didn’t track my spending that much, but for one head, even overspending on tools like a hot glue gun, I kept my total expenditures well under $300.
- Using tools provided by community makerspaces helped keep the costs down substantially.
- There is a community of other makers out there! You don’t need to go it alone! About a month before I finished the project, I was lucky enough to meet another self-taught maker who introduced me to the first of many fursuit making Telegram chats out there. I asked a few rudimentary questions while completing my first head, but in the meantime I’ve learned to get more involved, ask good questions, and listen carefully to the advice of others.
- Do some homework! Two YouTube tutorials for the entire project will NOT suffice. If you can*, watch as many of the latest tutorials online as possible. The maker community mostly revolves around video content these days, and new methods are always popping up, so watch one video, watch another, watch as many as you can.
- *Unfortunately, in my particular case, I find it excessively difficult to consume video content, and the written word is largely dormant in the community… Which is part of why I wrote this article. Be the change you wish to see, and all.
- The homework doesn’t stop with tutorials. Websites like Etsy and the Dealers Den are ripe with products available to help suit your needs. Patterns for sewing, the premade eyes I purchased. You can even find premade head bases, which would help with avoiding the mistake of…
- Trying to make your own head base model the first time. I strongly don’t recommend this, since you won’t be familiar with the proportions that are comfortable for heads. Let your first be guided by an expert; use a premade 3D-printed base or a premade pattern if you’re sculpting one out of foam.
- On this note, NEVER EVER try to use a VR model to make a fursuit. Not only is it significantly more effort than just creating the geometry from scratch, it will lead to a much worse product that creates endless layers of problems
- This goes out to the whole maker community, not just first-timers. It’s been tried now! It doesn’t work!
Epilogue
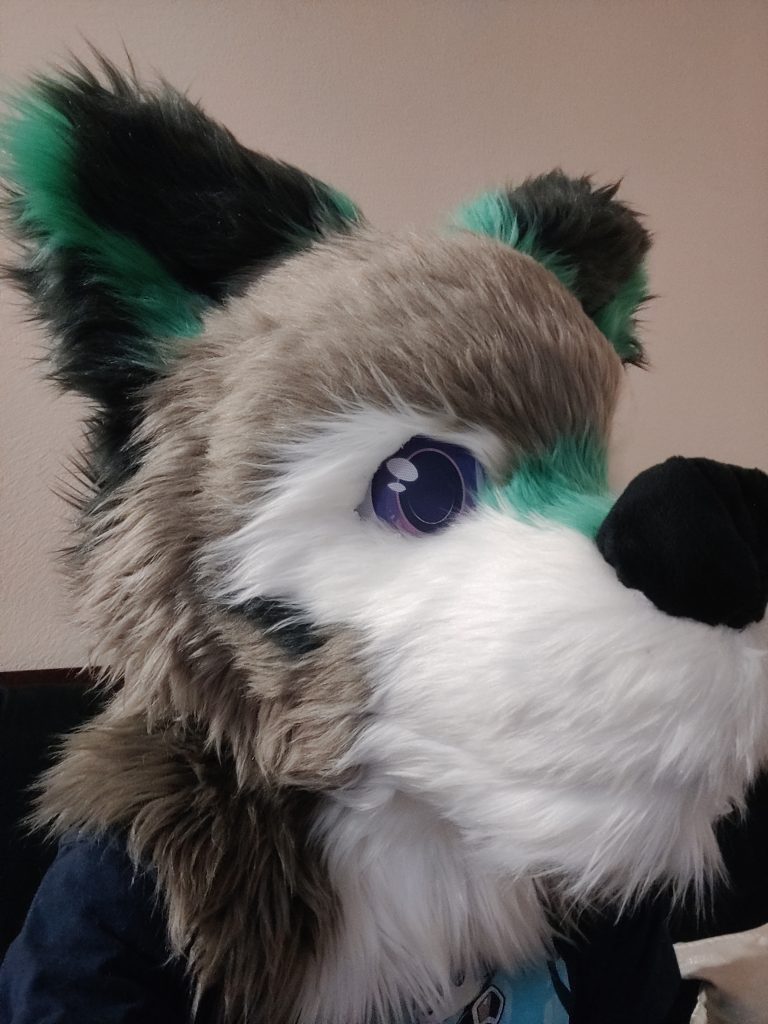
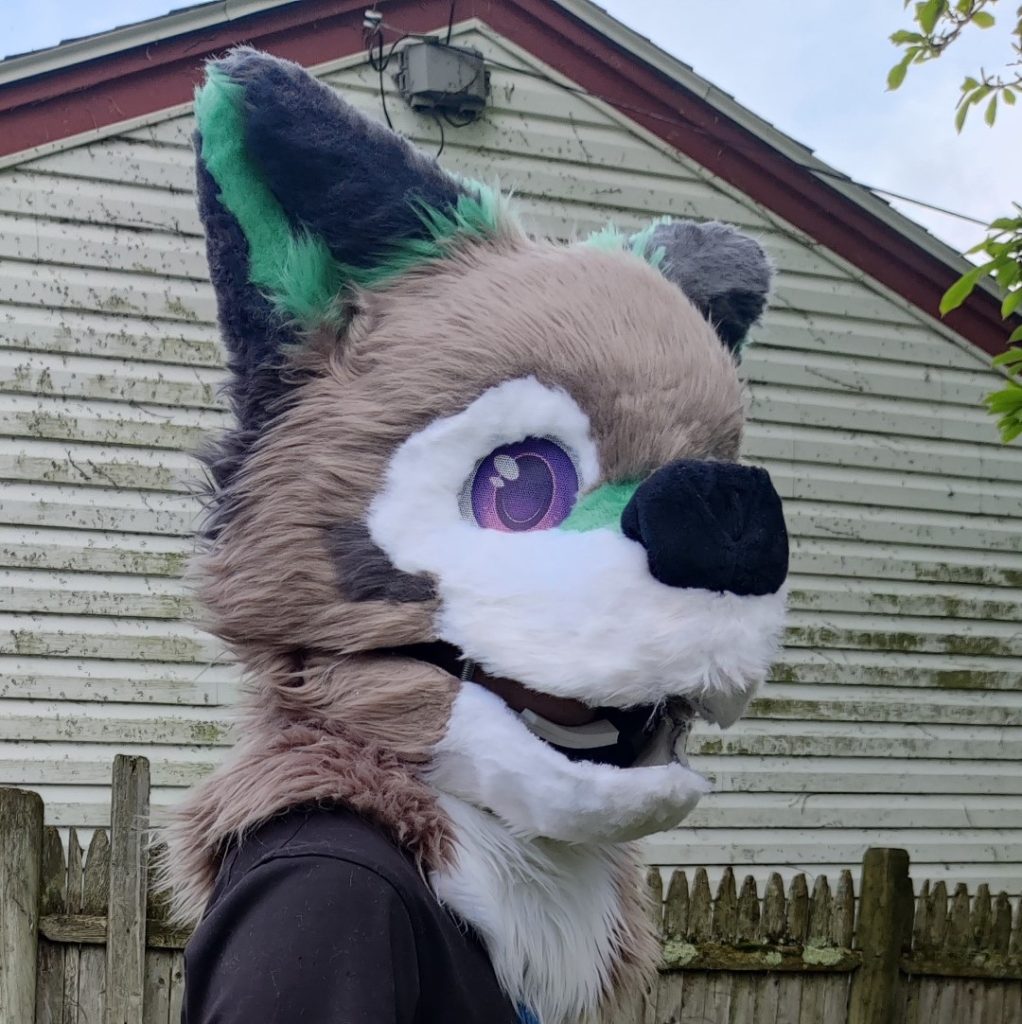
While hammering out the grammar review for this article, I was invited by an experienced craftswoman to finally shave this head seven months after completing it. As I’m still learning the ropes on this subject, I’ll refrain from writing in detail about it… But look at what a difference it makes!
Leave a Reply